
Catalog excerpts
Table of Contents 1. Regulatory Information . . . . . . . . . . . . . . . . . . . . . . . . . . . . . . . . . . . . . . 1.1 Compliance . . . . . . . . . . . . . . . . . . . . . . . . . . . . . . . . . . . . . . . . . . . 1.2 Safety Precautions . . . . . . . . . . . . . . . . . . . . . . . . . . . . . . . . . . . . . . 4. Mechanical Installation . . . . . . . . . . . . 4.1 Working Distance and Field-of-View 4.2 Mechanical Interface . . . . . . . . . . . 4.3 Flatness of Mounting Surface . . . . . 4.4 Mounting Accessories . . . . . . . . . . 4.5 Positioning Correctly . . . . . . . . . . . In...
Open the catalog to page 2
Regulatory Information 1.1 Compliance The Zivid Two camera is compliant with EN 62368, FCC class B, Canada ICES-003 (B) / NMB-003 (B), KC, CE, and CB environmental standards. This device complies with part 15 of the FCC Rules. Operation is subject to the following two conditions: (1) This device may not cause harmful interference, and (2) this device must accept any interference received, including interference that may cause undesired operation. Changes or modifications not expressly approved by the party responsible for compliance could void the user's authority to operate the equipment....
Open the catalog to page 3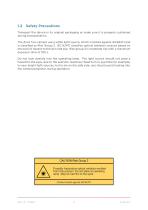
Safety Precautions Transport the device in its original packaging or make sure it is properly cushioned during transportation. The Zivid Two camera use a white light source, which is tested against IEC62471 and is classified as Risk Group 2. IEC 62471 classifies optical radiation sources based on the level of hazard to the skin and eye. Risk group 2 is moderate risk with a maximum exposure time of 100 s. Do not look directly into the operating lamp. The light source should not pose a hazard to the eyes, due to the aversion response (head turn or eye blink for example) to very bright light...
Open the catalog to page 4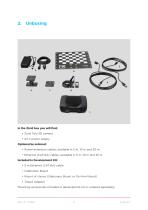
In the Zivid box you will find: • Zivid Two 3D camera • 24 V power supply Optional/as ordered: • Power extension cables, available in 5 m, 10 m and 20 m • Ethernet (CAT-6A) cables, available in 5 m, 10 m and 25 m Included in Development Kit: • 5 m Ethernet (CAT-6A) cable • Calibration Board • Mount of choice (Stationary Mount or On-Arm Mount) • Tripod Adapter Mounting accessories included in development kit or ordered separately.
Open the catalog to page 5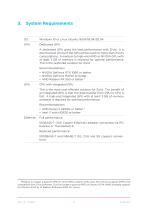
System Requirements Windows 10 or Linux Ubuntu 16.04/18.04/20.04 Dedicated GPU A dedicated GPU gives the best performance with Zivid. It is also the best choice if the GPU will be used for more than Zivid’s computations. A medium to high-end AMD or NVIDIA GPU with at least 3 GB of memory is required for optimal performance. This is the preferred solution for Zivid. Recommendations: • NVIDIA GeForce GTX 1060 or better • NVIDIA GeForce MX150 or better • AMD Radeon RX 550 or better 1 CPU with integrated GPU This is the most cost-efficient solution for Zivid. The benefit of an integrated GPU is...
Open the catalog to page 6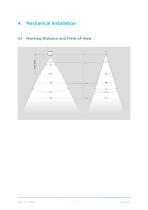
Mechanical Installation 4.1 Working Distance and Field-of-View
Open the catalog to page 7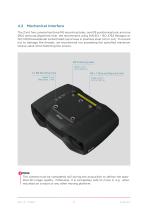
Mechanical Interface The Zivid Two camera has three M5 mounting holes, one Ø5 positioning hole, and one Ø5x1 obround alignment hole. We recommend using DIN 912 / ISO 4762 Hexagon or ISO 14579 Hexalobular socket head cap screws in stainless steel (A2 or A4). To ensure not to damage the threads, we recommend not exceeding the specified maximum torque value when fastening the screws. Note The camera must be completely still during the acquisition to deliver the specified 3D image quality. Otherwise, it is completely safe to move it, e.g. when mounted on a robot or any other moving platform.
Open the catalog to page 8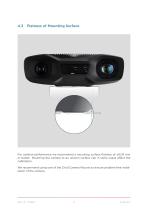
Flatness of Mounting Surface For optimal performance we recommend a mounting surface flatness of ±0,05 mm or better. Mounting the camera to an uneven surface can in some cases affect the calibration. We recommend using one of the Zivid Camera Mounts to ensure problem free installation of the camera.
Open the catalog to page 9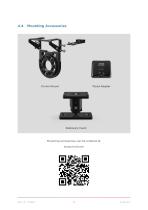
Mounting accessories can be ordered at: shop.zivid.com
Open the catalog to page 10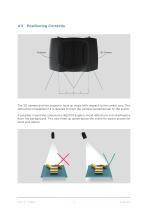
Positioning Correctly The 2D camera and the projector have an angle with respect to the center axis. This should be considered if it is desired to have the camera perpendicular to the scene. If possible, mount the camera at a slight tilt angle to avoid reflections and interference from the background. This also frees up space above the scene for easier access for tools and robots.
Open the catalog to page 11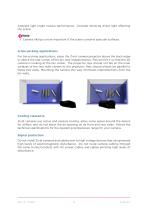
Ambient light might reduce performance. Consider blocking direct light affecting the scene. Note Camera tilting is more important if the scene contains specular surfaces. In bin-picking applications For bin-picking applications, place the Zivid camera projector above the back edge or above the rear corner of the bin (see images below). Pan and tilt it so that the 2D camera is looking at the bin center. The projector rays should not fall on the inner surfaces of the two walls closest to the projector; they should almost be parallel to those two walls. Mounting the camera this way minimizes...
Open the catalog to page 12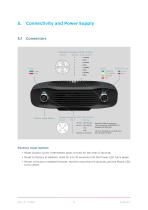
Connectivity and Power Supply Factory reset button • Reset (power cycle): Intermittent press or hold for less than 5 seconds. • Reset to factory IP address: Hold for 5 to 10 seconds until the Power LED turns green. • Revert to factory installed firmware: Hold for more than 10 seconds until the Power LED turns yellow.
Open the catalog to page 13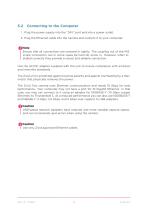
5.2 Connecting to the Computer 1. Plug the power supply into the “24V” port and into a power outlet. 2. Plug the Ethernet cable into the camera and connect it to your computer. Note Ensure that all connections are screwed in tightly. The coupling nut of the M12 screw connectors can in some cases be hard do screw in. However, when installed correctly they provide a robust and reliable connection. Use the AC/DC adapter supplied with the unit to ensure compliance with emission and immunity standards. The Zivid unit is protected against reverse polarity and against overheating by a thermistor...
Open the catalog to page 14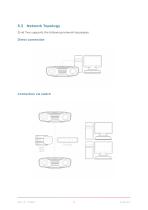
5.3 Network Topology Zivid Two supports the following network topologies: Direct connection
Open the catalog to page 15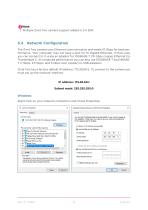
Note Multiple Zivid Two camera support added in 2.4 SDK. Network Configuration The Zivid Two camera uses Ethernet communication and needs 10 Gbps for best performance. Your computer may not have a port for 10 Gigabit Ethernet. In that case, you can connect to it using an adaptor for 10GBASE-T (10 Gbps copper Ethernet) to Thunderbolt 3. At a reduced performance you can also use 1000BASE-T and NBASET (1 Gbps, 2.5 Gbps, and 5 Gbps over copper) to USB adapters. Zivid Two has a factory default IP address: 172.28.60.5. To connect to the camera you must set up the network interface. IP address:...
Open the catalog to page 16All Zivid catalogs and technical brochures
-
Zivid One+ datasheet
21 Pages
-
Zivid Two datasheet
15 Pages
-
Zivid One+ user guide
18 Pages
-
Zivid Studio user guide
22 Pages


