


Zivid Studio user guide

Zivid Studio user guide
Zivid Studio is a graphical user interface for the Zivid SDK, designed to work with Zivid Cameras to capture high-definition 3D point clouds. It enables users to capture, visualize, and analyze 3D data, configure settings for target objects, and save data.
Control Panel
The control panel is divided into two main sections: Camera and Capture.
Camera
Users can scan for, connect to, and disconnect from cameras, with support for one camera connection at a time. The software ensures camera firmware compatibility with the SDK.
Capture
This section includes Assisted and Manual Modes for capturing 3D images.
Assisted Mode
Users set a maximum capture time, and the camera optimizes settings based on scene analysis. Ambient Light Adaptation adjusts to different power grid frequencies.
Manual Mode
Users manually adjust settings like exposure time, aperture, brightness, and gain. Filters such as Noise, Outlier, Reflection, Gaussian Smoothing, and Contrast Distortion refine captures.
Single and Live Captures
Single captures a single acquisition, while Live provides continuous real-time viewing.
HDR
HDR mode captures multiple images with varying settings for high dynamic range scenes, merging them into a single frame.
Available Views
Zivid Studio offers Point Cloud, Color, and Depth views.
Point Cloud
Displays the point cloud for quality evaluation through rotation, panning, and zooming.
Color
Shows the color image with pixel coordinates and RGB values.
Depth
Displays the depth image, allowing Z range modifications and distance evaluations.
Toolbar
Includes options for saving, opening files, exporting data, and importing settings.
Save and Open
Point clouds can be saved in ZDF format or exported to PLY, XYZ, or PCD formats. Color images can be saved as PNG, BMP, or JPG.
Import and Export Settings
Settings can be saved and imported using YML files.
Quick Reference Index
Provides shortcuts and functions for file operations, view adjustments, and help resources.
Support and Troubleshooting
Offers guidance on resolving issues and accessing support.
About Zivid
Includes information about Zivid and its software offerings.
The software allows scanning for connected cameras, displaying them by model and serial number. Users can connect to one camera at a time and disconnect as needed.
Capture Function
Offers assisted and manual capture modes. Assisted mode allows setting maximum capture time and adapting to ambient light frequencies, while manual mode supports single, live, or HDR captures with specified settings.
Acquisition Function
Users can adjust exposure time, aperture, brightness, and gain, with options to toggle, clone, delete, or reset acquisitions.
Filters Function
Includes noise, outlier, reflection, and Gaussian smoothing filters to remove erroneous points and correct contrast distortion. Filters can be reset to default.
Color Function
Allows adjustment of blue, green, and red color balances for natural images, with gamma adjustments and reset options.
Support and Troubleshooting
The Zivid Knowledge Base provides solutions for common issues and detailed articles on camera technology and best practices.
About Zivid
Zivid is a leading provider of 3D machine vision cameras and software, known for accuracy in real-time 3D color imaging. Contact information for technical support, sales, and general inquiries is provided.
Catalog excerpts
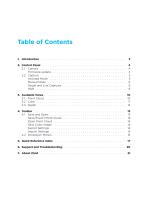
Table of Contents 1. Introduction . . . . . . . . . . . . . . . . . . . . . . . . . . . . . . . . . . . . . . . . . . . . . . 2. Control Panel . . . . . . . . . . . 2.1 Camera . . . . . . . . . . . . Firmware update . . . . . . 2.2 Capture . . . . . . . . . . . . Assisted Mode . . . . . . . Manual Mode . . . . . . . . Single and Live Captures HDR . . . . . . . . . . . . . . . 3. Available Views . 3.1 Point Cloud 3.2 Color . . . . . 3.3 Depth . . . . 4. Toolbar . . . . . . . . . . . . . . . . 4.1 Save and Open . . . . . . . Save/Export Point Cloud Open Point Cloud . . . . . Save Color Image ....
Open the catalog to page 2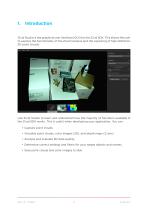
Zivid Studio is the graphical user interface (GUI) for the Zivid SDK. This allows the user to explore the functionality of the Zivid Cameras and the capturing of high definition 3D point clouds. Use Zivid Studio to learn and understand how the majority of functions available in the Zivid SDK works. This is useful when developing your application. You can: • Capture point clouds. • Visualize point clouds, color images (2D), and depth maps (Z axis). • Analyze and evaluate 3D data quality. • Determine correct settings and filters for your target objects and scenes. • Save point clouds and color...
Open the catalog to page 3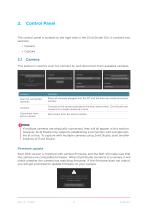
Control Panel The control panel is located on the right side in the Zivid Studio GUI. It contains two sections: • Camera • Capture 2.1 Camera This section is used to scan for, connect to, and disconnect from available cameras. Scan for connected cameras Show all cameras plugged into the PC and list them by model and serial number. Connect to the camera selected in the drop-down menu. Zivid Studio can connect to a single camera at a time. Disconnect from active camera Disconnect from the active camera. Note If multiple cameras are physically connected, they will all appear in this section. However,...
Open the catalog to page 4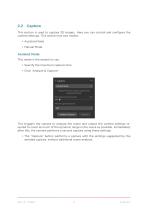
This section is used to capture 3D images. Here you can control and configure the camera settings. This section has two modes: • Assisted Mode • Manual Mode Assisted Mode This mode is the easiest to use. • Specify the maximum capture time • Click “Analyze & Capture” This triggers the camera to analyze the scene and output the camera settings required to cover as much of the dynamic range in the scene as possible. Immediately after this, the camera performs a second capture using these settings. • The “Capture” button performs a capture with the settings suggested by the assisted capture, without...
Open the catalog to page 5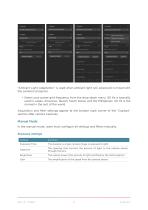
“Ambient Light Adaptation” is used when ambient light (AC powered) is mixed with the camera’s projector. • Select your power grid frequency from the drop-down menu. 60 Hz is typically used in Japan, Americas, Taiwan, South Korea, and the Philippines. 50 Hz is the normal in the rest of the world. Acquisition and filter settings appear at the bottom right corner of the “Capture” section after camera captures. Manual Mode In the manual mode, users must configure all settings and filters manually. Exposure settings Setting Exposure Time The duration a single camera image is exposed to light. The...
Open the catalog to page 6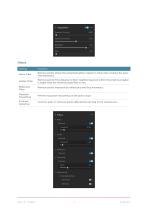
Filters Setting Noise Filter Remove points where the projected pattern signal-to-noise-ratio is below the specified threshold. Outlier Filter Remove points if the distance to their neighboring pixels within the small local region is larger than the threshold specified in mm. Reflection Filter Remove points impacted by reflections and thus erroneous. Gaussian Smoothing Perform Gaussian smoothing on the point cloud. Contrast Distortion Corrects and/ or removes points affected by blurring in the camera lens.
Open the catalog to page 7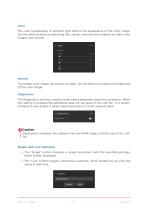
Color The color temperature of ambient light affects the appearance of the color image. Set the white balance by adjusting blue, green, and red color balance to make color images look natural. Gamma The output color image can appear too dark. Set the Gamma to adjust the brightness of the color image. Diagnostics The Diagnostics setting is used to collect extra diagnostic data from a capture. When this setting is enabled the additional data will be saved in the .zdf file. It is recommended to only enable it when reporting issues to Zivid’s support team. Caution Diagnostics increases the capture...
Open the catalog to page 8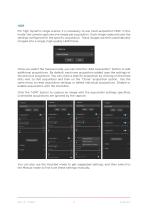
HDR For high dynamic range scenes, it is necessary to use multi-acquisition HDR. In this mode, the camera captures one image per acquisition. Each image captured uses the settings configured for the specific acquisition. These images are then automatically merged into a single, high-quality HDR frame. Once you select the manual mode, you can click the “Add Acquisition” button to add additional acquisitions. By default, each new acquisition added uses the settings of the previous acquisition. You can clone a specific acquisition by clicking on the three dots next to that acquisition and then on...
Open the catalog to page 9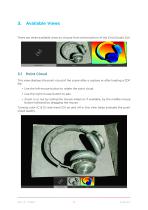
Available Views There are three available views to choose from at the bottom of the Zivid Studio GUI. 3.1 Point Cloud This view displays the point cloud of the scene after a capture or after loading a ZDF file. • Use the left mouse button to rotate the point cloud • Use the right mouse button to pan. • Zoom in or out by rolling the mouse wheel or, if available, by the middle mouse button followed by dragging the mouse. Turning color (C & D) and mesh (D) on and off in this view helps evaluate the point cloud quality.
Open the catalog to page 10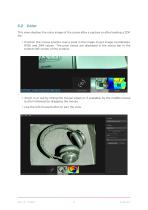
This view displays the color image of the scene after a capture or after loading a ZDF file. • Position the mouse pointer over a pixel in the image to get image coordinates, RGB, and SNR values. The pixel values are displayed in the status bar in the bottom left corner of the window. • Zoom in or out by rolling the mouse wheel or, if available, by the middle mouse button followed by dragging the mouse. • Use the left mouse button to pan the view.
Open the catalog to page 11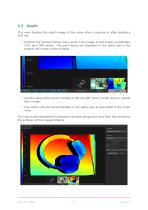
3.3 Depth This view displays the depth image of the scene after a capture or after loading a ZDF file. • Position the mouse pointer over a pixel in the image to get image coordinates, XYZ, and SNR values. The pixel values are displayed in the status bar in the bottom left corner of the window. • Use the drop-down menu located at the top left corner of the view to modify the Z range. • Use zoom and pan functionalities in the same way as described in the Color View. The color scale represents the distance variation along the z-axis from the camera to the surfaces of the imaged objects.
Open the catalog to page 12All Zivid catalogs and technical brochures
 Zivid 2+M130
19 Pages
 Zivid 2+ M60
19 Pages
 Zivid 2+ MR130
19 Pages
 Zivid One+ datasheet
21 Pages
 Zivid Two datasheet
15 Pages
 Zivid One+ user guide
18 Pages
 Zivid Two user guide
22 Pages
- Digital imager
- Visible imager
- Industrial camera module
- Full-color camera system
- Image processing camera module
- Inspection imager
- HD camera module
- Rugged camera
- High-performance imager
- Lightweight imager
- 5 Mpx camera
- 3D imager
- HDR camera module
- Robotic camera module
- Vision sensor
- Software library
- Object detection vision sensor
- Color vision sensor
- Smart vision sensor