
- Catalogs
- Zaber Technologies - Vancouver, BC
- Zaber's Getting Started Guide - Version 2.3

Zaber's Getting Started Guide - Version 2.3

Zaber's Getting Started Guide - Version 2.3
Zaber devices can exert significant force, posing injury risks. Users should avoid contact with moving parts and be cautious of hot motors, which can exceed 90°C. Avoid electrostatic damage by not touching electrical contacts. Store devices with retracted components and avoid extreme conditions or submersion in liquids. Disassembly is not recommended as devices lack user-serviceable parts.
Most Zaber positioners require minimal maintenance. Lead screws and rails generally do not need greasing unless specified. Clean dust or dirt with isopropyl alcohol, avoiding stronger solvents.
Zaber offers a 30-day satisfaction guarantee for standard products, excluding high vacuum devices once unsealed. A one-year warranty covers manufacturing defects, excluding misuse or modifications. Repairs are available for non-warranty issues.
Definitions include positioners, peripherals, devices, and joysticks. The guide focuses on X-Series devices, which share features like connectors and protocols. Closed-loop and servo devices use encoder feedback for control, with servo devices requiring tuning.
Steps include removing shipping guards, connecting peripherals, daisy-chaining devices, connecting to a computer and power, installing USB drivers, and configuring communication. Fine-tuning is necessary for servo devices.
Devices can be daisy-chained to share power and computer connections. Peripherals connect via specific cables, and power is supplied through a 24-48VDC source. USB connections require specific cables and drivers.
Zaber Console software is recommended for initial configuration, allowing for device management and communication setup. COM ports must be selected for device communication.
Zaber devices use ASCII and Binary protocols, with ASCII recommended for X-Series. Software options include Zaber Launcher and Zaber Console, with programming libraries available in various languages.
Resolution is defined by microsteps for stepper motors and encoder counts for servo motors. Microstepping allows for precise control, with default settings at 64 microsteps per step. Servo devices use encoders for fine positioning.
Includes firmware updates, resetting to factory defaults, and understanding device indicators.
Servo devices utilize a control loop with encoder feedback to drive motors. Default parameters are optimized for no-load conditions but can be adjusted for load variations using the Zaber Console's Servo Tuning tool. Users should exercise caution when tuning to avoid instability. The tool allows saving and applying parameter sets, with options for Simple, PID, and Advanced tuning methods.
Zaber controllers feature configurable digital and analog inputs/outputs. Proper setup is crucial, and guidance is available in product manuals. Triggers can be configured to initiate actions or respond to conditions, with detailed instructions in the ASCII protocol manual.
The Servo Tuning tool offers four modes: Simple, PID, Import/Export, and Advanced. Simple mode requires minimal input, while PID mode is for experienced users. Import/Export facilitates parameter set management across devices. Advanced mode allows direct low-level parameter adjustments.
This tool in Zaber Console displays device data over time, aiding in performance assessment. Users can plot expected vs. actual positions to evaluate tuning effectiveness. Recommended settings include manual trigger mode and a 1 kHz sample rate.
Devices feature manual knobs for movement without a computer. Joysticks can control multiple devices and have programmable buttons. Configuration requires a computer connection initially.
Firmware updates are available for devices with version 6.18 or higher. Slipping or stalling issues can be addressed by adjusting speed, acceleration, or load. A factory reset can resolve communication or performance issues.
LED indicators provide device status, including power, communication, and error states. Specific patterns indicate conditions like slipping, stalling, or critical errors.
Contact information for Zaber Technologies is provided for further assistance, along with an invitation to subscribe to their e-newsletter for updates and tips.
Catalog excerpts
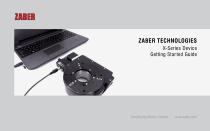
ZABER TECHNOLOGIES X-Series Device Getting Star ted Guide Simplifying Motion Control
Open the catalog to page 1
Contact Customer Support 1-888-276-8033 (Toll Free Canada/USA) 1-604-569-3780 (Direct) [email protected]
Open the catalog to page 2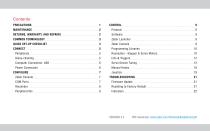
Contents PRECAUTIONS RETURNS, WARRANTY, AND REPAIRS COMMON TERMINOLOGY Zaber Launcher QUICK SET-UP CHECKLIST Zaber Console Programming Libraries Resolution - Stepper & Servo Motors Servo Device Tuning Manual Knobs Power Connection CONFIGURE Zaber Console Firmware Update Resetting to Factory Default
Open the catalog to page 3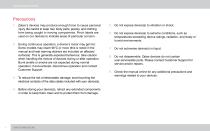
Getting Started Guide Precautions 1. Zaber’s devices may produce enough force to cause personal injury. Be careful to keep hair, body parts, jewelry, and clothing from being caught in moving components. Pinch labels are used on our devices to indicate areas of particular concern. 2. During continuous operation, a device’s motor may get hot. Some models may reach 90°C or more (this is noted in the manual and heat warning stickers are included on affected surfaces). This is generally expected behaviour; take caution when handling the motors of devices during or after operation. Burnt smells or...
Open the catalog to page 4
Returns, Warranty, and Repairs Most of our positioners do not require regular maintenance. Lead screws and rails do not need to be greased (unless otherwise specified in the user manual). If a component is exposed to dust or dirt, it should be gently wiped with isopropyl alcohol. We do not recommend using stronger solvents, as they can damage non-metal components. Please refer to our online manuals at www.zaber.com/support for maintenance information on your specific positioner. All of Zaber’s standard products (those that appear on our website) are backed by a 30-day satisfaction guarantee....
Open the catalog to page 5
Getting Started Guide Common Terminology Positioner X-Series, A-Series, and T-Series A motorized product with moving mechanics, such as a linear stage, a rotational stage, or a stepper motor. Devices that share common features, such as connectors, protocols, and power. The series is indicated by the first letter of the device’s name. For example, the X-LSM025A model belongs to the X-Series family. This guide specifically relates to X-Series devices. See an older version of the manual for setup instructions for T-Series or A-Series devices at: www.zaber.com/documents/Getting-started-guide.pdf....
Open the catalog to page 6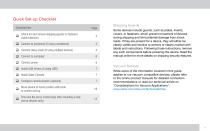
Quick Set-up Checklist Checklist Item Check for and remove shipping guards or fasteners q (select devices) q Connect to peripheral (if using a peripheral) q Connect daisy-chain (if using multiple devices) q Install USB drivers (if using USB) q Install Zaber Console q Configure communication (optional) Move device to home position with knob to confirm set-up Fine tune the servo control loop after mounting a load (servo devices only) Shipping Guards Some devices include guards, such as plates, inserts, covers, or fasteners, which prevent movement of devices during shipping and limit potential damage...
Open the catalog to page 7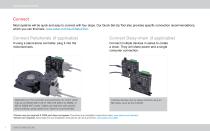
Getting Started Guide Connect Most systems will be quick and easy to connect with four steps. Our Quick Set-Up Tool also provides specific connection recommendations, which you can find here: www.zaber.com/QuickSetupTool. Connect Peripherals (if applicable) Connect Daisy-chain (if applicable) If using a stand-alone controller, plug it into the motorized axis. Connect multiple devices in series to create a chain. They will share power and a single computer connection. Depending on the controller and peripheral, the motor cable may be an MC03 (DB-15 M-F), MC10T3 (DB15 to DB26), or MC10 (DB26 M-F)...
Open the catalog to page 8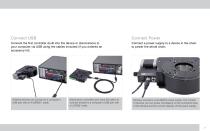
Connect Power Connect the first controller (built into the device or stand-alone) to your computer via USB using the cables included (if you ordered an accessory kit). Connect a power supply to a device in the chain to power the whole chain. X-Series devices can connect to a computer’s USB port with an X-USBDC* cable. Stand-alone controllers also have the option to connect directly to a computer’s USB port with a U-DC06† cable. Devices connect to a 24-48VDC power supply. The number of devices you can power will depend on the combined draw of the devices and the current capacity of the power supply....
Open the catalog to page 9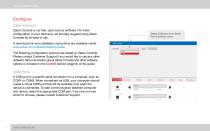
Getting Started Guide Configure Zaber Console Zaber Console is our free, open-source software. For initial configuration of your device(s), we strongly suggest using Zaber Console for its ease of use. A download link and installation instructions are available online: www.zaber.com/software/ZaberConsole. The following configuration sections are based on Zaber Console. Please contact Customer Support if you would like to use any other software. More information about Zaber Console and other software options is included in the Control section (page 9) of this guide. COM Ports A COM port is a specific...
Open the catalog to page 10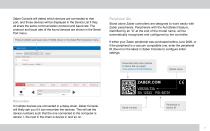
Zaber Console will detect which devices are connected to that port, and those devices will be displayed in the Device List if they all share the same communication protocol and baud rate. The protocol and baud rate of the found devices are shown in the Serial Port menu. Protocol (ASCII) and baud rate (115200) shown in the Serial Port dropdown menu Peripheral IDs Stand alone Zaber controllers are designed to work easily with Zaber peripherals. Peripherals with the AutoDetect feature, identified by an “A” at the end of the model name, will be automatically recognized and configured by the controller....
Open the catalog to page 11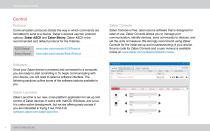
Getting Started Guide Control Protocol Zaber Console Communication protocols dictate the way in which commands are formatted to send to a device. Zaber’s devices use two protocol options: Zaber ASCII and Zaber Binary. Zaber ASCII is the recommended and default protocol for the X-Series. Zaber Console is free, open-source software that is designed for ease of use. Zaber Console allows you to manage port communication, identify devices, send commands to devices, and set the units of measure. We strongly recommend using Zaber Console for the initial set-up and troubleshooting of your device. Source...
Open the catalog to page 12All Zaber Technologies - Vancouver, BC catalogs and technical brochures
 Zaber Catalog 2022
188 Pages

Archived catalogs
 Zaber's 2021 Catalogue
202 Pages
 Zaber's 2019 Catalogue
198 Pages
 ZABER TECHNOLOGIES
22 Pages
 LRT0100AL-E08CT3
7 Pages
 Zaber's 2017 Catalogue
169 Pages
 X-NA08A25-E09
5 Pages
 Zaber's 2016 Catalogue
121 Pages
 Zaber 2015 Catalogue
103 Pages
 Zaber 2013 Catalogue
94 Pages
 Two-sided brochure
2 Pages

- Electromotor
- Actuator
- Linear actuator
- Electric actuator
- Positioning table
- Microscope
- Translation stage
- Optical microscope
- Motorized positioning table
- Turntable
- Compact actuator
- Precision positioning table
- Laboratory microscope
- Screw actuator
- Motor controller
- Electric rotary table
- Linear motion system
- DC actuator
- Technology positioning stage