
- Catalogs
- U-Reach Data Solutions Inc.
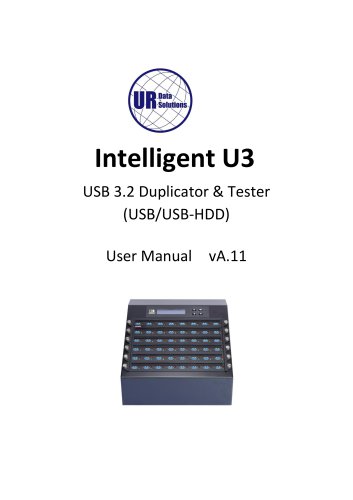
- USB/USB-HDD Duplicator & Sanitizer

USB/USB-HDD Duplicator & Sanitizer
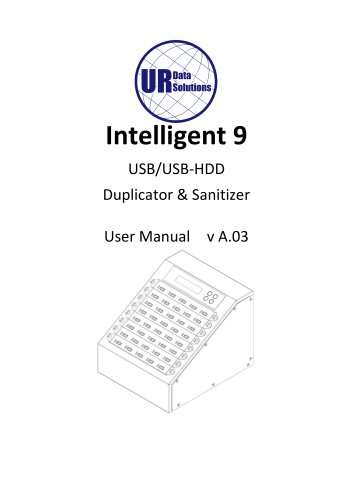
USB/USB-HDD Duplicator & Sanitizer
U-Reach disclaims liability for damages from product use, including data loss or device malfunction. Customers must ensure product suitability and are responsible for data loss from improper use.
U-Reach provides a one-year parts and labor warranty, with an option for extension. Lifetime support is available as defined by U-Reach.
U-Reach is not liable for copyright infringement. Users must ensure legal compliance when copying data.
Read the manual thoroughly. Ensure devices are not overheated and are properly grounded to prevent ESD. Use approved power sources and operate in a clean, dry environment.
Notes and cautions are provided for proper operation and safety.
The duplicator includes control buttons, LED indicators, and USB ports for PC monitoring.
The duplicator offers functions such as Copy, Compare, Copy+Compare, Media Check, Information, Utility, Setup, Burn-In, Log Manager, and Write Protect.
- Copy: Duplicates data from source to target devices.
- Compare: Performs a bit-for-bit comparison between source and target.
- Copy+Compare: Combines copying and comparing processes.
- Media Check: Assesses flash quality and sets error limits.
- Information: Displays USB and system information.
- Utility: Includes formatting, speed measurement, and erasure functions.
- Setup: Configures system settings such as language, speed, and startup menu.
- Burn-In: Tests USB targets through copying and comparing.
- Log Manager: Manages log records and requires a password for advanced functions.
- Write Protect: Sets or releases write protection on USB drives.
The duplicator copies data from a source to multiple targets. Target capacity must be equal to or larger than the source. The LCD shows connected targets and duplication duration. Operations can be stopped with button combinations, and a reboot is recommended after manual stops.
The 'Compare' function checks data accuracy. 'Copy+Compare' automates copying and verifying.
Functions like H2 RW, H2+Format, and H5 RW test flash media quality. Caution is advised as these tests can overwrite data. Users can set quality check ranges and error limits.
The duplicator formats flash media to FAT16, FAT32, or exFAT and measures read/write speeds, which may alter format and data content.
'Capacity Check' and 'Quick Erase' verify flash media capacity and erase data while maintaining format. 'Full Erase' and 'DoD Erase' offer thorough data removal.
Firmware updates via flash drive. Advanced functions include CRC64 calculation, A2 Fake Picker for capacity verification, and releasing write protection on USB drives.
Users can configure startup menus, copy areas, button sounds, target tolerance, and asynchronous settings. Language selection, transmission speed adjustments, and post-copy device status monitoring are available.
Features like 'Monitor Device After Copy' and 'Use Port 2 as Compare Source' enhance duplication reliability and accuracy.
- Minimum Speed: Set a minimum speed threshold during Copy and Compare, from 0 to 30 MB/s. Failure occurs if any device doesn't meet this speed.
- Advanced Setup: Available in the Golden Series, includes setting LEDs in Traditional or Factory mode.
- Burn-In Test: Involves data writing, power off, and data comparing. Users can set parameters like writing loop, compare loop, power off time, and writing pattern.
- Log Manager: Monitors, records, and manages the duplication process, providing detailed information for each port.
- Write Protect: Available in the Golden Series, allows setting write protection on USB targets.
- Ensure identical content in sources before copying.
- Use the Compare function for duplication accuracy.
- Use flash media with the same capacity for source and target.
- Change the default password for log protection to ensure security.
- Port 2 doesn't support functions like erase, H5 test, and speed measuring.
- Write protected devices don't support the burn-in function.
- Interrupting the write protect process may damage your USB drive.
- Significant capacity differences between source and target may cause errors and data loss.
- To replace a socket, turn off power, remove faceplate screws, and replace the damaged socket.
- Differences between Intelligent 9 Series flash duplicator and PC-based duplicator include multi-task processing capability, no virus infection risk, duplication accuracy, and instant power on/off.
- The flash duplicator supports copying any file format, including NTFS.
- If a copy fails, check source and target capacities, ensure the source isn't corrupt, and consider slowing down the copy speed.
- Operation Type: Stand-alone, FPGA-based operation (Non-PC based)
- Supported Languages: English or Japanese
- Display: Backlit Monochrome LCD Display
- LED Indicators: 2 per port (1 Red/1 Green)
- Control Panel: 4 Push Buttons (▲, ▼, OK, ESC)
- Copy OK: Data within the 8GB area
- Can't Copy: Data outside of the 8GB area
- Copy Modes: Quick Copy (Systems & Files Copy), Whole Media Copy, Asynchronous Duplication
- Compare Function: Bit-by-bit data comparison
- Diagnostic Modes: H2 Test (Read and write test), H5 Test (Read and write test)
- Sanitization Modes: Quick Erase, Full Erase, DoD Erase
- Format Functions: Formats device to FAT16, FAT32, exFAT
- Special Features: Burn-in Test (30 minutes to 30 days), Log Report Management, Write Protection, PC Monitoring
- Quick Copy: FAT16/32/64, Windows (NTFS), Linux (Ext2/Ext3/Ext4)
- Whole Media Copy: All Formats, including proprietary formats
- All (Windows, Mac, Linux, and other stand-alone systems)
- Power Supply: 12V DC Adapter
- Temperature: Working 5°C ~ 45°C (41°F ~ 113°F), Storage -20°C ~85°C (-4°F ~ 185°F)
- Humidity: Working 20% ~ 80%, Storage 5% ~ 95%
- Certifications: FCC, CE, RoHS
Catalog excerpts
Intelligent 9 USB/USB-HDD Duplicator & Sanitizer User Manual
Open the catalog to page 1
Product Disclaimer U-Reach is not accountable for any incidental or consequential damages, which includes, but is not constrained to property harm, loss of time or data from use of a U-Reach product, or any other damages attributable to product malfunction or failure (including without limitation, those attributable to: (1) reliance of the materials provided, (2) costs of product replacement, (3) loss of use, data or profits, (4) delays or business interruptions, (5) and any principle of legal responsibility, arising out of or in reference to the use or overall performance or from delays in servicing...
Open the catalog to page 3
• Carefully read the entire manual before operating. • Never turn off the power while the firmware is updating. • Devices will operate at high temperature during high-speed tasks. Please wear protective gloves to prevent burns when handling devices. • Devices working in high temperature may cause it to slow down or even shut down. Please make sure the devices are not overheated. • Ensure machine and operator are properly grounded to prevent ESD. • Make sure the source device is correct and functioning. • Equal capacity of source and target is recommended for guaranteed data consistency. • Using...
Open the catalog to page 4
Special items, procedures, or notes to be observed prior to use.
Open the catalog to page 5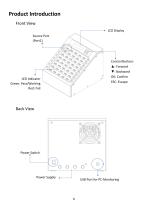
Product Introduction Front View LCD Display Source Port (Port1) Control Buttons ▲: Forward ▼: Backward OK: Confirm ESC: Escape LED Indicator Green: Pass/Working Red: Fail Back View Power Switch Power Supply
Open the catalog to page 6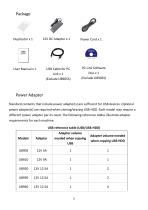
PC-Link Software Disc x 1 User Manual x 1 USB Cable for PC Standard contents that include power adapter(s) are sufficient for USB devices. Optional power adapter(s) are required when cloning/erasing USB-HDD. Each model may require a different power adapter per its need. The following reference tables illustrate adapter requirements for each machine. USB reference table (USB/USB-HDD)
Open the catalog to page 7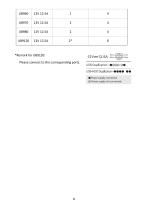
# Power supply connected © Power supply not connected Please connect to the corresponding ports.
Open the catalog to page 8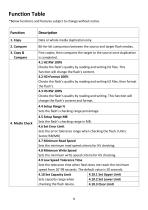
*Below functions and features subject to change without notice.
Open the catalog to page 9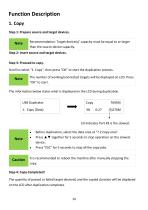
Step 1: Prepare source and target devices. Note Recommendation: Target device(s)' capacity must be equal to or larger than the source device capacity. Step 2: Insert source and target devices. Step 3: Proceed to copy. Scroll to select "1. Copy", then press "OK" to start the duplication process. Note The number of working/connected targets will be displayed on LCD. Press "OK" to start. The information below states what is displayed on the LCD during duplication. USB Duplicator 1. Copy (Data) (3) indicates Port #3 is the slowest. Step 4: Copy Completed! The quantity of passed or failed target device(s)...
Open the catalog to page 14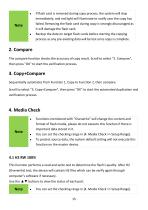
• If flash card is removed during copy process, the system will stop immediately, and red light will illuminate to notify user the copy has failed. Removing the flash card during copy is strongly discouraged as it will damage the flash card. • Backup the data on target flash cards before starting the copying process as any pre-existing data will be lost once copy is complete. The compare function checks the accuracy of copy result. Scroll to select "2. Compare", then press "OK" to start the verification process. Sequentially automates from Function 1, Copy to Function 2, then compare. Scroll...
Open the catalog to page 15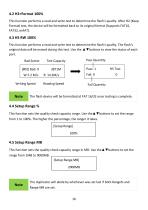
4.2 H2+Format 100% This function performs a read and write test to determine the flash’s quality. After H2 (Keep Format) test, the device will be formatted back to its original format (Supports FAT16, FAT32, exFAT). 4.3 H5 RW 100% This function performs a read and write test to determine the flash’s quality. The flash’s original data will be erased during this test. Use the ▲▼buttons to view the status of each port. Bad Sector [#02] Bad: 0 W:7.2 M/s Writing Speed Pass Quantity Test Capacity Fail Quantity The flash device will be formatted at FAT 16/32 once testing is complete. 4.4 Setup Range...
Open the catalog to page 16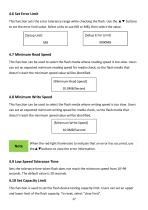
4.6 Set Error Limit This function sets the error tolerance range while checking the flash. Use the ▲▼ buttons to set the error limit value. Select units to use (KB or MB), then select the value. [Setup Error Limit] [Setup Unit] 4.7 Minimum Read Speed This function can be used to select the flash media whose reading speed is too slow. Users can set an expected minimum reading speed for media check, so the flash media that doesn’t reach the minimum speed value will be identified. [Minimum Read Speed] 10.0MB/Second 4.8 Minimum Write Speed This function can be used to select the flash media whose...
Open the catalog to page 17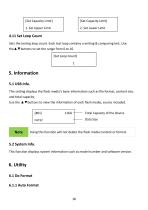
4.11 Set Loop Count Sets the testing loop count. Each test loop contains a writing & comparing test. Use the▲▼buttons to set the range from 0 to 10. [Set Loop Count] 1 5. Information 5.1 USB Info. This setting displays the flash media’s basic information such as file format, content size, and total capacity. Use the ▲▼buttons to view the information of each flash media, source included. [#01] Total Capacity of the Device Data Size Using this function will not delete the flash media content or format. 5.2 System Info. This function displays system information such as model number and software...
Open the catalog to page 18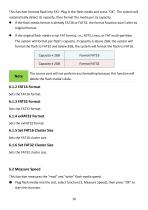
This function formats flash into FAT. Plug in the flash media and press "OK". The system will automatically detect its capacity, then format the media per its capacity. • If the flash media format is already FAT16 or FAT32, the format function won't alter its original format. • If the original flash media is not FAT format, i.e., NTFS, Linux, or FAT multi-partition. The system will format per flash's capacity. If capacity is above 2GB, the system will format the flash to FAT32 and below 2GB, the system will format the flash to FAT16. The source port will not perform any formatting because this...
Open the catalog to page 19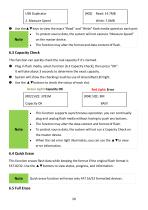
USB Duplicator 2. Measure Speed © Use the ▲▼keys to view the exact "Read" and "Write" flash media speed on each port. • To protect source data, the system will not execute "Measure Speed" on the master device. • The function may alter the format and data content of flash. 6.3 Capacity Check This function can quickly check the real capacity if it's claimed. O Plug in flash media, select function [6.3 Capacity Check], then press "OK". It will take about 3 seconds to determine the exact capacity. © System will show the checking result by use of Green/Red LED light. © Use the ▲▼ buttons to check...
Open the catalog to page 20All U-Reach Data Solutions Inc. catalogs and technical brochures
 Carry Series
21 Pages
 SATA III Ultra-High Speed
19 Pages
 Carry Series
18 Pages
 MTS-SASN Series
31 Pages
 MT/MTC Series
31 Pages
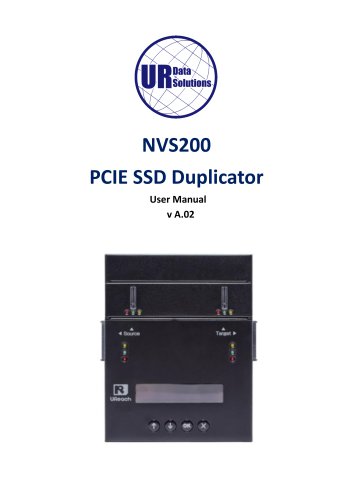 PCIE SSD Duplicator
23 Pages
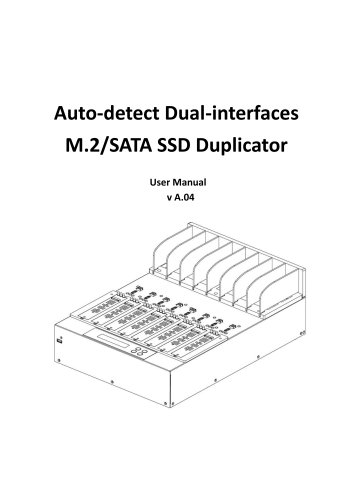 Auto-detect Dual-interfaces
23 Pages
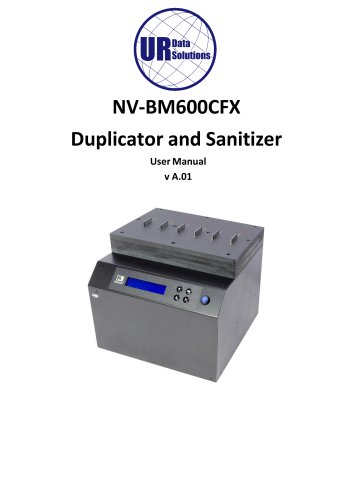 NV-BM600CFX
37 Pages
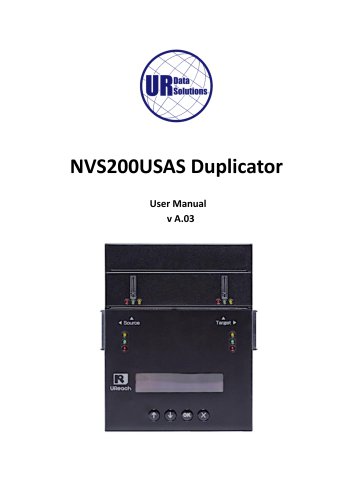 NVS200USAS Duplicator
21 Pages
 NV-BM Series – Slim Version
24 Pages
 NV-BM DUC Series
4 Pages
 NV-BM GT11 Series
41 Pages
 NV-BM Series
2 Pages
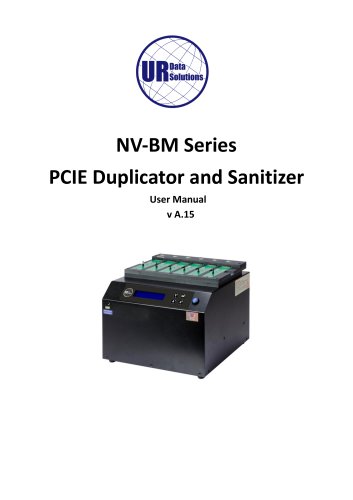 NV-BM Series
41 Pages
- Grinding mill
- LED hand lamp
- Vertical pulverizer
- Reporting software
- Punching center
- Creation software
- Waste chopper
- Impact pulverizer
- Rechargeable hand lamp
- Storage software
- Visible illumination
- Hammer grinding mill
- Compact lump breaker
- Portable hand lamp
- Hole punch punching machine
- Lamp illumination
- Automatic grinding mill
- Software solution on site
- Hand lamp with battery
- UV illumination