
- Catalogs
- TR-Electronic GmbH
- BQS 224 Sensor

BQS 224 Sensor

BQS 224 Sensor
- Protection Class: IP68
- Housing Material: Aluminum, eloxed
- Service Life: Up to 10 million cycles
- Scanning Angle: 15° to 300° on both sides
- Immunity to Interference: Complies with DIN EN 61000-4-4
- Ambient Temperature Range: 0 to 80°C
- Dimensions: Length 236.5 mm, Diameter 24 mm
- Weight: 128.8 g (with tactile probe)
- X1 Flange Connector: M12x1-5 pol. B-coded
- Incremental INK_A: Pin 1
- Supply Voltage: +15V (Pin 2)
- Ground: GND (Pin 3)
- Motor Controller: Pin 4
- Incremental INK_B: Pin 5
- Paddle: 49 931 005
- Connection Cable 2 m: 620 001 587
- Connection Cable 5 m: 620 001 614
- Collect Chuck BQS Drill Breakage Control: 49 931 006
- BQS Flange Plate 30x5x50: 49 931 007
- Screw M4x10: 27 003 037
Catalog excerpts
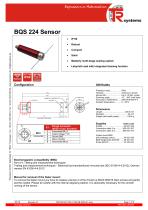
Masterly multi-stage sealing system Labyrinth seal with integrated cleaning function Flange connector (M12x1-5 pol. B-coded) Incremental INK_A Supply Voltage +15V Ground GND Motor controller Inkremental INK_B Electromagnetic compatibility (EMC) Part 4-4: Testing and measurement techniques Testing and measurement techniques - Electrical fast transient/burst immunity test (IEC 61000-4-4:2012); German version EN 61000-4-4:2012 Manual for removal of the feeler mount: To remove the feeler mount you have to release unscrew 2 of the 3 lined up M3x5 DIN915 Allen screws and gently pull the needle. Please be careful with the internal adjusting washer. It is absolutely necessary for the smooth running of the sensor. 03/18 Revision 01 Changes reserved
Open the catalog to page 1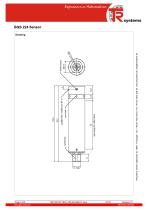
Changes reserved
Open the catalog to page 2All TR-Electronic GmbH catalogs and technical brochures
 USB PC-Adapter HID V5
2 Pages
 BQS–Drill Quality Assurance
6 Pages
 Absolute-Encoder CMV22 - A,
4 Pages
 Overview Linear Encoders
48 Pages
 Sensor Highlights 2018
12 Pages
 Intelligent drive technology
44 Pages
 Wire Actuated Encoders Overview
48 Pages
 Product Information BQS
12 Pages
 Flyer Automation/Retrofit
12 Pages
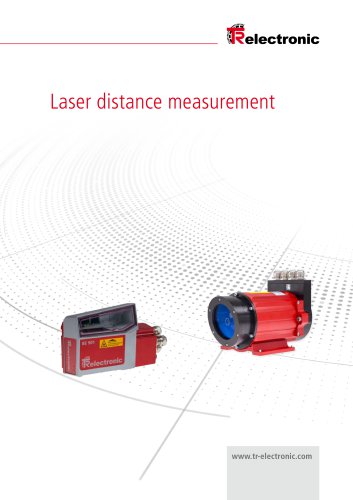 Laser distance measurement
24 Pages
 The catalog
562 Pages






Archived catalogs
 Industrial Ethernet
16 Pages
 TRgroup
12 Pages
 Profinet
4 Pages


- Electromotor
- Display module
- DC electromotor
- TR-Electronic rotary encoder
- Intel® Core™ PC
- Industrial computer
- Embedded PC
- Box PC
- RS-232 PC
- Digital I/O
- EC motor
- USB 2.0 PC
- TR-Electronic incremental encoder
- Windows PC
- IO module
- 24 V motor
- TR-Electronic incremental rotary encoder
- Digital indicator
- Analog I/O
- Compact electromotor