
- Catalogs
- TQC Sheen BV
- PULL OFF ADHESION TESTER MODEL PAT GM01 GM04


- Products
- Catalogs
- News & Trends
- Exhibitions
PULL OFF ADHESION TESTER MODEL PAT GM01 GM04

PULL OFF ADHESION TESTER MODEL PAT GM01 GM04
The Precision Adhesion Tester (PAT) is an advanced tool for adhesion testing, offering superior performance compared to traditional laboratory methods. It is designed to be robust, reliable, and user-friendly across various applications. Users are advised to thoroughly review the instruction manual to fully utilize the equipment and prevent issues.
Scope of Supply
The PAT comes in multiple models, each equipped with a hydraulic pump, testing head, cutting tool, test elements, carry case, calibration certificate, and user manual. Models such as PAThandy™/6.3kN, GM01/6.3kN, GM04/20kN, and GM04/40kN provide different testing capacities and accessories.
Important Points
The instrument is certified for loads up to 85% of full scale, with a safety margin for accidental overloads. Exceeding 95% of full scale can compromise precision and may necessitate recalibration. For frequent high-pressure applications, smaller diameter test elements or more powerful testing heads are recommended.
Cleaning of Test Elements
Test elements must be cleaned before testing to prevent glue failure. Cleaning methods include using solvents, grit blasting, or heating to remove residues. Final cleaning involves abrasion with grit paper to expose a bare metal surface, enhancing adhesive strength.
Preparing the Coating
Coatings should be cleaned or abraded according to their type. The choice of adhesive depends on the coating's characteristics, with cyanoacrylate and epoxy adhesives being common options.
Preparing and Executing Tests
Test elements are glued to the surface with suitable adhesives. After curing, excess glue is removed, and the coating is cut around the test element if necessary. The testing head is then connected, and the test is conducted using a manual pump or crank.
Executing the Test
Tests can be destructive or non-destructive. Destructive tests involve increasing pressure until fracture, while non-destructive tests avoid cutting around the test element and require careful judgment to prevent premature fracture.
External Factors Affecting Test Results
Factors such as incorrect adhesive use, substrate thickness, cutting around the test element, and atmospheric conditions can impact test results. Proper handling and preparation are crucial for accurate measurements.
Maintenance and Care
Regular maintenance includes bleeding the hydraulic system and checking the dynamic characteristics of the testing head. Useful tips are provided to ensure the longevity and accuracy of the instrument.
Testing on Curved Surfaces
Special test elements and platforms are available for testing on curved surfaces, ensuring accurate adhesion measurements in diverse conditions.
Adhesive Application and Testing Procedures
For accurate testing, ensure the adhesive layer is homogeneous and free of air pores. Use low molecular epoxy adhesives for high-value measurements. Apply adhesive centrally on the substrate or test element, press the test element until embedded, and remove excess adhesive carefully. Exclude test results with glue fractures below average.
Substrate Thickness Considerations
Thicker test panels yield higher pull-off values due to reduced flexing. Flexing can distort results, especially in thin, brittle coatings. To prevent flexing, cut test panels into smaller pieces and glue them onto a rigid surface.
Calibration and Accuracy Checks
Regularly check the instrument's accuracy, especially if used by multiple people or transported frequently. Factory calibration involves comparing the instrument against a load cell. A portable calibration unit (PAT model GM03) is available for frequent checks.
Maintenance and Care
Keep the instrument in its case when not in use. Bleed the hydraulic system carefully if needed. Check the dynamic characteristics of the testing head after any impact.
Testing on Curved Surfaces
Use purpose-machined test elements for convex and concave surfaces. Ensure the test elements are aligned correctly to avoid radial forces during testing.
Catalog excerpts

Precision Adhesion Tester. 2908 LL Capelle a/d IJssel @ [email protected] WWW.TQC.EU The Netherlands ©www.tqc.eu Dear Owner You are now in possession of an instrument which is a technological leader in its field and which even supersedes current recognised laboratory test methods. The instrument is robust and designed to be reliable and easy to use in a wide range of applications. If you have any queries relating to the use of this equipment e.g. types of coatings, accessories, test elements, calibration, use of glue - in fact any issues in the area of adhesion testing, please do dot hesitate to contact us. We promise to assist you in any way we can! In order to get maximum satisfaction from the use of the equipment and to avoid complications you should Good luck with your testing! Yours sincerely DFD® INSTRUMENTS Page 1 of 14
Open the catalog to page 1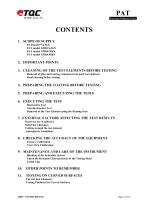
Precision Adhesion Tester. CONTENTS 1. SCOPE OF SUPPLY PAThandy™/6.3kN PAT model GM01/6.3kN PAT model GM04/20kN PAT model GM04/40kN 3. CLEANING OF THE TEST ELEMENTS BEFORE TESTING Removal of glue and coating remnants from used test elements Final cleaning before testing 6. EXECUTING THE TEST Destructive Test Non-Destructive Test Removal of the Test Element using the Heating Iron 7. EXTERNAL FACTORS AFFECTING THE TEST RESULTS Incorrect use of adhesive Substrate Thickness Cutting around the test element Atmospheric Conditions 9. MAINTENANCE AND CARE OF THE INSTRUMENT Bleeding of the hydraulic system. Check...
Open the catalog to page 2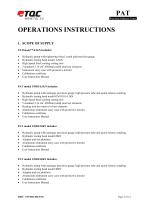
• Hydraulic pump with tightening wheel, crank and precision gauge • Hydraulic testing head model 6.3kN • High Speed Steel coating cutting tool • 5 standard 3.14 cm2 (020mm) mild steel test elements • Instrument carry case with protective interior • Calibration certificate • User Instruction Manual PAT model GM01/6.3kN includes: • Hydraulic pump with analogue precision gauge, high pressure tube and quick-release coupling • Hydraulic testing head model GM 0101 6.3kN • High Speed Steel coating cutting tool • 5 standard 3.14 cm2 (020mm) mild steel test elements • Heating iron for removal of...
Open the catalog to page 3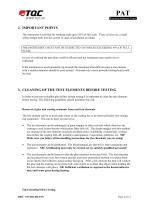
PAT Precision Adhesion Tester. 2. IMPORTANT POINTS The instrument is certified for working loads up to 85% of full scale. There is however, a small safety margin built into the system in cases of accidental overload. THE INSTRUMENT MUST NOT BE SUBJECTED TO FORCES EXCEEDING 95% OF FULL SCALE. In case of overload the precision could be affected and the instrument may need to be recalibrated. If the instrument is used repeatedly up towards the maximum allowable pressure a test element with a smaller diameter should be used instead. Alternatively a more powerful testing head could be used. 3. CLEANING...
Open the catalog to page 4
PAT Precision Adhesion Tester. Immediately prior to gluing the test elements to the surface they should be abraded with a grit paper (grit size 80 –120). Place the gritpaper on a flat, smooth and hard surface and rub the test surface of the test element firmly against the gritpaper in the same direction several times until the characteristic grey pure steel colour appears. Rub the test elements in the one direction only as this will create many parallel micro-grooves on the test surface with minimal contamination. (The only contamination will be fragments of grit and steel which will be absorbed...
Open the catalog to page 5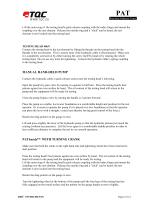
PAT Precision Adhesion Tester. Lift the outer ring of the testing head's quick release coupling with the index finger and mount the coupling over the test element. Release the outside ring and a "click" can be heard, the test element is now locked into the testing head. TESTING HEAD 40kN Connect the testing head to the test element by fitting the threads on the testing head into the threads in the test element. This is easiest done if the hydraulic cable is disconnected. Make sure it is completely screwed on by either turning the screw itself by hand or by rotating the whole testing head. Do...
Open the catalog to page 6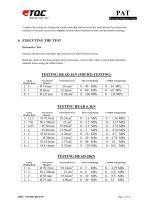
PAT Precision Adhesion Tester. Conduct the testing by turning the crank smoothly and successively until desired level has been reached or fracture occurs (see separate section about destructive and non-destructive testing). 6. EXECUTING THE TEST Destructive Test Increase the pressure smoothly and successively until fracture occurs. Read the value on the drag pointer and, if necessary, convert this value to the actual maximum material stress using the tables below: TESTING HEAD 1kN (MICRO TESTING) Gauge Test Element Test Element Area Max Testing Range Certified Testing Range Reading...
Open the catalog to page 7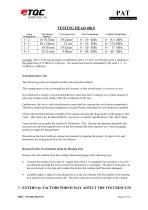
PAT WWW.TQC.EU Precision Adhesion Tester. TESTING HEAD 40kN Gauge Test Element Test Element Area Max Testing Range Certified Testing Range Reading RatioDiameter Example: The 6.3 kN testing head in combination with a 1.57cm2 test element gives a reading on the gauge dial of 12 MPa (or 1740 psi). The actual test result is calculated by the ratio 2 : 1, i.e. 24 MPa (or 3480 psi). Non-Destructive Test The following points are important before choosing this method: The coating must not be cut around the test element, as this would make it a destructive test. Non-destructive testing is...
Open the catalog to page 8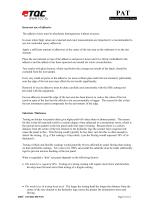
PAT Precision Adhesion Tester. Incorrect use of adhesive The adhesive layer must be absolutely homogeneous without air pores. In cases where high values are expected and exact measurements are important it is recommended to use low molecular epoxy adhesives. Apply a sufficient amount of adhesives in the centre of the test area on the substrate or on the test element. Place the test element on top of the adhesive and press it down until it is firmly embedded in the adhesive and the adhesive has been squeezed out around the whole circumference. Test results with glue fracture, which read below...
Open the catalog to page 9
PAT Precision Adhesion Tester. • The actual thickness of the substrate. A substrate may vary in thickness from a less than 1µm (e.g. a coated metal film) up to infinite thickness (e.g. a coated tunnel wall). How to prevent flexing of a test panel. To eliminate flexing of the test panel the following procedure is recommended: • Cut (e.g. with a hacksaw) the test panel into small pieces sufficiently big for one test element to be glued on each piece. When gluing the test element to the small pieces, glue the pieces themselves onto a completely rigid surface (e.g. a steel plate more than 10 – 15...
Open the catalog to page 10All TQC Sheen BV catalogs and technical brochures
 FILM THICKNESS GAUGE
2 Pages
 PTK pretreatment test Kit
3 Pages
 TM0030
3 Pages
 TQC Sheen Catalog 2019
32 Pages
 COLOR MATCHING LIGHTS
1 Page
 BASIC INSPECTION KIT
1 Page
 ADHESION TESTER POSITEST AT
3 Pages
 ADHESION TEST KIT (HPK)
2 Pages
 ROTOTHINNER™
3 Pages
 TQC SHEEN BRESLE PATCHES
1 Page
 CONCRETE MOISTURE METER
3 Pages
 THERMOMETER TE1000
2 Pages
 UV INSPECTION SPOTLIGHT
2 Pages
 INSPECTOR FLASHLIGHT
3 Pages
 MACHU TEST BATH
3 Pages
 MACHU SCRATCHING TOOL
2 Pages


Archived catalogs
 ADHESION TEST PAT HANDY
2 Pages
 COLORCATCH
3 Pages
 LED POCKET FLASHLIGHT
2 Pages
 TQC Sheen Novelties
20 Pages
 TQC Glossmeters
8 Pages

- Kiln
- Temperature probe
- Test cabinet
- Electric furnace
- Data logger
- Drilling tool
- Indentation hardness tester
- Solid drill bit
- Temperature datalogger
- USB datalogger
- Thermocouple temperature transducer
- Table-mounted hardness tester
- Data-logger with screen
- Automatic tester
- LED hand lamp
- Thickness gauge
- Automatic test kit
- Datalogger without display
- Portable thickness gauge
- Manual test equipment