Inks
1 /6Pages
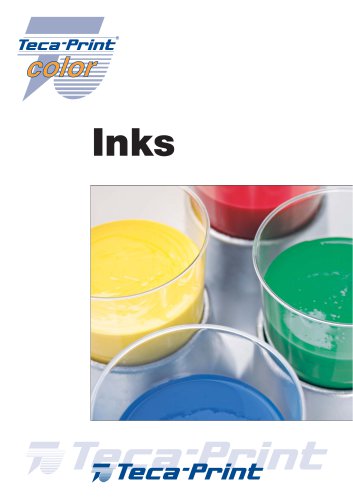
Inks
1 /6Pages
Catalog excerpts
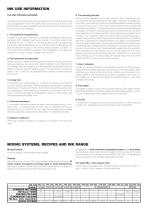
INK USE INFORMATION THE PAD PRINTING PROCESS The basic principle of the pad printing process is that the ink becomes tacky due to evaporation, first in the cliché before ink pick-up and then on the pad. This effect is used to transfer the ink from the cliché to the pad and then from the pad to the workpiece. 1. Pre-treatment of polyolefines To obtain an optimum ink adhesion on polyolefine, polyethylen (PE) and polypropylen (PP), materials must be pre-treated. The surface tension must be at least 38 Dyn = 0.038 N / m. The surface tension can be tested using the test pen (see accessories list on...
Open the catalog to page 2
Highly opaque silk gloss pad printing ink for the printing of various kinds of plastic materials like hard and soft PVC, coated polyester and PET-G, polystyrene and its modifications such as ABS, ASA,SAN, acrylic glass PMMA and polycarbonate PC, pretreated polyolefine PP and PE, manifold coated surfaces and layers as well as cellulose acetate CA and CAB, papers and cardboard products. very highly opaque, excellent fluidity, may be applied for open and closed machine system, quick drying. Most universal pad printing ink, opaque suitable for thermoplastic materials as well as duroplastics, wood,...
Open the catalog to page 3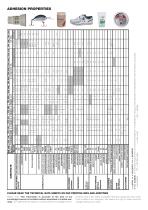
+ = good, ++ = very good, +++ = excellent (++) = suitable: for increased requirements for chemical resistance, or weatherproof, drying or other special ink characteristics, tests should be conducted. 1 = pre-treated FG = with fiber glass * = oven cured part. = partially ADHESION PROPERTIES PLEASE READ THE TECHNICAL DATA SHEETS ON PAD PRINTING INKS AND ADDITIVES Please note: This information is accurate to the best of our knowledge however is furnished without expressed or implied warranty. Our statements are based on topical technical knowledge and ex- perience. Due to the variety of possible...
Open the catalog to page 4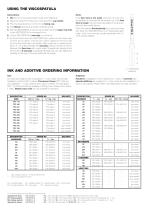
USING THE VISCOSPATULA Instructions: 1. Stir the ink to ensure thorough mixing of the pigments. 2. Place the Teca-Print mixing cup in the Teca-Print cup holder. 3. Pour the required amount of ink into a mixing cup. 4. Add thinner drop by drop whilst constantly stirring. 5. Dip the VISCOSPATULA into the cup so that half of the large / top hole in the VISCOSPATULA is immersed in ink. 6. Lift the VISCOSPATULA vertically out of the ink. 7. As the ink flows down the VISCOSPATULA, watch how the holes open up from top to bottom. The amount of time it takes for the ink to flow from the first small hole...
Open the catalog to page 5
oven cured Hardener must be used in an appropriate ratio to the ink. Strong deviations from the noted ratios above can lead to problems. Some problems may take a while to show and can eventually affect resistance and adhesion. Thus, after adding hardener and then thinner – this order is very important – the mixture should rest for approx. 15 minutes so that optimum ink flow and adhesion are achieved. Hardener only to increase the chemical resistance. Pot life can be reduced by approx. half for metal colour tones. With some ink types, pot life depends on a direct relationship to roomtemperature...
Open the catalog to page 6All Teca-print catalogs and technical brochures
 Serie X5
4 Pages
 Cosmetic edition TPX 301
2 Pages
 TPX 302
2 Pages
 TPX 301
2 Pages
 TPX 300
2 Pages
 TPX 252
2 Pages
 TPX 250
2 Pages
 TPX 221
2 Pages
 TPX 112
2 Pages
 TPX 102
2 Pages
 TPX 100
2 Pages
 TPM 161
2 Pages
 TPM 101
2 Pages
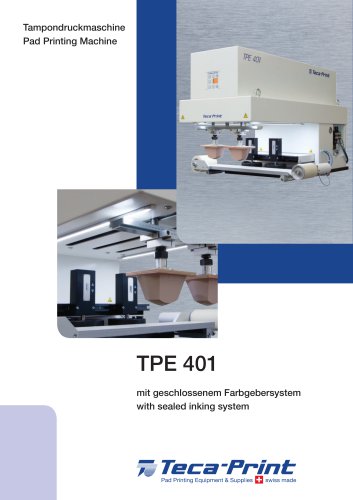 TPE 401
2 Pages
 TPE 251
2 Pages
 TPE 250
2 Pages
 TPE 151
2 Pages
 TPE 150
2 Pages
 Printing pads
36 Pages
 Plates for pad printing
11 Pages
 TPE 100
2 Pages
- Pump
- Industrial pump
- Stationary pump
- Chemical pump
- Positioning table
- Drying system
- 380 V pump
- Industrial cleaning system
- Precision positioning table
- 24 V pump
- Control pump
- Continuous drying system
- Process cleaning system
- Filling pump
- Pad printing machine
- Fully integrated pump
- Manual cleaning system
- Automatic pump
- Compact positioning table
- Pad printing machine with closed ink cup