


- Company
- Products
- Catalogs
- News & Trends
- Exhibitions
HemoTemp® II Activator

HemoTemp® II Activator
The HemoTemp® II Activator is a block module heater designed for uniform temperature control to activate HemoTemp® II Indicators. Users should inspect the unit upon receipt, read the manual thoroughly, and ensure all operators are familiar with the operation instructions. A warranty registration card should be filled out and submitted.
Description
The device features a single control thermostat, temperature uniformity within ±0.5°C, a rocker power switch, a heater lamp, a steel housing, and an anodized aluminum heating block. It can activate up to 12 indicators simultaneously and has a 12-month warranty.
Specifications
Operating temperature is 40°C with a uniformity of ±0.5°C and stability of ±2°C. The heater block dimensions are 9.5 x 7.5 x 5.1 cm. Electrical requirements vary by model (120V or 230V). The unit is intended for indoor use only.
Installation
Place the unit in a convenient, draft-free location near a grounded outlet. Ensure the heater is level and away from edges to prevent accidents. Use a 3-wire grounded plug for electrical connections.
Operation
Warnings include avoiding use near flammable materials and not heating substances above their auto-ignition temperature. The control panel allows for temperature adjustments, and indicators should only be placed in the block once the desired temperature is reached. The activation process involves heating the indicator to a specific phase and then applying it to a refrigerated blood bag.
Maintenance
Minimal maintenance is required. Disconnect the unit from power before cleaning or servicing. The heating block can be submerged in water, but the cabinet should not be immersed.
Troubleshooting
Common issues include the unit not heating or the heater lamp not lighting. Solutions involve checking power connections, replacing fuses, or adjusting the thermostat.
Replacement Parts
A list of replacement parts is provided, including part numbers for cords, heaters, pilot lights, and more. Contact information for ordering parts is included.
Catalog excerpts

HemoTemp® II Activator Single-Temperature Control Mulitple Block Heater Manual No. N2400364 Model No. 112001BIO (120v) Model No. 112001BIO-2 (230v) SpotSee | LCR Hallcrest LLC 1911 Pickwick Lane, Glenview, IL 60026
Open the catalog to page 1
Section 1 - Introduction Thank you for selecting SpotSee | LCR Hallcrest LLC for your equipment needs. For maximum value and ease of start-up: • Inspect the carton and contents for shipping damage. Notify the carrier immediately if damage is found. • Unpack and verify that the complete unit has been received. Do not discard packing materials until all is accounted for including the following accessories: 1 pulling handle, 1 sensing plate with liquid crystal indicators attached, 1 instruction for use sheet, a warranty card and a User Manual. • Read this Operation Manual thoroughly before deciding...
Open the catalog to page 2
The HemoTemp® II Activator is a block module heater designed by SpotSee | LCR Hallcrest LLC to provide uniform temperature for accurate and reliable activation of the HemoTemp® II Indicator. This heater features: • A single control thermostat. • Temperature uniformity maintained to within ± 0.5°C. • A rocker power switch to be set ON or OFF. • A separate heater lamp which indicates when power is being supplied through the thermostat to the heating element. • A steel housing with a baked enamel cabinet. • An anodized solid aluminum heating block. • Heat activation for up to 12 HemoTemp® II indicators...
Open the catalog to page 3
Section 4 - Installation Location: Find a convenient, draft-free location near a grounded electrical outlet meeting the power requirements listed on the unit nameplate. The heater should be level, though operation does not depend on this, and away from edges of the laboratory bench where there is danger of accidental burns or knocking the unit over. Electrical Connection: The heater is supplied with a 3-wire line cord. It should be plugged into an outlet wired for 3-prong plugs. If an extension cord is used, it also should be the 3-wire grounded type. For an outlet wired for 2-prong plugs (ungrounded),...
Open the catalog to page 5
Section 5 - Operation DANGER: DO NOT USE IN THE PRESENCE OF FLAMMABLE OR COMBUSTIBLE MATERIALS OR EXPLOSIVE GASES. DO NOT USE IN THE PRESENCE OF PRESSURIZED OR SEALED CONTAINERS. FIRE OR EXPLOSION MAY RESULT, CAUSING DEATH OR SERIOUS INJURY. WARNING: DO NOT HEAT ANY SUBSTANCE ABOVE A TEMPERATURE WHICH WILL CAUSE IT TO EMIT TOXIC FUMES-DEATH OR SERIOUS INJURY MAY RESULT. WARNING: DO NOT ADD WATER TO THE HEATING BLOCK OR THE EMPTY WELL OF A UNIT CONNECTED TO ELECTRICAL POWER-THIS CAN RESULT IN AN EXPLOSION WITH POSSIBILITY OF SERIOUS INJURY OR DEATH. WARNING: TO AVOID DANGER OF FIRE AND/OR EXPLOSION,...
Open the catalog to page 6
• Insert the plug into its outlet and move the Power Switch from the OFF position to the ON position. • Set the Temperature Adjust Control by rotating the adjustment knob. • Insert the sensing plate or a calibrated thermometer to establish desired temperature. When the temperature has stabilized, make adjustments to raise or lower the temperature as required by turning the Temperature Adjust Control clockwise to raise, counterclockwise to lower temperature. • Insert the HemoTemp® II Indicators into the heated block once the temperature has stabilized at the desired level. To avoid accidental...
Open the catalog to page 7
Section 5 - Operation (continued) Instruction for Use of the HemoTemp® II Activator: Background: Activation is a process of heating the HemoTemp® II liquid crystal formulation to a METASTABLE ORDERED GLASS phase at the color-play temperature range and then quenching. Steps for Use: 1. Turn Activator ON using POWER switch-when the switch is set to ON, you will see the switch light up. The ON light will be red until the temperature set point has been reached. The Activator takes approximately 20 to 30 minutes to reach its temperature set point. Check the liquid crystal indicator or calibrated thermometer,...
Open the catalog to page 8
CAUTION: MAKE NO ATTEMPT TO SERVICE OR REPAIR A SPOTSEE | LCR HALLCREST LLC PRODUCT UNDER WARRANTY BEFORE CONSULTING WITH SPOTSEE | LCR HALLCREST LLC. AFTER THE WARRANTY PERIOD, SUCH CONSULTATION IS STILL ADVISED, ESPECIALLY WHEN THE REPAIR MAY BE TECHNICALLY SOPHISTICATED OR DIFFICULT. IF ASSISTANCE IS NEEDED, PLEASE CALL SPOTSEE | LCR HALLCREST LLC CUSTOMER SERVICE AT 847-998-8580. NO MERCHANDISE, HOWEVER, SHOULD BE RETURNED DIRECTLY TO SPOTSEE | LCR HALLCREST LLC WITHOUT WRITTEN PRIOR APPROVAL FROM SPOTSEE | LCR HALLCREST LLC. CAUTION: DISCONNECT UNIT FROM POWER SOURCE BEFORE PERFORMING ANY...
Open the catalog to page 9
The following is intended as a guide to help in servicing this unit, if problems should occur. NOTE: BEFORE ATTEMPTING ANY REPAIR, DISCONNECT POWER CORD FROM OUTLET. Possible Causes of Problem The unit is not plugged in or it is not plugged into a proper, working outlet (check the outlet) The heater lamp will not light and the unit The power switch is OFF The Fuse is blown (replace) Thermal cutoff is blown (replace) The temperature control adjustment The heater lamp is on or flickering but the unit is set too low (turn clockwise) will not heat to the desired level: Faulty thermostat (replace)...
Open the catalog to page 10
*To order replacement parts, contact:
Open the catalog to page 11All SpotSee catalogs and technical brochures
 WarmMark Data Sheet
3 Pages
 ShockLog® 298 Overview
5 Pages


Archived catalogs
 TempU
TempU1 Page
 ShockWatch RFID Overview
2 Pages
 Forehead Thermometer
2 Pages
 Tilt Indicators
2 Pages
 ShockLog 248
2 Pages
 SpotSee® Tilt Indicators
2 Pages
 SpotBot 4G Plus Overview
3 Pages
 Blood Temp 10
1 Page
 SpotBot BLE
1 Page
 Temperature Recorders
2 Pages
 Cold Chain Indicators
2 Pages
 SpotBot Cellular
2 Pages
 Mag-2000
2 Pages
 ShockDot
2 Pages
 ShockLog Cellular
2 Pages
 ShockWatch Label
2 Pages
 ShockWatch Tube
2 Pages
 ShockWatch Flex
2 Pages
 OpsWatch Overview
3 Pages
 WarmMark Overview
2 Pages
 ColdMark
1 Page
 LOGIC Temperature Recorder
2 Pages
 SpotBot™ Cellular
2 Pages
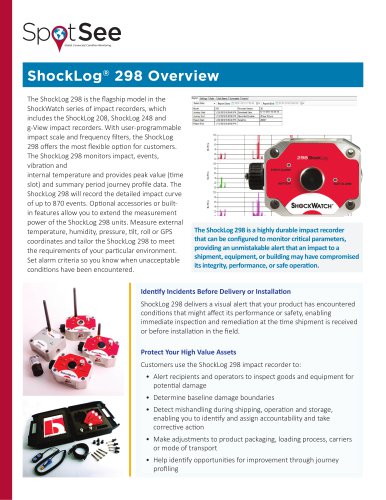 2018 ShockLog® 298 Overview
4 Pages
 2018 ShockTrak™ Overview
2 Pages
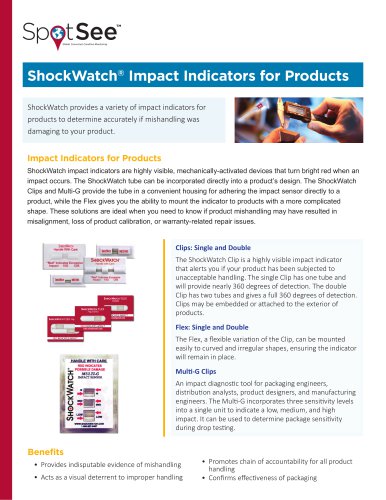 2018 ShockWatch Clip
2 Pages
 ShockDot Impact Indicator
2 Pages
 ShockWatch® MAG 2000
2 Pages
 ShockWatch® Flex
2 Pages
 OpsWatch
2 Pages
 ShockLog 208
2 Pages
 ShockWatch Labels
2 Pages
 Seafood Indicator
1 Page
 Impact Recorders
2 Pages
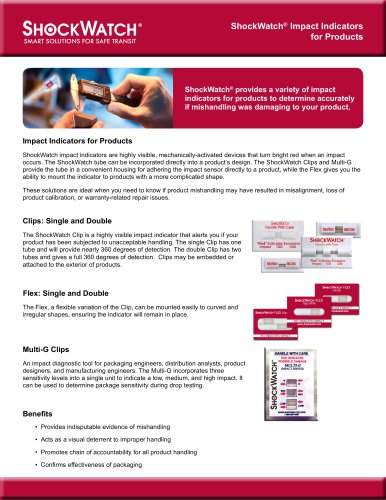 2016 ShockWatch Clip
2 Pages








- Temperature probe
- Data logger
- Resistance temperature sensor
- Temperature datalogger
- USB datalogger
- Data-logger with screen
- Stainless steel temperature transducer
- Wireless datalogger
- Datalogger without display
- Battery-powered datalogger
- Monitoring datalogger
- RTD temperature sensor
- Datalogger with LCD display
- Precision temperature transducer
- Analog indicator
- Programmable datalogger
- Polymer tag
- Compact logger
- Temperature indicator
- Ink