- Catalogs
- Smartrek Technologies Inc.
- Smartrek monitoring
Smartrek monitoring
1 /142Pages
Smartrek monitoring
1 /142Pages
Catalog excerpts

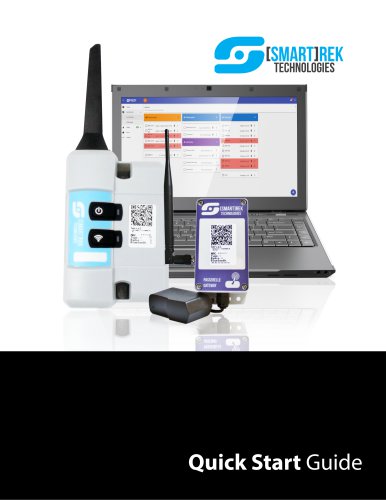
Smartrek monitoring Thank you for purchasing! This document contains a how-to guide and general information to help you get the most out of this product. Look here first for answers and to get started.
Open the catalog to page 1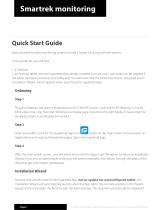
Smartrek monitoring Quick Start Guide Most Smartrek turnkey monitoring system include a Starter kit along with the sensors. In the starter kit, you will find: 1. a Gateway 2. an Android tablet with the Sugarheld App already installed. In most cases, stop steps can be skipped if the tablet has been previously preconfigured. You will know that the tablet hasn’t been setupped yet an installation Wizard doesn’t appear when launching the Sugarheld App. Unboxing Step 1 Plug the Gateway and open it by pressing on the ON/OFF button. Look at the LED flashing. It should blink a few time, stop then start...
Open the catalog to page 2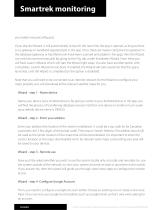
Smartrek monitoring your tablet was preconfigured. If you skip the Wizard, it will automatically re-launch the next time the app is opened, as long as there is no gateway or handheld registered yet in the app. Once there are master components registered in the database (gateway or handheld units have been scanned and added in the app), then the Wizard can only be launched manually by going to the Cfg. tab, under Installation Wizard. From there you will have Launch Wizard, which will start the Wizard right away. You also have another option with a checkbox, Launch Wizard at next boot. If enabled,...
Open the catalog to page 3
Smartrek monitoring Wizard - step 5 - Configure Alarms Next, you can customize the basic alarms settings. You can disable/enable: - Sound alarms on errors and warnings (you will be able to set the error limits on each sensor later on) - Use Text-to-speech ability of your phone so that errors and warnings are read to you Wizard - step 6 - Configure Units Next, you can customize the units that will be used throughout the app. You can choose either Metric or Imperial units or tap on Customize Units to choose the right unit for each of your measurements. - Metric units : distance in m, height in...
Open the catalog to page 4
Smartrek monitoring Wizard - step 10 - Define system Enter the distance of the farthest node from the gateway (from your main location). In other words, what will be the radius of your Smartrek network if the center is at the gateway. Wizard - step 11 - Configure Performance Choose how you would like to optimize the system: 1) Save batteries (low data-rate). You should choose this option if you do not currently need very high data rate to save your battery life. When saving batteries, the system will respond slower than with the high performance option. You will still get a lot of data, but not...
Open the catalog to page 5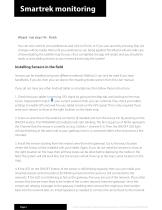
Smartrek monitoring Wizard - last step (14) - Finish You can now commit your preferences and click on Finish, or if you can cancel by pressing Skip (no changes will be made). Wait until your preferences are being applied. The Wizard will also take care of downloading the satellite map for you. Once completed, the app will restart and you should be ready to start adding sensors to your network and enjoy the system! Installing Sensors in the field Sensors can be installed using two different methods. Method 2 can only be used if you have handhelds. If you do, then you can skip to the Installing...
Open the catalog to page 6
Smartrek monitoring In the Sugarheld app (on the tablet): 1. Go to the Nodes tab, swipe left to right or right to left until the displayed page is that of the node to be installed. If your tablet was preconfigured, then all unused sensor types might be hidden. You can unhide them by going to the Cfg. tab, tap on Select Active sensors and check all sensor types that you wish to show. 2. Optionnaly, you could check on the map to see if you are at the correct location (GPS is working) 3. Tap on the Menu button of the Android device and tap on Add node. The menu button varies depending on the Android...
Open the catalog to page 7
Smartrek monitoring gateway is highlighted in red, then your tablet has not been paired with the gateway. To pair, click and hold on the gateway’ name. In the menu, scroll down and tap on Activate. The app will restart, this time with a bluetooth connection with the gateway. After a few seconds, the sensors’ tabs will change color and you will start seeing data.
Open the catalog to page 8
Quick Start Guide 1. Smartrek Automation and Monitoring system features 12 1.1 Definition of a Wireless Sensor Network 12 1.3.2 Main controller device 19 1.3.3 Portable computer device 21 1.3.7 Vacuum sensor node 21 1.3.8 Level sensor node 22 1.3.9 Remote controls (Relay) 22 1.3.11 Pressure sensor node 22 1.3.12 Flowmeter sensor node 22 1.3.13 Refractometer sensor node 22 1.3.14 Piezometer (Temperature Depth) sensor node 23 1.3.15 Tensiometer sensor node 23 1.3.16 Temperature sensor node 23 1.3.17 Reverse Osmosis sensor node 23 1.3.18 High Power Ultrasonic Level sensor node 23 2.1 Overview of...
Open the catalog to page 9
2.3.3 Normal boot sequence 27 2.3.4 Programming a node on a channel 28 3. Relay (remote controls) 33 3.4 Available inputs for the Remote Controls device (Relay) 37 3.4.1 Mechanical limit switch 38 3.5.1 Downloading road and satellite maps 42 3.5.3 Transferring maps to another Android device 44 3.5.4 Other display options 44 4.2 Transferring the installation file to the device 61
Open the catalog to page 10
4.3 Configuring security options of the Android device 61 4.4 Installing the Sugarheld app from a file from a local computer 62 Smartrek network 5.5 Transferring database between two Android devices 5.5.2 2nd Method, using Wi-Fi 5.6 Backup and restore database 5.7 Updating the Sugarheld application 5.9 Enabling sensors data history 6.2 Going through the wizard 81 6.2.1 Step 1 - Name device 81 6.2.2 Step 2 - Enter your address 81 6.2.4 Step 4 - Configure Google Account 81 6.2.5 Step 5 - Configure alarms 81 6.2.6 Step 6 - Configure Units 82 6.2.7 Step 7 - Choose application 82
Open the catalog to page 11
6.2.8 Step 8 - Reader or writer 82 6.2.9 Step 9 - Install gateway 82 6.2.10 Step 10 - Define network 82 6.2.11 Step 11 - Configure performance 82 6.2.12 Step 12 - Enable features 83 6.2.13 Step 13 - Choose theme 83 7.3 Warning and Error alarms 85 7.4 Displaying real-time location of the handheld node 85 7.6 Node list order 86 7.8 Table page modes 87 7.9 Selecting displayed sensor types 87 9. Configuring remote access using Internet (Google Drive) 93 9.1 Step 1 - Enable Google Drive mode 94 9.2 Step 2 - Create a Google account 95 9.4 Connecting to your account 97
Open the catalog to page 12All Smartrek Technologies Inc. catalogs and technical brochures
 Quick Start Guide
11 Pages
 SMK900
55 Pages
 Smartrek Raven-Eye 2
2 Pages
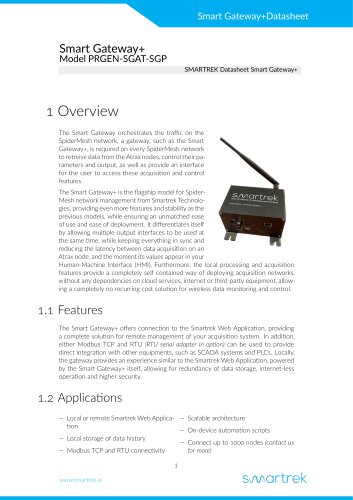 Smart Gateway+
10 Pages
- Flowmeter
- Liquid flow monitor
- Resistance temperature sensor
- Waterproof flow meter
- Stainless steel flow monitor
- Liquid level sensor
- Wireless remote control
- Industrial remote control
- Remote control with buttons
- Analog level sensor
- Industrial gateway
- Fieldbus gateway
- RS485 flow monitor
- Transceiver module
- Modbus flow monitor
- Membrane pressure sensor
- RTD temperature sensor