- Catalogs
- SENSORLINK
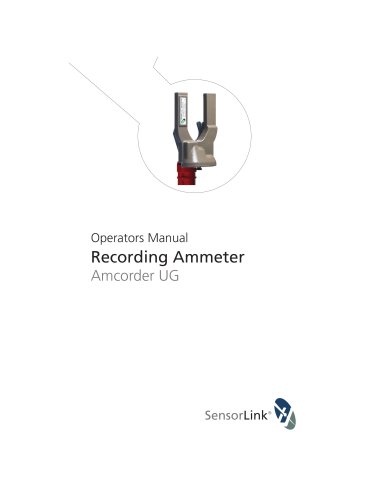
- Recording Ammeter
Recording Ammeter
1 /20Pages
Recording Ammeter
1 /20Pages
Catalog excerpts
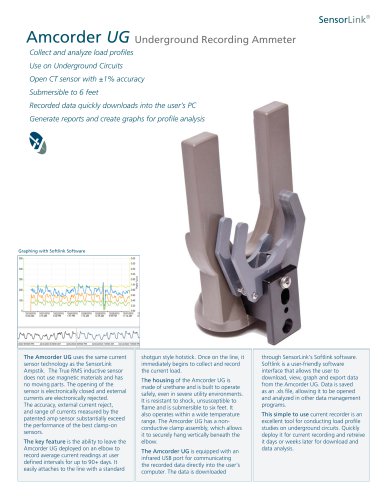
Operators Manual Recording Ammeter Amcorder UG
Open the catalog to page 1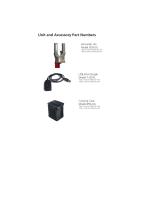
Unit and Accessory Part Numbers Amcorder UG Model 920-UG *Qty (1) sold in 6-920-UG-1 Kit *Qty (3) sold in 6-920-UG-3 Kit USB IrDA Dongle Model 7-021B *Qty (1) sold in 6-920-UG-1 Kit *Qty (1) sold in 6-920-UG-3 Kit Carrying Case Model 659-UG *Qty (1) sold in 6-920-UG-1 Kit *Qty (1) sold in 6-920-UG-3 Kit
Open the catalog to page 2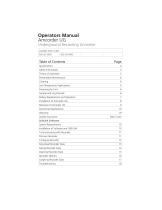
Battery Replacement and Operation 7 Quality Assurance Back Cover SoftLink Software Installation of Software and USB IrDA 10 Communicating with Recorder 11 Download Recorder Data 13 Saving Recorder Data 14 Opening Recorder Data 15 Graphing Recorder Data 17
Open the catalog to page 3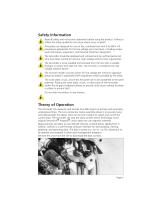
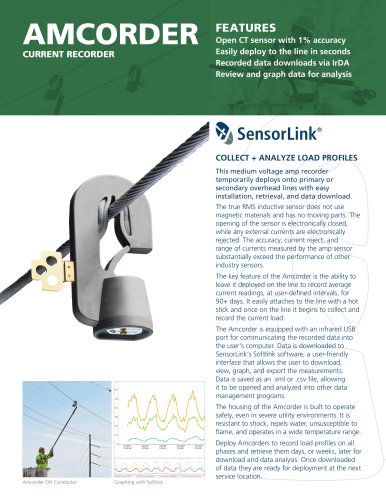
Safety Information Read all safety and instruction statements before using the product. Failing to follow the safety guidelines can cause severe injury or death. Amcorders are designed for use on live, overhead lines with 0 to 69KV. All procedures appropriate for the line voltage are to be taken, including proper work techniques, equipment, and Personal Protection Equipment. The Amcorder should be deployed and retrieved only by certified personnel who have been trained for live-line, high voltage work by their organization. The Amcorder is to be installed and removed from the line with a suitable...
Open the catalog to page 5
The Recorder should be visually inspected for cracks in urethane. Do not use if cracks are present or the unit is damaged. Verify the air vent on the faceplate has not been covered. The membrane on the inside of the faceplate is designed to allow the unit to breath properly. The Recorder should be cleaned by wiping with a silicone hot stick wipe to remove dirt, sand, and salt that will degrade the urethane housing. The Alkaline Battery and the IrDA transceiver are two components that limit the operation of the Recorder to down to -4F / -20C. By substituting a Lithium long-life battery the Recorder...
Open the catalog to page 6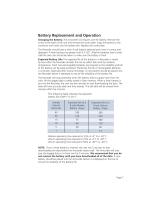
Changing the Battery: The Amcorder UG requires one 9V battery. Remove the screw at the base of the unit and remove the cover plate. Snap the battery to the connector and insert into the battery slot. Replace the cover plate. The Recorder should have a fresh 9-volt battery replaced each time it is setup and deployed. A fresh battery has greater than 9.2 VDC. Alkaline batteries have a short shelf life and care should be taken to make sure the battery is fresh. Expected Battery Life: The expected life of the battery in a Recorder is varied by how often the Recorder samples the line to collect data...
Open the catalog to page 7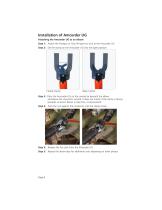
Installation of Amcorder UG Attaching the Amcorder UG to an elbow: Step 1: Attach the Shotgun or Grip All type hot stick to the Amcorder UG Step 2: Set the clamp on the Amcorder UG into the open position Closed Clamp Open Clamp Step 3: Place the Amcorder UG on the conductor beneath the elbow and above the concentric neutral. It does not matter if the clamp is facing upwards as shown below in step four, or downwards Step 4: Push the unit against the conductor until the clamp closes Step 5: Release the hot stick from the Amcorder UG Step 5: Repeat the above teps for additional units deploying on...
Open the catalog to page 8
Removal of the Amcorder UG Removing the Amcorder UG from an elbow: Step 1: Attach the hot stick to the Amcorder UG Step 2: Pull the hot stick to open and release the clamp's grip on the conductor Note: If there is a concern about pulling the elbow off the bushing, pull from the side, or use a second hot stick to hold the elbow in place. Submersed Applications When placing the Amcorder UG in an application where it may become submersed in water, make sure that the battery cover is seated tight against the bottom of the battery cavity. If the Amcorder UG is going to be left submersed for an extended...
Open the catalog to page 9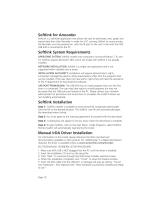
Softlink for Amcorder SoftLink is a software application that allows the user to download, view, graph and import data from their Recorder. In order for a PC running Softlink to communicate, the Recorder must be powered on, with the IR port on the unit in-line with the IrDA USB that is connected to the PC. Softlink System Requirements OPERATING SYSTEM: Softlink installs onto computers running Windows 7, 8, and 10. Softlink requires Microsoft .NET, which will install with Softlink if not already installed. NETWORK INSTALLATION: Softlink is a single user application and is not supported when installed...
Open the catalog to page 10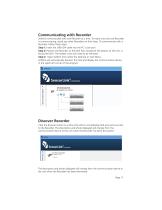
Softlink communicates with one Recorder at a time. To make sure only one Recorder is communicating, stand any other Recorders on their base. To communicate with a Recorder, follow these steps: Step 1: Insert the USB IrDA cable into the PC's user port Step 2: Position the Recorder so the IrDA Port, located at the bottom of the unit, is facing the IrDA. The battery cover will need to be removed. Step 3: Open Softlink from either the Desktop or Start Menu. Softlink will automatically discover the IrDA and display the communication device in the upper left corner of the program. Click the discover...
Open the catalog to page 11
Configure Select the Configure button to setup Recorder preferences. Name: Identify the Recorder with up to 16 characters. Description: Enter a description of up to 46 characters. For example, you may want to note the Recorder's service location and the date range for the recordings. Log Interval: Select how often to log data. The Recorder averages all samples taken since the previous logging and records the result. Typical sample and log synchronization intervals are one minute and 15 minutes, respectively. The log interval must exceed the sample interval. How many Log intervals are available...
Open the catalog to page 12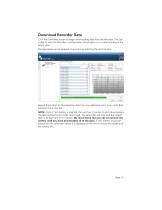
Click the Download button to begin downloading data from the Recorder. The user is able to view the Recorder's configuration and progress as it is downloading in the graph view. The download can be stopped at any time by selecting the red X button. SensorLink corpor. Repeat these steps to download the data from any additional units. Each unit's data will load into a new tab. NOTE: Once a fresh battery is inserted, the user has 5 minutes to start downloading the data before the Amcorder resets itself. The Amcorder will only save the logged data in its flash ram for 5 minutes. We recommend that...
Open the catalog to page 13All SENSORLINK catalogs and technical brochures
 VOLT LITEWIRE
2 Pages
 VARCORDER
2 Pages
 TROUBLEMANS KIT
2 Pages
 TRANSCORDER
2 Pages
 TMS
TMS2 Pages
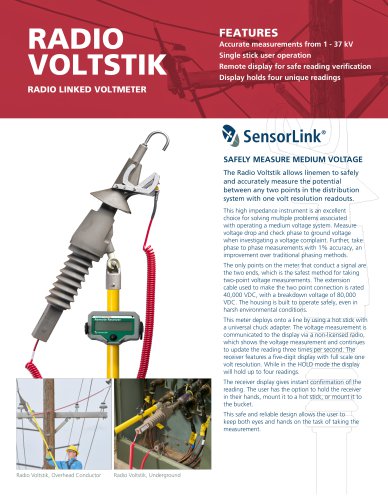 RADIO VOLTSTIK
2 Pages
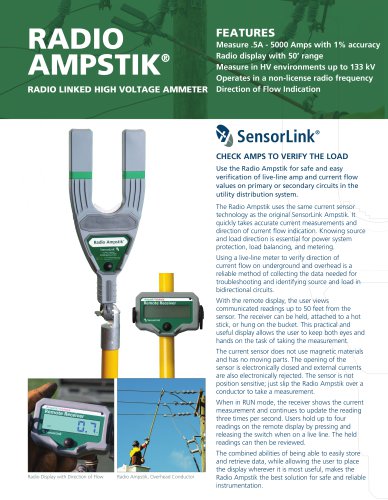 Spécification Radio Ampstik
2 Pages
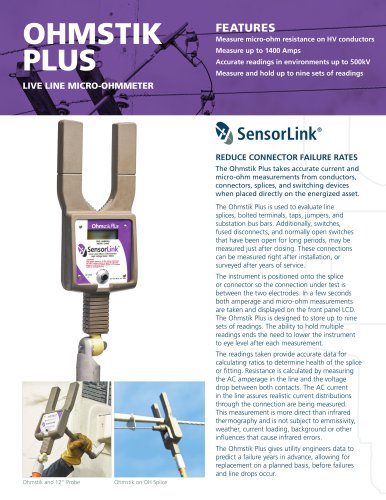 Spécification Ohmstik Plus
2 Pages
 Spécification Ampstik Plus
2 Pages
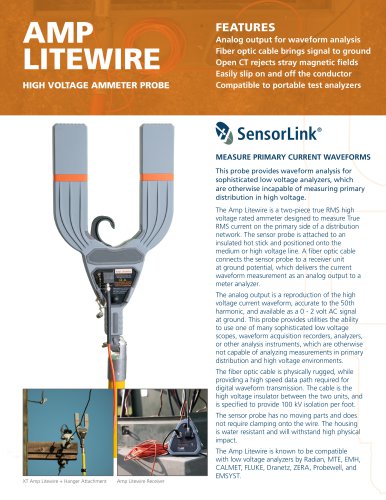 Spécification Ampli Litewire
2 Pages
 Spécification AMCORDER UG
2 Pages
 Ohmstik PLUS
20 Pages
 Ampstik® +
16 Pages
 Amp Litewire
17 Pages
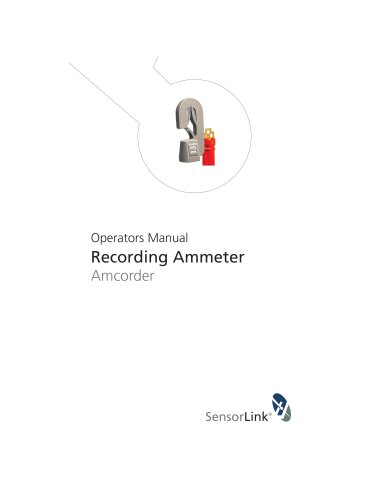 Recording Ammeter
20 Pages

- Power supply unit
- DC power supply
- AC/DC power supply
- Measuring device
- Electrical power supply connector
- Tabletop power supply
- Cable connector
- Optical cable
- Coaxial connector
- Power meter
- Single-phase electric energy meter
- Carrying case
- Radio receiver
- Measuring instrument with display
- Adapter power supply
- Compact receiver
- Rugged receiver
- Power supply with USB outlet
- Current measuring module