Catalog excerpts

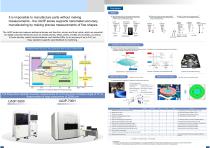
Ultrahigh Accurate 3D Profilometer General Catalog Safety Cautions ●Please read the User’s Manual carefully to familiarize yourself with safe and effective usage procedures. ●To ensure safety when using this equipment all work should be performed according to that as stated in the supplied Operating Instructions. Read your operating instruction manual thoroughly. Panasonic Group products are built with the environment in mind. •Check our website for more details For more information, contact: Panasonic Production Engineering Co., Ltd. 2-7 Matsuba-cho, Kadoma City, Osaka 571-8502, Japan Tel. +81-6-6905-4882 Information in the catalog is as of June 2015. Ver. 20150601 Actual product colors may differ slightly from those in the printed matter. Ratings and design of the product may subject to upgrading or improvement without prior notice. The product is specified for use in Japan. For use abroad, consult wit
Open the catalog to page 1
■ Technology for realizing ultrahigh accurate measurement Options Hardware Stylus It is impossible to manufacture parts without making measurements - the UA3P series supports nanometer-accuracy manufacturing by making precise measurements of fine shapes. New diamond stylus for top-surface measurement • Supports precise shape measurement, such as of mobile lenses and diffracting gratings r=2μm,5μm Tip angle 45° Ruby stylus for top-surface measurement • Uses a high-sphericity ruby ball for generalpurpose measurements The UA3P series can measure aspherical lenses and free-form mirrors and...
Open the catalog to page 2
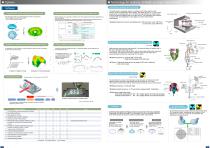
Technology for realizing ultrahigh accurate measurement Coordinate measurement technology Software Circumferential scanning measurement software User-defined software (free-form curved surfaces, etc.) The measured object is circumferentially scanned and measured. • Hollow objects are also measureable. • Up to 1200 concentric circles. Other formulae are supported in addition to the lens design formula that is registered as a standard feature. The use of the C language for creating the design formula and the calculation part of a partial differential equation allows all of ISO10110-12 to be...
Open the catalog to page 3
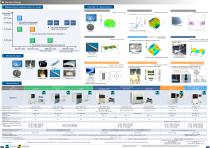
Series lineup Example of measurement Measurement area/accuracy by model Surface measurement of lens and mold Off-axis mirror surface measurement Diffractive lens shape measurement Applicable model: All models Applicable model: All models Applicable model: All models Measurement accuracy Top-surface measurement/ High-accuracy equipment Aspherical lens Diffractive lens Top-surface measurement/ Large-scale equipment Parabolic mirror for telescope Lens mold Top and side-surface measurement equipment Surface measurement of free-form curved lens Lens tool mark measurement Applicable...
Open the catalog to page 4All Panasonic Factory Automation Company catalogs and technical brochures
-
NPM-GPL
3 Pages
-
APX300-DM
2 Pages
-
NPM-WX/NPM-WXS
4 Pages
-
NPM-W2S
2 Pages
-
NPM-DX
4 Pages
-
NPM-D3A
2 Pages
-
SPV-DC
2 Pages
-
SPG2
2 Pages
-
NPM-TT2
2 Pages
-
NPM-W2
4 Pages
-
MD-P200
2 Pages
-
RG131
2 Pages
-
NPM-VF
2 Pages
-
MD-P300
2 Pages
-
PSX307A
2 Pages
-
AV132
2 Pages
-
AM100 Placement Machine
2 Pages
-
NPM SERIES
12 Pages
-
AM100
5 Pages
-
NPM-VF
2 Pages
-
MD-P300
2 Pages
-
APX300
2 Pages
-
PARALLEL LINK ROBOT
2 Pages
-
CM602
2 Pages
-
NPM-D3
4 Pages
-
Plasma Cleaner PSX307
2 Pages
-
PanaCIM® Express
2 Pages
-
RG131
2 Pages
-
SPG Screen Printer
2 Pages
-
RL132
2 Pages
-
NPM D2
4 Pages
-
AV132
2 Pages
-
PSX800
2 Pages
-
E600
9 Pages
-
MD-P200
2 Pages
-
20261
2 Pages
-
NPM-TT
2 Pages
-
NPM_W
2 Pages
-
NPM
4 Pages
-
Panasonic SP60
2 Pages
-
Panasonic SP18
2 Pages
-
Panasonic HDF
2 Pages
-
Panasonic DT401
2 Pages
-
Panasonic CM602
4 Pages
-
Panasonic CM232
2 Pages
-
Panasonic CM101
4 Pages
-
Panasonic BM231
2 Pages
-
Panasonic BM221
2 Pages
-
Panasonic IP121
2 Pages
-
Panasonic GB2-350
4 Pages
-
Panasonic TAWERS
6 Pages
-
Panasonic PA360S
2 Pages
-
Panasonic PSX307 Plasma Cleaner
2 Pages
-
Panasonic IPAC
4 Pages
-
Panasonic FCB3
2 Pages
-
Panasonic AV 131 Axial Inserter
2 Pages
-
Panasonic BM123-133
2 Pages
-
Panasonic IP321
2 Pages
Archived catalogs
-
2016 SP series
8 Pages
-
AM100
8 Pages
-
NPM-W2
4 Pages
-
PSX307
2 Pages
-
SP70
2 Pages
-
SPD-Dual-Screen-Printer
2 Pages
-
JV131
2 Pages
-
UA3P
2 Pages


