Catalog excerpts

OPTODYNE Optodyne, Inc.1180Mahalo PlaceCompton, CA 90220310-635-7481 www.optodyne.com >
Open the catalog to page 1
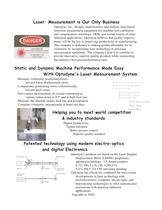
What is the performance of your machine tools? It is better to catch errors before they appear in parts bymeasuring both the volumetric positioning accuracy andthe dynamic contouring accuracy. Volumetric positioning accuracy Using the laser vector technique (patent pending), 3displacement errors, 6 straightness errors and 3 squarenesserrors can be determined in a few hours while conventional laser interferometers may takes a few days. Dynamic contouring accuracy Using the laser/ballbar (patent pending),contouringaccuracy of various radii at high feed rates can be determined. Furthermore,...
Open the catalog to page 2
∗+∗−= ααδ > yzxx xzxyxxE )()()()()()()( yyzyyE ∗+∗−= θαδ > xyyxx )()()()()( zzzE ∗−= θδ > xyxx ∗−= αδ > xyy xzxxE ∗−= αδ > xyy xzyyE )()()( )()( zzzE ∗−= θδ > yzyy Laser Typicalbeam separation1" Retroreflector Detector Typical beamdiameter 1/4" Retroreflector0.2"Beam diameterSingle-aperturelaser head MCV-500 size="-1">
Open the catalog to page 3
Table of contents Improving machine tool performanceMission statement, capabilities, applications and technologiesCustomers and benefits I.Volumetric calibration and compensation > Basic Theory u u y u y Volumetric positioning error measurement and compensation Laser vector measurement Body diagonal displacement measurement Sequential step diagonal measurement > P B P u x A u x E y (x)E(x) z x z E (x)u Volumetric displacement errors II.Dynamic circular contouring measurement Telescoping ballbar Laser/ballbar Major features and benefits A comparison > R RRR III. Systems and capabilities...
Open the catalog to page 5
Machine spindleCircular tool path 6" long (12" optional) > Optical adapter MCV-500 Laser head > Flat mirror
Open the catalog to page 8
A laser/ballbar is designed for the non-contact circular contouringmeasurement (Patent pending). The hardware used for the test are anMCV-500 laser calibration system, an optical adapter, and a flat-mirrortarget with an adjustable mount, a PC interface card, and a notebookPC with Windows software. For a small radius or high feed ratecircular test, high data rate is required. With a special PCMCIAinterface card, a data rate up to 1000 data/sec can be achieved. The software for the data collection and data processing is a Windows basedsoftware. With a few clicks, the data can be collected...
Open the catalog to page 9
The laser/ballbar uses a laser Doppler displacement meter for themeasurement. Hence the accuracy is very high, typically 1 ppm andtraceable to NIST. The telescoping ballbar uses a transducer for themeasurement. Hence the accuracy is low, need periodical calibrationand it is sensitive to temperature changes.Of course, two sets of measurements with two setups are needed for thelaser/ballbar to generate the circular path as compare to telescopingballbar, only one setup and one set of measurement is needed. A performance comparison is shown below. > The major features are: the measurement is...
Open the catalog to page 10
This is an add-on package to the MCV-500 laser calibrationsystem for the measurement of squareness and straightness.The package includes a quad-detector and an optical square.The quad-detector is a precision position sensor, and theoptical square is a precision penta-prism to bend the laserbeam 90 degree. A laser produces an intense beam of redlight which is a straight line of the greatest accuracy in a vacuum. In atmosphere, the straightness of a laser beammay be changed by temperature gradients or air currents.For a typical indoor condition, the stability of the laser beamis in the order...
Open the catalog to page 14
USAHeadquarter 1180Mahalo Place Compton, CA 90220 Tel: 310-635-7481 Fax: 310-635-6301http://www.optodyne.com e-mail: optodyne@aol.com Chicago 293 Deerpath Lane Carpentersville, IL 60110 Tel: 847-836-6156 Fax: 847-836-6163 Europe Italy Via Veneto, 5 20044 BernareggioMilano Tel: 39-039-60-93-618 Fax: 39-039-68-00-147 e-mail: optodyne@attglobal.net China Shanghai Room 2108, No.596 YananZhong Road Shanghai 200041, China Tel: 86-21-62710315-2126 Fax: 86-21-62728322 > OPTODYNE size="-1">
Open the catalog to page 16All OPTODYNE catalogs and technical brochures
Archived catalogs
-
Precision Linear Positioning
4 Pages
-
Precision Linear Positioning
4 Pages
-
Volumetric Calibration
4 Pages
-
Linear Machine Calibrator
4 Pages


