- Catalogs
- Oleotec S.r.l.
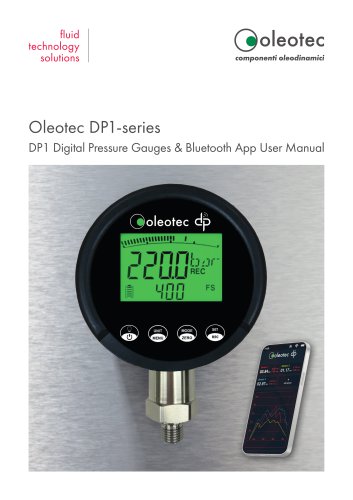
- DP1 Digital Pressure Gauges & Bluetooth App User Manual
DP1 Digital Pressure Gauges & Bluetooth App User Manual
1 /8Pages
DP1 Digital Pressure Gauges & Bluetooth App User Manual
1 /8Pages
Catalog excerpts
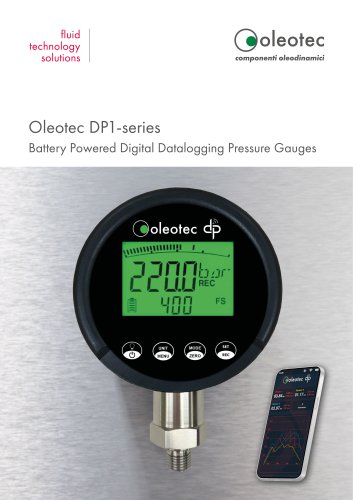
Oleotec DP1-series DP1 Digital Pressure Gauges & Bluetooth App User Manual
Open the catalog to page 1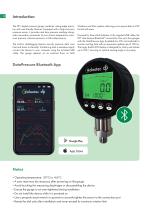
The DPI digital pressure gauge combines cutting-edge precision with user-friendly features. Equipped with a high-accuracy pressure sensor, it provides real-time pressure readings alongside a secondary parameter of your choice: temperature, maximum pressure, minimum pressure, or full-scale pressure. The built-in datalogging feature records pressure data over time and stores it internally. Transferring data is seamless-simply connect the device to your computer using the included USB cable. The gauge appears as an external drive on both Windows and Mac systems, allowing you to export data in CSV...
Open the catalog to page 2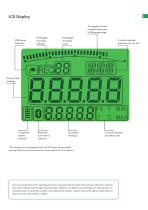
33-segment current pressure ad percent of full gauge range USB power indicator* Datalogger recording indicator Datalogger recording count Currently selected pressure units, eg., bar Primary (live) readings Bluetooth connectivity indicator Secondary readings Currently selected secondary units *The onboard power management will use USB power where possible, meaning USB power may be used without removing the 3x AAA batteries. The current publication of this operating instruction supersedes all information from previous publications. Oleotec reserves the right to make changes and substitutions. Oleotec...
Open the catalog to page 3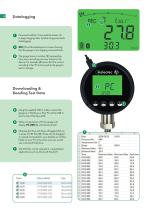
Press and hold (for 3 seconds) the button (1) to begin logging data. Another long-press ends datalogging. REC (2) will be displayed on screen showing that the gauge is now logging measured data. The gauge shows a number (3) representing how many recordings are now stored on the device. For example (3) shows that the current recording is the 7th to be saved to the gauge's built-in storage. Using the supplied USB-C cable, connect the gauge to a Windows or Mac PC via the USB-C port on top of the device (4). When connected to a PC the gauge will display PC USB (5) until disconnected. Opening the...
Open the catalog to page 4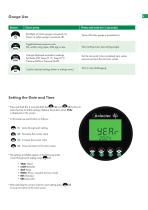
Short press Press and hold (for 3 seconds) Backlight on (when gauge is powered on). Power on (when gauge is powered off). Power off (when gauge is powered on). Toggle between pressure units. Enter settings menu (see settings page). Change displayed secondary readings. Full Scale (FS), Temp (T) °C, Temp (T) °F, Pressure (MIN) or Pressure (MAX). Set the tare point to be considered zero system presure and zero the min/max values. Confirm selected settings (when in settings menu). Start or stop datalogging. Setting the Date and Time Press and hold (for 2 seconds) both the (2) and 1er™ (3) buttons...
Open the catalog to page 5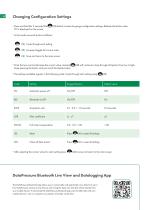
Press and hold (for 3 seconds) the (2) button to enter the gauge configuration settings. Release the button when PO is displayed on the screen. In this mode use each button as follows: (2) Cycle through each setting ^2^ (3) Increase/toggle the current value fa (4) Save a nd return to the main screen Note that you cannot decrease the current value. Instead, (3) will continue to loop through all options from low to high. Keep pressing the button until you reach the desired value. The settings available appear in the following order. Cycle through each setting using (2): RATE Acquisition rate FLTR...
Open the catalog to page 6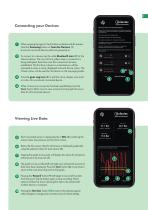
When opening the app for the first time no devices will be present. Press the 'Scanning' button or 'Scan for Devices' (1) to scan for any local devices which are powered on. Press $ to connect to the required sensor The symbol will change to $•> whilst connecting The symbol will change to on successful connection Press O to select unit of measurement, rename the sensor and select a different colour if required To connect to a device, tap the white bluetooth icon (2) for the relevant device. The icon will turn yellow when a connection is being attempted, then blue once the connection has been...
Open the catalog to page 7
componenti oleodinamici
Open the catalog to page 8All Oleotec S.r.l. catalogs and technical brochures
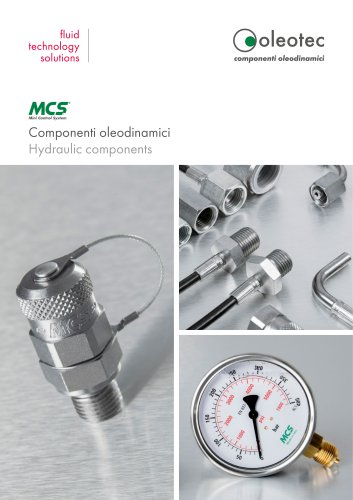 Hydraulic Components
54 Pages
 Oleotec DP1 series
4 Pages
- Fitting
- Hydraulic fitting
- Screw-in fitting
- Threaded fitting
- Plastic fitting
- Analog pressure gauge
- Stainless steel pressure gauge
- Dial pressure gauge
- Threaded pressure gauge
- Gas pressure gauge
- Waterproof pressure gauge
- Manual test equipment
- Industrial test kit
- IP65 pressure gauge
- Hose fitting
- Aluminum pressure gauge
- Calibration pressure gauge
- PA fitting