 Website:
NOVACAM TECHNOLOGIES INC
Catalog excerpts

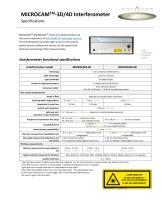
MICROCAMTM-3D/4D Interferometer Specifications NOVACAMTM MICROCAMTM series of interferometers are the core components of NOVACAM 3D metrology systems. The interferometer provides light source to the system optical sensor probe(s) and carries out the optical and electronic processing of the measurements. Fiber connection to optical probe Interferometer functional specifications Interferometer model Light wavelength Light bandwidth Broadband light Pointer for alignment purposes In-probe red laser @ 650 nm Class 1M laser product < 20 mW of infrared, < 5 mW of in-probe laser pointer Instrument safety1 Non-contact measurements Depth of field Scanning depth range options Acquisition (A-scan) rate depends on selected probe parameters 3.5 mm (0.138 in.) Axial (Z-axis) resolution3 Light spot size3 (Lateral (X-Y-axis) resolution) Roughness measurement (Ra) range Standoff distance < 0.5 µm (19.69 µin.) 2.2 - 146 µm (86.6 – 5,748 µin.), depends on selected probe parameters Ra ≥ 0.4 µm (16 µin.) with most probes Ra ≥ 0.8 µm (31.5 µin.) with most probes Ra ≥ 0.05 µm (2.0 µin.) with selected probes 1 - 100 mm (0.118 - 3.93 in.) for standard probes, up to 1 m (3.28 feet) for non-standard probes Interferometer repeatability4 Diameter measurement repeatability (1σ) Max angle between the probe beam and the surface < 1 µm (39.4 µin.) 0.5 - 1 µm (20 - 39.4 µin.), depending on the configuration ≤ 45˚on machined surface ≤ 4˚ on specular surface (glass, mirror, etc.) 1 - 3 µm (39.4 - 118 µin.), depending on the configuration ≤ 70˚ on machined surface ≤ 15˚ on specular surface (glass, mirror, etc.) Thickness measurements Thickness measurement range (optical in air) Typical materials measured for thickness Sample reflectivity 1 glass, polymers, multi-layer films, coatings, plastics, silicone, liquids, specular or non-specular 0.1 - 100 % Class 1M laser product: Visible and invisible laser radiation. Do not stare into beam or view directly with optical instruments. 2 To further increase maximum scanning depth, a mechanical displacement axis is available. 3 Light spot size and axial resolution are independent of each other. 4 The stated repeatability pertains to a non-scanning system. The repeatability value of the motion mechanism is usually bigger; this can be effectively addresse
Open the catalog to page 1
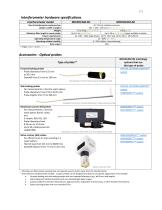
Interferometer hardware specifications Interferometer model 4U1 19 inch rackable enclosure 445 x 445 x 178 mm/ (17.5 x 17.5 x 7 in.) 17 to 20 kg (37.5 to 44 lb) 8.6 kg (19lb) Up to 1 km (3,280 feet) Up to 10 m (32.8 feet), longer available as option AC 110V - 240V single phase; 2A for 110 V and 1A for 220 V; 50 Hz/60 Hz 15 - 30ºC (59 - 86ºF) 6 - 95% relative, noncondensing USB Size of interferometer enclosure box (depth x width x height) Weight Maximum fiber length to sensor probe Power requirements Operating temperature range Operating relative humidity Data output 1 Height of 1U = 44 mm...
Open the catalog to page 2
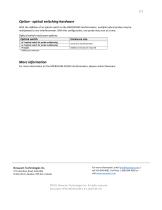
Option - optical switching hardware With the addition of an optical switch to the MICROCAM interferometer, multiple optical probes may be multiplexed to one interferometer. With this configuration, one probe may scan at a time. Optical switch enclosure options Optical switch 1 x 2 optical switch for probe multiplexing1 1 x 4 optical switch for probe multiplexing1 > 4 inputs 1 Millisecond switches Enclosure size Internal to interferometer Additional enclosure required More information For more information on the MICROCAM-3D/4D interferometer, please contact Novacam. Novacam Technologies Inc....
Open the catalog to page 3All NOVACAM TECHNOLOGIES INC catalogs and technical brochures
-
BOREINSPECT
5 Pages
-
TUBEINSPECT system
4 Pages


