
- Catalogs
- Mach III Clutch, Inc.
- Air Engaged Friction Clutch Mechanisms with Couplings

Air Engaged Friction Clutch Mechanisms with Couplings

Air Engaged Friction Clutch Mechanisms with Couplings
Catalog excerpts

Installation and Maintenance Manual AIR ENGAGED FRICTION CLUTCH MECHANISMS with COUPLING This document applies to the following catalog standard products, and to custom versions based upon these models: M2G2R-STH M3G2R-STH & M3G2R-STL, M4G2R-STH & M4G2R-STL M5G2R-STH & M5G2R-STL, M5G2K-STH & M5G2K-STL M6G2G-STH & M6G2G-STL, M6G2K-STH & M6G2K-STL M8G2K-STH & M8G2K-STL, MAG2K-STH & MAG2K-STL MBG2K-STH PLEASE NOTE Mach III products are manufactured on a per order basis and may only be returned in cases of warranty defect. We strongly recommend review of all new applications with Mach III Engineering staff to ensure suitability of the chosen product for the intended use. © Mach III Clutch, Inc. All Rights Reserved
Open the catalog to page 1
ADDITIONAL RESOURCES AND SERVICES PRODUCT DETAIL SHEETS Click on the product number shown on page 1 of this document for a link to download the product detail sheet which contains dimensional data, torque capacity and other specifications along with parts list and parts kits details. For custom products (part numbers ending in three numeric characters), contact Mach III Engineering. ANTI-ROTATION ARM MOUNTING INSTRUCTIONS Mach III through-shaft mounted clutches and clutch-brake combinations require installation of an anti-rotation arm (also known as a reaction arm) which is discussed later in...
Open the catalog to page 2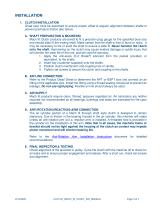
INSTALLATION 1. CLUTCH INSTALLATION Great care must be exercised to ensure proper offset & angular alignment between shafts to prevent premature friction disc failure. A. SHAFT PREPARATION & MOUNTING Mach III Clutch products are bored to fit a precision plug gauge for the specified bore size and should slide fit the mating shaft. Make certain that the shaft is free of burrs or nicks. It may be necessary to file or sand the shaft to ensure a slide fit. Never hammer the clutch onto the shaft. Hammering on the clutch may cause evident damage or subtle injury that will shorten the wear life of the...
Open the catalog to page 3
OPERATION A. AIR PRESSURE Torque output of this model is proportional to air pressure applied. Refer to the Product Detail Sheet for specifics regarding torque capacity. To achieve the longest possible bearing life, the air pressure supplied to the unit should be regulated to the minimum amount necessary to attain the required torque output. The maximum operating pressure should not exceed 80 PSI. B. CONTAMINATION The friction material (pads) contained within this product will absorb oil, water, chemicals, and other contaminants. Depending on the type of contamination, clutch may either seize...
Open the catalog to page 4
SCREW CONE FRICTION DISC PISTON CYLINDER BEARING RETAINER RING COUPLING DRIVE DISC CONE SPRING BEARING RETAINER RING COUPLING DRIVE DISC 6/19/2020
Open the catalog to page 5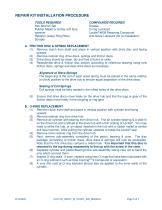
REPAIR KIT INSTALLATION PROCEDURE TOOLS REQUIRED Hex Wrench Set Rubber Mallet or similar soft face hammer Retainer (snap) Ring Pliers Scraper COMPOUNDS REQUIRED Grease O-ring Lubricant Loctite® #609 Retaining Compound Anti-Seize Lubricant (for re-installation) A. FRICTION DISC & SPRING REPLACEMENT (1) Remove clutch from shaft and place in vertical position with drive disc end facing upward. (2) Remove retainer ring, drive discs, springs and friction discs. (3) Drive discs should be clean, dry and free of burrs or nicks. (4) Reassemble drive & friction disc section according to reference drawing...
Open the catalog to page 6
C. REASSEMBLY (1) Place the piston/bearing/cone sub-assembly over drive hub making sure the screw head in the cone is inserted in the corresponding hole milled in the drive disc. This prevents the cone from skidding on the drive disc. (2) Replace the inner retainer ring on the drive hub. (3) Inspect the inside diameter of the bearing in the air cylinder. If Loctite® residue is present, gently scrape and ensure that the surface is clean. (4) Apply a thin coat of Loctite® #609 retainer compound to the inside diameter of the bearing (applying excessive Loctite® will make future disassembly more...
Open the catalog to page 7All Mach III Clutch, Inc. catalogs and technical brochures


Archived catalogs




- Friction brake
- Spring brake
- Overload clutch
- Safety brake
- Pneumatic brake
- Mechanical slip clutch
- Spring activated brake
- Friction torque limiter
- Pneumatic clutch
- Safety torque limiter
- Spring clutch
- Motor brake
- Failsafe brake
- Multiple-disc clutch
- Spring torque limiter
- Tension control brake
- Multiple-disc brake
- Adjustable brake
- Torque limiter with coupling