ITR110-0104 - ITR107-0104
1 /1Page

ITR110-0104 - ITR107-0104
1 /1Page
Catalog excerpts
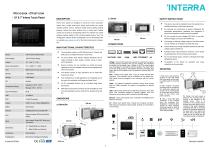
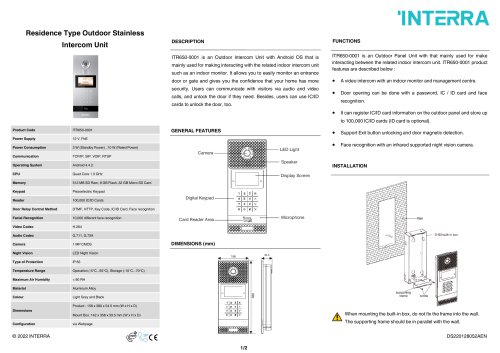
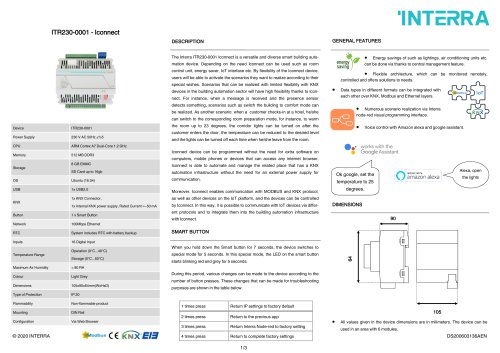
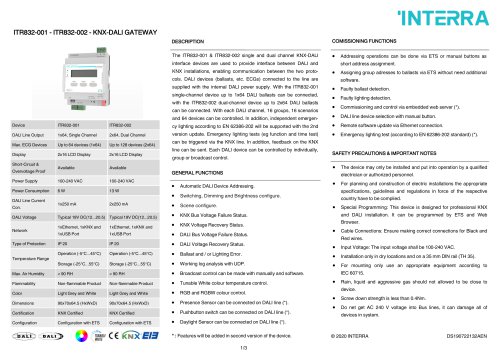
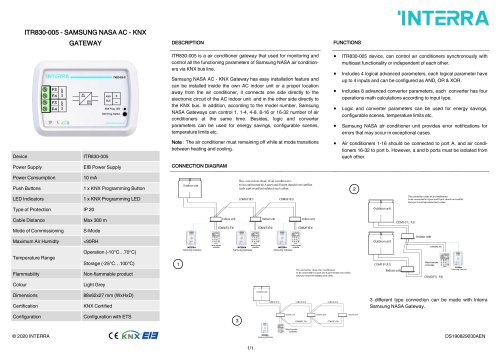
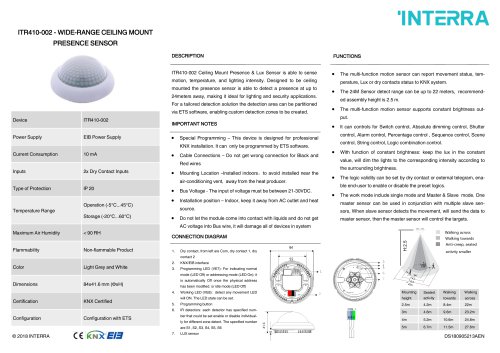
SAFETY INSTRUCTIONS Interra touch panels are designed to control the entire automation complex systems such as switches, simple sensors, lighting, heating systems, camera and alarm systems from a central point. Mobile system from a single smart point. Interra touch panels can control control can be done by downloading Interra Pro software from online software markets related to IOS or Android based devices. Also, The configuration software (Interra Configurator) can be downloaded from tion. our website (www.interra.com.tr) for the Interra touch panel configura- MAIN FUNCTIONAL CHARACTERISTICS Power Consumption Temperature Range The desired number of logic operations can be made with Push notifications to mobile applications is immediately sent in the event of a notification via Google and Apple Cloud. All IOT compatible devices can be controlled using Interra With Interra touch panel, the house can be controlled via voice Ethernet : Interra touch panels have a standard 10/100Mbps RJ45 ethernet connector. I/O : Interra touch panels have 3 inputs and 3 outputs connector. Both inputs and outputs are optocoupled. Outputs are connected to 12V-5A relays. qualified electrician or authorized personnel. For planning and construction of electric installations the appropriate specifications, guidelines and regulations in force of the respective country have to be complied. Do not connect the main voltage (230 VAC) or any other external voltages to any point of the KNX bus. Connecting an external voltage might put the KNX system into risk. Please, do not forget to consider this issue. Ensure that there is enough insulation between the 230 VAC voltage cables and KNX bus. Screwing torque value should be maximum 1.2nm during mounting process of mount case and touch panel. Do not use aerosol sprays, solvents or abrasives that might damage the device. Accessibility of the device for operation and visual inspection must be provided. MOUNTING I. First of all, a slot should be opened on the wall where the touch panel will be used, in suitable sizes for mounting case. II. Then, number 1 the panel mounting case is mounted to the previously opened slot so that it is on a level parallel to the ground and the arrow mark on the frame must points upwards. III. After, 2 long metal laths numbered 2 are screwed onto the mounting box. Installation of metal bar laths should be done carefully, mounting should be done at appropriate torque in order not to bend the laths. 3 IV. Finally, the touch panel is placed in the mounting box by moving in the direction of the dashed arrow. Then it is screwed to the mounting frame through the screw slots on the 4 corners of the panel. Magnetic materialled lath with 2 horizontal holes on it should be attached to the lower part of the panel and the other one is attached to the upper part of the panel and the mounting process is completed. USB : Interra touch panels have a USB host connector on the side panel. This connection extends its storage capacity. Also, this connector can be used for WIFI connection via USB dongle. command assistants such as Amazon Eco, Google Home and Siri. 3pcs relayed Output (5A), 3pcs input connectors. HDMI : For different application purposes, Interra touch panels have an HDMI connector. Its output is configurable via special software. touch panel. KNX : Interra touch panels have a two pin green colored KNX connector. This connector has pin indications on the plastic box. KNX cables must be plugged to this connector with the correct polarity. Interra touch panel. System includes RTC with CR1220 battery applications and also available cameras can be displayed with Interra touch panel. Security systems can be controlled via mobile and panel Reset button Voltage : Interra touch panels are powered by a special 3-pin green industrial special connector with 12V DC voltage. Pin indications are written on the plastic case. Cables of the 12V power supply must be plugged in accordance with the polarity. The reset button on the top cover is used to “Hard Reset” the device manually. This button has an LED indicator and if the system is powered this LED lights on. Via touch panel’s timer feature, desired operations can be made according to daily, weekly, monthly, annual or determined schedules. The automation system via EIO (Ethernet Input / Output) and KNX can be controlled with Interra Touch Panel. Power Supply The device may only be installed and put into operation by a With Interra Conf
Open the catalog to page 1All Interra catalogs and technical brochures
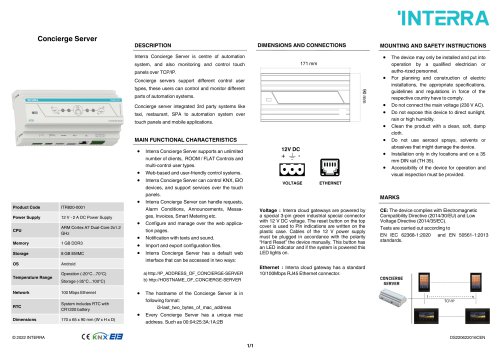 Concierge Server
1 Page
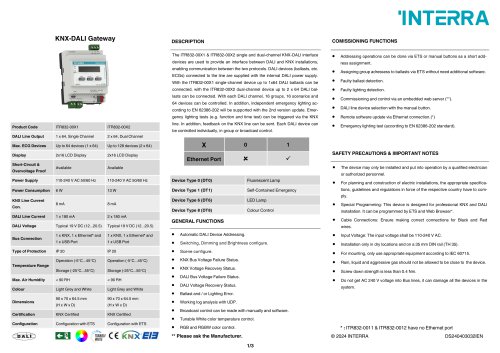 KNX-DALI Gateway
3 Pages
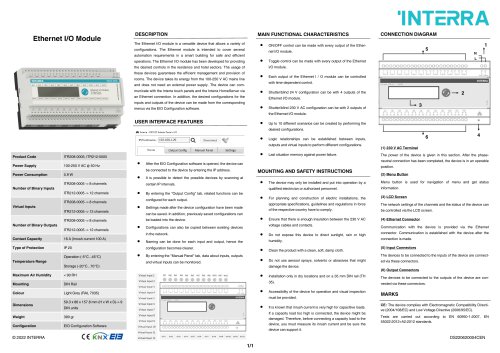 Ethernet I/O Module
1 Page
Archived catalogs
 itr10
itr101 Page
 itr901
1 Page
 itr230
3 Pages
 itr640-001
2 Pages
 itr3
itr32 Pages


- Panel PC
- Industrial panel PC
- Panel PC with touch screen
- LCD panel PC
- LCD screen
- Monitor with touchscreen
- Digital I/O
- Panel-mount screen
- Single-pole switch
- IO module
- Wireless panel PC
- Analog I/O
- Digital IO module
- WiFi panel PC
- Communication gateway
- Industrial gateway
- Ethernet gateway
- TFT-LCD monitor
- Ethernet panel PC
- Ethernet communication router