Catalog excerpts

(General Safety Information Continued) 14. Check hose for weak or worn condition before each use. Make certain that all connections are tightly secured.15. Periodically inspect the pump and the system components. Perform routine maintenance as required (see Maintenance section). 16. Use only pipe, hose and fittings rated for the maximum psi rating of the pump.17. Do not use these pumps for pumping water or other liquids for human or animal consumption. > Symptom Probable Cause(s) Corrective Action(s) Pump will not prime or retain prime after 1. Air leak in the suction line. 1. Repair or...
Open the catalog to page 2
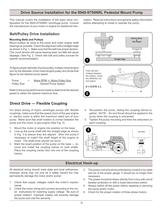
This manual covers the installation of the basic drive con- figuration for the 9940-9750NRL centrifugal pump. Consult the manufacturer of your motor or engine for additional infor- mation. Read all instructions and general safety information before attempting to install or operate the pump. Mounting Belts and Pulleys Mount pulleys as close to the pump and motor engine shaft bearings as possible. Check the alignment with a straight edge as shown in Fig. 1. Make sure that the belt has proper tension. (Too much tension will cause bearing wear; too little will cause slippage.) See Fig. 2. Check...
Open the catalog to page 3
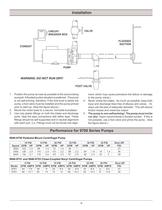
The pump is non-self-priming! The pump must not be run dry! Hypro recommends a flooded suction. If this is not possible, use a foot valve and prime the pump. (See the figure above.) 1. Position the pump as near as possible to the source being pumped. A flooded suction situation is preferred. The pump is not self-priming, therefore, if the fluid level is below the pump, a foot valve must be installed and the pump primed prior to start-up. (See the figure above.)2. Mount the motor base to a secure, immobile foundation. 3. Use only plastic fittings on both the intake and discharge ports. Seal...
Open the catalog to page 4
Disassembly 1. Shut off the power to the motor before disconnecting any electrical wiring from the back of the motor.2. Disassemble the body-motor assembly from the volute. (The volute may be left in-line if you wish.)3. Remove the cap covering the shaft at the back motor and, with a large screwdriver, prevent the shaft from rotating while unscrewing the impeller.4. Remove the ceramic piece from the impeller. 5. Detach the body from the motor. 6. Remove the carbon-graphite seal from the body by press-ing the seal out from the back. Do not dig the seal out from the front. Pump End Assembly...
Open the catalog to page 5
HYPRO as manufacturer, warrants to the original purchaser, each new pump or other product of its own manufacture, for a period of one year from the date of shipment from the factory, to be free from defects in material and workmanship under normal use and service. Normal use and serviceӔ means not in excess of recommended maximum speeds, pressures, and temperatures or handling fluids not compatible with component materials, as noted in applicable HYPRO product catalogs, technical literature, and instructions. This warranty shall not apply to any pump or other product which shall have been...
Open the catalog to page 8All Hypro Pressure Cleaning catalogs and technical brochures
-
PRODUCT CATALOG
236 Pages
-
Transfer Pumps
7 Pages
-
Gear Driven
3 Pages
-
Centrifugal Pumps
41 Pages
-
9302 Series
2 Pages
Archived catalogs
-
ULD Sales Sheet
2 Pages
-
ESI Sales Sheet
2 Pages
-
TwinCap Sales Sheet
2 Pages
-
HP Stainless Steel Nozzles
2 Pages
-
UAS Ceramic Nozzles
2 Pages
-
9302 Series Sales Sheet
2 Pages
-
Hydraulic Pump Selection Guide
38 Pages
-
Foam Marker OIPM
20 Pages
-
Cleanload OIPM
12 Pages
-
Series 2100 Versa-Twin OIPM
16 Pages
-
Hydraulic Pressure Washer OIPM
20 Pages
-
PowerLine Plunger OIPM
24 Pages
-
2535S OIPM
12 Pages
-
Series 5200 Piston Pump OIPM
8 Pages
-
Series 5300 OIPM
20 Pages
-
DBS & DBA Diaphragm Pump OIPM
20 Pages


