
- Catalogs
- heol design
- wck004

- Products
- Catalogs
- News & Trends
- Exhibitions
wck004
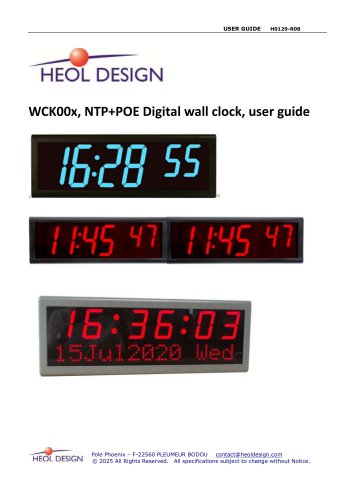
wck004
NTP (Network Time Protocol) is used for precise time transfer over networks, while PoE (Power Over Ethernet) allows simultaneous data and power transfer through a single cable. The WCK00x digital wall clocks combine these technologies to provide a cost-effective, precise timekeeping solution with options for double-sided displays and enclosures for both internal and external use.
Technical Specifications
The clocks offer an accuracy of +/- 20 milliseconds, operate between -10°C to 60°C, and have a viewing distance of 60 meters. They support PoE/PoE+ with less than 13W power consumption and have various installation options. The clocks are available in different configurations, including single and double-sided displays, with varying dimensions and weights.
Installation
Installation can be done using PoE or an optional power adapter. The guide provides detailed instructions for wall, cantilever, and pendant mounting, emphasizing the need for proper cable routing and secure mounting.
Operation Status
Upon powering, the clock undergoes a self-check, displays its IP address, and then shows the time. The time display can be configured for 12 or 24-hour formats, and the clock can be synchronized with a network time server.
Configuration
Configuration is done via the 'Clock Sniffer' software, allowing settings for time zone, IP, NTP server, brightness, and more. The default IP is 192.168.2.55, and the clock supports both DHCP and static IP configurations.
Restore Factory Settings
Factory settings can be restored by pressing a button on the clock, which will reboot the device. It is advised to restore settings one device at a time to avoid IP conflicts.
Troubleshooting
The guide provides solutions for common issues such as incorrect time display, unchanged display, IP address issues, dark LED segments, software tracking failures, synchronization problems, and power issues related to PoE support.
Catalog excerpts
USER GUIDE WCK00x, NTP+POE Digital wall clock, user guide Pole Phoenix – F-22560 PLEUMEUR BODOU [email protected] © 2025 All Rights Reserved. All specifications subject to change without Notice.
Open the catalog to page 1
USER GUIDE 1. Introduction NTP (Network Time Protocol) is a highly-precise and convenient way to transfer time via the network. NTP time source is available from public NTP servers, or from local network time servers (for example T101 server with GPS time source, manufactured by Heol Design). POE (Power Over Ethernet) utilizes the technology that delivers DC power to Ethernet connected devices. POE enables data and power transfer simultaneously through one standard network cable, which makes the deployment of network equipment more cost-effective. WCK00x clocks bring together all the advantages...
Open the catalog to page 2
2. Technical specifications Dimensions high-strength black plastic high-strength black plastic Part Number Part Number Part Number Part Number high-strength black plastic high-strength black plastic Part Number Part Number high-strength black plastic ABS or metal or stainless steel Pole Phoenix - F-22560 PLEUMEUR BODOU [email protected] © 2025 All Rights Reserved. All specifications subject to change without Notice.
Open the catalog to page 3
1) If the local network supports PoE, One network cable is needed. The use of SFTP cable is highly recommended. 2) If not, power adapter is available in option. The detailed installation instructions are shown as below. a. If necessary, remove the hole on the top of the single-sided clock. b. Install the metal accessories, then make the network cable go through the hole. c. After the installation being finished the wall clock will just like what is shown below: HEQL DESIGN Pole Phoenix - F-22560 PLEUMEUR BODOU [email protected] © 2025 All Rights Reserved. All specifications subject to change...
Open the catalog to page 4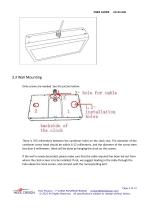
USER GUIDE 3.3 Wall Mounting Only screws are needed. See the picture below: There is 375 millimeters between the cantilever holes on the clock rear. The diameter of the cantilever screw head should be within 6-12 millimeters, and the diameter of the screw stem less than 6 millimeters. Work will be done by hanging the clock on the screws. If the wall is newly decorated, please make sure that the cable required has been led out from where the clock screen is to be installed; If not, we suggest leading in the cable through the hole above the clock screen, and connect with the corresponding port....
Open the catalog to page 5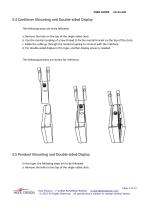
The following steps are to be followed: a. Remove the hole on the top of the single-sided clock. b. Use the mental coupling of screw thread to fix the mental bracket on the top of the clock. c. Make the cable go through the mental coupling to connect with the interface. d. For double-sided display in this type, another display screen is needed. The following pictures are shown for reference. 3.5 Pendant Mounting and Double-sided Display In this type, the following steps are to be followed: a. Remove the hole on the top of the single-sided clock. HEGL DESIGN Pole Phoenix - F-22560 PLEUMEUR BODOU...
Open the catalog to page 6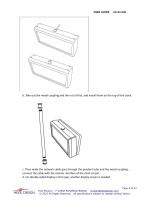
USER GUIDE b. Take out the metal coupling and the nut at first, and install them on the top of the clock. c. Then make the network cable pass through the pendant tube and the metal coupling; connect the cable with the interior interface of the clock screen. d. For double-sided display in this type, another display screen is needed. Page 6 of 12 Pole Phoenix – F-22560 PLEUMEUR BODOU [email protected] © 2025 All Rights Reserved. All specifications subject to change without Notice.
Open the catalog to page 7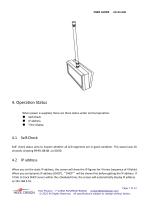
USER GUIDE 4. Operation Status When power is supplied, there are three status under normal operation: • Time display Self- check status aims to inspect whether all LED segments are in good condition. This status lasts 10 seconds, showing 99:99, 88:88...to 00:00. When you set the static IP address, the screen will show the IP figures for 4 times (sequence of 4 fields). When you set dynamic IP address (DHCP), “DHCP” will be shown first before getting the IP address. If it fails to track DHCP server within the scheduled time, the screen will automatically display IP address as 192.168.2.55. HEQL...
Open the catalog to page 8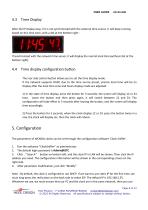
USER GUIDE Time Display After the IP display step, if it is not synchronized with the external time source, it will keep running based on this time zone, with a dot at the bottom right : If synchronized with the network time server, it will display the normal local time (without dot at the bottom right). Time display configuration button The rear side control button allows you to set the time display mode . If the network supports DHCP, due to the time source preset, precise local time will be on display after the local time zone and hours display mode are adjusted. 1) In the state of time display,...
Open the catalog to page 9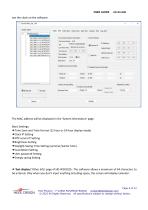
The MAC address will be displayed in the 'System information' page. Basic Settings: ►T ime Zone and Time Format (12 hour or 24 hour display mode) ►Clock IP Setting -►Daylight Saving Time Setting (summer/winter time) ►Countdown Setting ► User password Setting ► Energy saving Setting ► Text display ('Other Info' page of HD-WCK010) : The software allows a maximum of 64 characters to be entered. Only when you don't input anything including space, the screen will display calendar. Pole Phoenix - F-22560 PLEUMEUR BODOU [email protected] © 2025 All Rights Reserved. All specifications subject to...
Open the catalog to page 10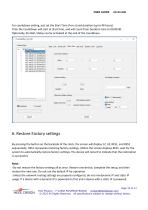
USER GUIDE For countdown setting, just set the Start Time (h:m:s) and duration (up to 48 hours). Then the countdown will start at Start time, and will count from Duration time to 00:00:00. Optionally, the Bell / Relay can be activated at the end of the countdown. 6. Restore Factory settings By pressing the button on the backside of the clock, the screen will display 12, 24, RES1, and RES2 sequentially. RES1 represents restoring factory settings. (When the screen displays RES1, wait for the system to automatically restore factory settings. The device will restart to indicate that the restoration...
Open the catalog to page 11
USER GUIDE on afterward, it may cause an IP conflict. The clock shows incorrect time. Check the host IP configuration and make sure the network can communicate with the time server preset. Check pig request of necessary. The display remain unchanged. Check the condition of the button. Display the default IP address The host configuration is DHCP. Make sure the network support DHCP server. If the clock can not get the IP address from DHCP server for a long time, it will resort to the default IP: 192.168.2.55. 7.4 Some LED segments are dark. Re-power the device. Check whether there are dark segments...
Open the catalog to page 12All Heol design catalogs and technical brochures
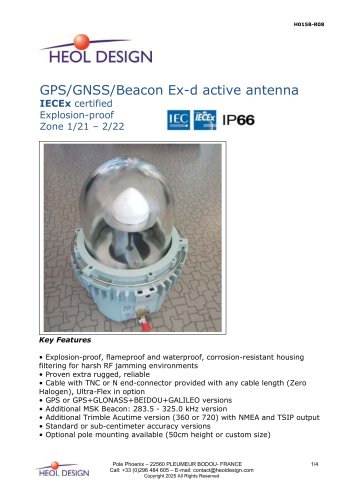 exd_gps_antenna_r03-2
5 Pages
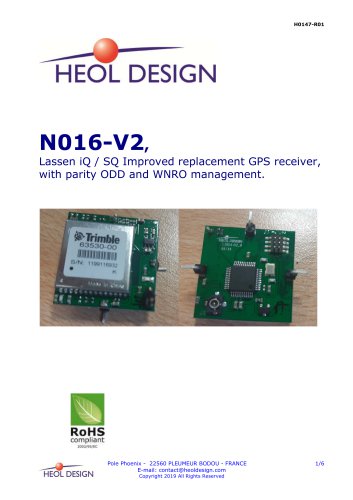 N016-v2
6 Pages
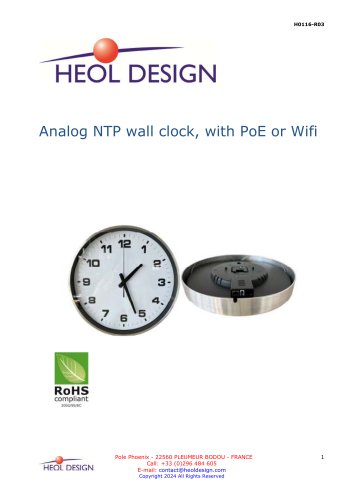 HD wck002
2 Pages
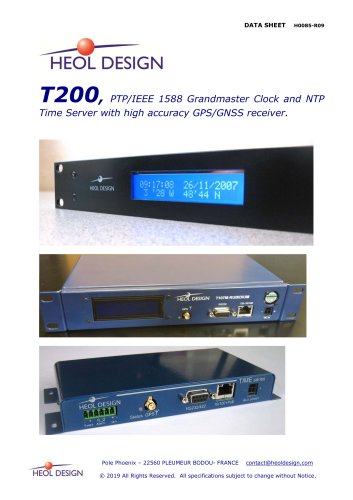 T200 PTP Grandmaster Clock
8 Pages
 N021, Lassen SK2 drop-in
5 Pages





- Measuring machine
- Windows software
- Computer-aided design software
- Design software solution
- Automatic measurement system
- GNSS antenna
- GNSS receiver
- IP67 antenna
- Remote control receiver
- Server software
- External antenna
- Serial receiver
- Digital clock
- GPS antenna
- Radio remote control receiver
- Standby tracker
- RS232 receiver
- Wall-mounted clock
- Real-time measurement system
- Position measurement system