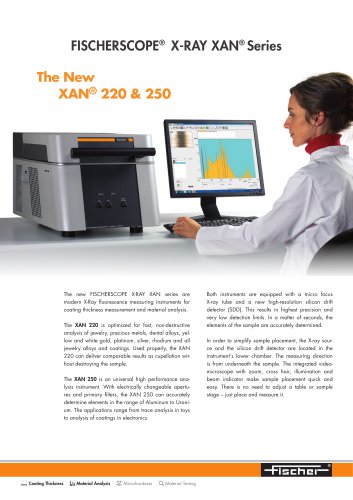
Catalog excerpts
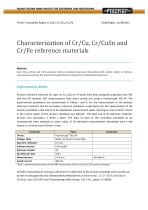
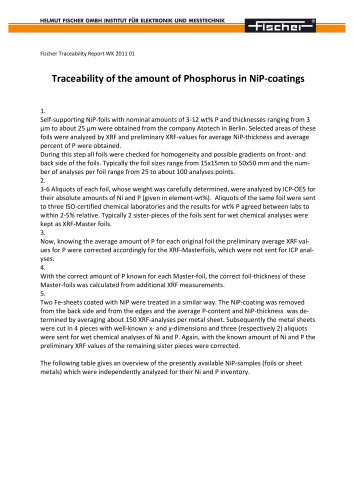
Characterization of Cr/Cu, Cr/CuSn and Cr/Fe reference materials Abstract: New Cr/Cu, Cr/CuSn and Cr/Fe secondary reference standards have been characterized with a direct relation to reference measurements using the ICP (Inductively Coupled Plasma) method from 2 independent laboratories. Experimental details Primary reference materials (Cr layer on Cu, CuSn or Fe base) have been analyzed using data from XRF and the ICP method. XRF measurements have been carried out using a Fischerscope XDL-M. The experimental parameters are summarized in Tables I and II, for the measurement of the primary reference materials and the secondary reference standards, respectively. For the measurement of the primary standards a 4x4 matrix of 16 equidistant measurement spots covering an area of 6mm x 6mm in the central region of the primary standards was defined. The total size of all reference materials, primary and secondary, is 8mm x 8mm. The data of each of the secondary standards to be characterized were obtained as mean value of 16 individual measurements distributed over a 4x4 matrix in a central area of 2mm x 2 mm. Table I : experimental parameters for the XRF measurement of the Cr/Cu and Cr/Fe primary standards. ICP-OES measurements serving as reference for calibration of the primary standards were carried out by fem Foschungsinstitut fur Edelmetalle & Metallchemie, Katharinenstr. 17, D-73525 Schwabisch Gmund, report 2K12541 and ThyssenKrupp Steel Europe, FuE-C-A-L, report 12-36696.
Open the catalog to page 1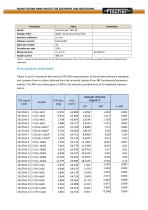
Table II : experimental parameters for the XRF measurement of the Cr/Cu and Cr/Fe secondary reference standards to be calibrated. Data analysis and results Tables III and IV summarize the results of ICP-OES measurements of the primary reference standards and compare them to values obtained from the universal standard free XRF fundamental parameter method. The XRF uncertainty given (c-XRF) is the absolute standard error of 16 individual measurements. mass per unit area ICP report Code
Open the catalog to page 2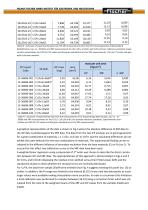
Table III : Summary of experimental data from ICP-OES measurements from fem fur Foschungsinstitut, Edelmetalle & Metallchemie, rep. no. 2K12541 and XRF measurements for the Cr/Cu, Cr/CuSn and Cr/Fe primary reference standards. Experimental uncertainties are 0.5% for ICP values and the given standard errors for XRF measurements. The star (*) marks samples with CuSn base material. Table IV : Summary of experimental data from ICP measurements from ThyssenKrupp Steel Europe, rep. no. 1236696 and XRF measurements for the Cr/Cu, Cr/CuSn and Cr/Fe primary reference standards. Experimental...
Open the catalog to page 3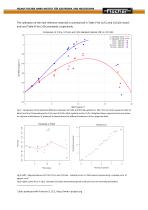
The calibration of the new reference materials is summarized in Table V for Cr/Cu and Cr/CuSn standards and Table VI for Cr/Fe standards, respectively. Fig 1 : Comparison of the absolute difference between ICP-OES and XRF data plotted vs. XRF. The red circles (squares) refer to data from fem (ThyssenKrupp) for Cr/Cu and Cr/CuSn. Blue symbols are for Cr/Fe. Weighted linear regression lines are drawn for the two combinations of materials to demonstrate the different behaviour of the respective data. Fig 2 (left) : Appropriateness of fit for Cr/Cu and Cr/CuSn: residual errors vs. fitted values...
Open the catalog to page 4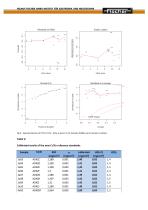
Fig 4 : Appropriateness of fit for Cr/Fe: Data at point no 16 (sample 20a04) were treated as outliers. Table V: Calibrated results of the new Cr/Cu reference standards.
Open the catalog to page 5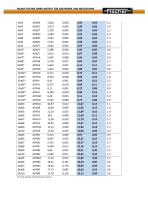
(*) marks samples with CuSn base material
Open the catalog to page 6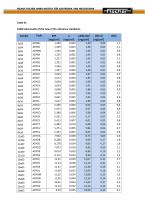
Calibrated results of the new Cr/Fe reference standards.
Open the catalog to page 7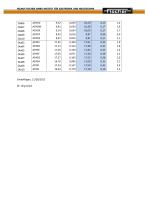
Sindelfingen, 11/28/2012 Dr. Jorg Leske
Open the catalog to page 8All HELMUT FISCHER GMBH - INSTITUT FÜR ELEKTRONIK UND catalogs and technical brochures
-
MMS® Inspection
8 Pages
-
MMS® Inspection DFT
6 Pages
-
FISCHERSCOPE ® X-RAY SERIES
48 Pages
-
PRECIOUS METALS AND JEWELERY
4 Pages
-
Automated Measurement Solutions
28 Pages
-
FISCHERSCOPE® X-RAY XAN® 500
4 Pages
-
FISCHERSCOPE® ST200
4 Pages
-
MMS-PC2
16 Pages
-
SIGMASCOPE GOLD
4 Pages
-
XAN250-252
4 Pages
-
XAN220-222
4 Pages
-
Inline Measuring Systems
8 Pages
-
XAN Series
36 Pages
-
GOLDSCOPE Series
8 Pages
-
PMP10 Duplex
4 Pages
-
FMP100/150
8 Pages
-
MP0/MP0R Series
8 Pages
-
Brochure DUALSCOPE® FMP100
8 Pages
-
FISCHERSCOPE X-RAY XDV-SDD
2 Pages
-
FISCHERSCOPE X-RAY XDAL
2 Pages
-
PHASCOPE PMP10 DUPLEX
4 Pages
-
Probe catalogue
12 Pages
-
FISCHERSCOPE MMS PC2
16 Pages
-
FISCHERSCOPE X-RAY
36 Pages
-
FISCHER Product Overview
24 Pages


