
Catalog excerpts

DRYSTAR MANUAL REV: 2-4-10 1 of 14 GENERAL AIR PRODUCTS DRYSTAR™ HEATLESS DESICCANT DRYER
Open the catalog to page 1
DRYSTAR MANUAL REV: 2-4-10 2 of 14 Table of Contents Section 1 – Safety and Warnings 1.1 – Safety Guidelines 1.2 – Unpacking 1.3 – General Safety Information Section 2 – System Description Section 3 – Installation Instructions 3.1 - Initial Inspection 3.2 – Installation Section 4 – Set-Up & Operation 4.1 – Purge Setting 4.2 – Cycle Time 4.3 - Operation Section 5 – Start-Up Section 6 – Maintenance 6.1 – Frequency 6.2 – Desiccant Replacement Section 7 – Troubleshooting Section 8 – Warranty Policy
Open the catalog to page 2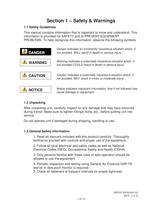
DRYSTAR MANUAL REV: 2-4-10 3 of 14 Section 1 – Safety & Warnings 1.1 Safety Guidelines This manual contains information that is important to know and understand. This information is provided for SAFETY and to PREVENT EQUIPMENT PROBLEMS. To help recognize this information, observe the following symbols. Danger indicates an imminently hazardous situation which, if not avoided, WILL result in death or serious injury. Warning indicates a potentially hazardous situation which, if not avoided COULD result in death or serious injury. Caution indicates a potentially hazardous situation which, if...
Open the catalog to page 3
DRYSTAR MANUAL REV: 2-4-10 4 of 14 Section 2 – System Description The Drystar™ is a heatless regenerative dryer. The units are designed to dry air for pneumatic systems. Proper installation and maintenance will ensure long life of the units. See the attached flow diagram for the recommended installation. A three-valve bypass is recommended around all heatless dryers to provide uninterrupted flow during maintenance. Filters must be installed before and after the dryer. Three valve bypasses are recommended for each filter to facilitate changing the elements. Special filter arrangements may...
Open the catalog to page 4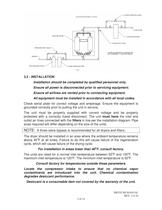
DRYSTAR MANUAL REV: 2-4-10 5 of 14 3.2 - INSTALLATION Installation should be completed by qualified personnel only. Ensure all power is disconnected prior to servicing equipment. Ensure all airlines are vented prior to connecting equipment. All equipment must be installed in accordance with all local codes. Check serial plate for correct voltage and amperage. Ensure the equipment is grounded correctly prior to putting the unit in service. The unit must be properly supplied with correct voltage and be properly protected with a correctly fused disconnect. The unit must have the inlet and...
Open the catalog to page 5
DRYSTAR MANUAL REV: 2-4-10 6 of 14 Each unit is shipped complete with its initial charge of desiccant. See the recommended service interval for replacement schedule. Vibration isolators, flexible line connections are recommended to ensure the unit is free of vibration from the compressor. The unit should be used in conjunction with three filters. The first is a precoalescing filter, the second is a fine coalescing filter, both to be installed in front of the dryer and the third is a particulate after filter which is to be installed downstream of the dryer. Filters can be purchased from...
Open the catalog to page 6
DRYSTAR MANUAL REV: 2-4-10 7 of 14 Section 4 – Set-Up & Operation 4.1 - PURGE SETTING Verify the purge gage reading corresponds to the setting shown on tag attached to purge valve, as the towers are purging. For adjustable purge units, up to 100 scfm capacity, the purge adjustment valve has been set at the factory. For units with capacity greater than 100 scfm, adjust the purge pressure during start up. Adjustments should only be made when one tower is at line pressure and the other tower is regenerating. During re-pressurization all gauges will be at line pressure. Minor pressure...
Open the catalog to page 7
DRYSTAR MANUAL REV: 2-4-10 8 of 14 Section 5 – Start-Up The compressed air system must be at the minimum operating pressure before the dryer is placed on line. Pumping up the system, from low pressure, through the dryer can result in damage to the dryer and subsequent desiccant dusting problems due to high velocity through the dryer at low pressures. Allow the dryer to reach system operating pressure. This may take several minutes on larger models. NOTE: On larger models, with air operated inlet valves, open the pilot air isolation valve connected to the inlet tee during start up or after...
Open the catalog to page 8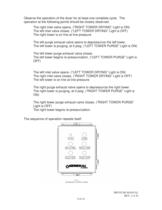
DRYSTAR MANUAL REV: 2-4-10 9 of 14 Observe the operation of the dryer for at least one complete cycle. The operation at the following points should be closely observed. The right inlet valve opens. (“RIGHT TOWER DRYING” Light is ON) The left inlet valve closes. (“LEFT TOWER DRYING” Light is OFF) The right tower is on line at line pressure. The left purge exhaust valve opens to depressurize the left tower. The left tower is purging, at 0 psig. (“LEFT TOWER PURGE” Light is ON) The left tower purge exhaust valve closes. The left tower begins re-pressurization. (“LEFT TOWER PURGE” Light is OFF)...
Open the catalog to page 9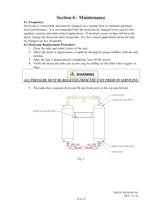
DRYSTAR MANUAL REV: 2-4-10 10 of 14 Section 6 - Maintenance 6.1 Frequency: Desiccant is consumable and must be changed on a regular basis to maintain optimum dryer performance. It is recommended that the desiccant be changed every year for fire sprinkler systems and other critical applications. If moisture occurs in lines fed from the dryer, change the desiccant more frequently. For less critical applications desiccant may be changed out less frequently. 6.2 Desiccant Replacement Procedure: 1. Close the inlet and outlet valves of the unit. 2. Allow the dryer to depressurize completely...
Open the catalog to page 10
DRYSTAR MANUAL REV: 2-4-10 11 of 14 6. Once the pressure has been removed from both tanks, remove the lower (drain) port plug. Desiccant will start to fall out of the drain port. It is easiest to vacuum the desiccant out with a shop vac. You may have to probe the outlet with a thin probe in order to keep the desiccant from jamming at the port. The desiccant is white in color. If it is yellow, then the desiccant has oil contamination and the inlet filters should be replaced. CHECK the condition of the lower desiccant. As flow is upward through the bed, the lower desiccant will see any major...
Open the catalog to page 11All General Air Products catalogs and technical brochures
-
Insure Flow Brochure
6 Pages
-
Oil / Water Separators
10 Pages
-
Fire Sprinkler Brochure
10 Pages
-
Air Cooled Chiller
5 Pages
Archived catalogs
-
Battery Back-Up Unit
1 Pages
-
REFRIGERATION AIR DRYERS
4 Pages
-
Oil Water Separators
10 Pages
-
High Inlet Air Temp Dryer
2 Pages


