Catalog excerpts

Multiple Inspector Rotating simultaneous measurements * pure * perfection FRENCO
Open the catalog to page 1
General Information The inspection of workpieces is carried out within a continuous rotation of 360°. The workpieces are scanned by radially assembled measuring carriages, each equipped with its own sensor and powered by a central encoder. The alignment of various measuring carriages, with one sensor each and a central encoder, allows for different measuring tasks to be carried out simultaneously within one single rotation. The measuring data is processed in real time via the measuring electronic MEG32. There are three types of measuring carriages that can be combined as required. Measuring...
Open the catalog to page 2
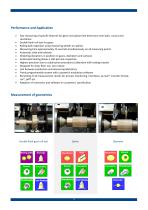
Fast measuring of specific features for gears and splines like dimension over balls, runout and roundness Double flank roll test for gears Rolling ball inspection using measuring wheels on splines Measuring time approximately 15 seconds simultaneously on all measuring points Automatic slide and tailstock Detecting deviations in position on gears, diameters and surfaces Automated testing allows a 100-percent-inspection Highest precision due to substitution procedure (calibration with setting master) Designed for shop-floor use, very robust Link between production and measuring laboratory...
Open the catalog to page 3
RM - Horizontal The typical place of use of URM-R/W inspection machines is directly next to the production machine. They can be used for quick random checks and are perfect for a 100 percent inspection. Measurement of splines 2 x measuring slides for splines with index measurement. Measurement of a crankshaft Measuring slide for splines and measuring slide for straight-sided splines with index measurement relative to each other. Measurement of a shaft 5 measuring slides for 5 splines with index measurement. Prepared for automatic loading.
Open the catalog to page 4
Special Designs RM - vertical Double flank gear rolling inspection with special evaluation for steering pinions RM - vertical Double flank rolling inspection machine with a vertical slide and a tailstock
Open the catalog to page 5
The RMpro software is used to measure and evaluate shafts with any number of measuring points. These measuring points can be: radial run-out, axial run-out, master gear or master wheel. The software provides a kind of modular system of components, measuring points, measurements, evaluations and representations. Inspection Plan Measurement View Measuring Record Settings View User Help Inspection Plan Measurement View Q Measuring Record —O® aliLl Runout bearing seat 1 . Matter tear fevai Length, Tooth Width 45 Total Composite Error Fj' Tolerance 0,9 The inspection plan is made up from the...
Open the catalog to page 6
The measured values can also be viewed individually.User ManagementIntegrated user management with user configurable group rights User Group Privileges 1AGeneral Set Log Level Display Language Output Language MEG32 Settings Measuring Record Settings AInspection Plan Load Edit Save > AMeasurement View
Open the catalog to page 7
Frenco Product Range High Precision Gears and Splines H Gear and Spline Gauges Master Gears, Master Wheels Artefacts, Masters Punches, Dies & Electrodes Profiled Clamping Systems Gear and Spline Manufacture B Rotation Measuring Systems R Instruments with Measuring Circles Multiple Inspector Gear Flank Analysing Linear Gear Flank Analyser Rack Gear Flank Analyser Double Flank Gear Roll Inspection □ instruments for Size Inspection Series V Measuring Pins and Ball Inserts Instruments, Rocking Type Instruments with Face Stop Instruments with Guiding Profiles Circumferential Backlash...
Open the catalog to page 8All Frenco GmbH catalogs and technical brochures
-
OF-Documents
8 Pages
-
Gear and Spline Manufacture
8 Pages
-
frenco english
92 Pages
-
Gear Flank Analyser
15 Pages
-
Spline Gages (HPL)
12 Pages
-
Overview Product Lines
92 Pages
-
Master Gears (HPR)
12 Pages


