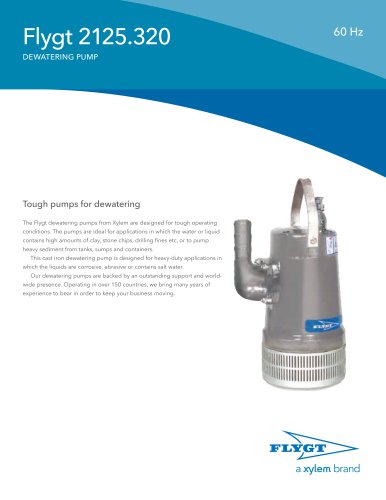
Catalog excerpts
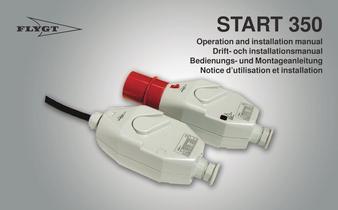
START 350 Operation and installation manual Drift- och installationsmanual Bedienungs- und Montageanleitung Notice d’utilisation et installation
Open the catalog to page 1
Antes de empezar cualquier trabajo, comprobar que el armario de sistemas automáticos esté desconectado de la red eléctrica, y que no pueda recibir tensión. Prima di iniziare qualsiasi lavoro, controllare che la centralina degli automatismi sia staccata dalla rete di alimentazione elettrica e che non sia sotto tensione. Controleer, voordat u begint te werken, of de schakelkast gescheiden is van de elektrische voeding en niet omder spanning kan komen te staan. Antes de iniciar qualquer trabalho, verifique se o compartimento do sistema automático se encontra desligado da rede eléctrica e...
Open the catalog to page 2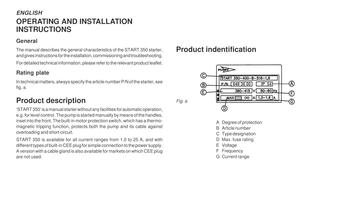
ENGLISH OPERATING AND INSTALLATION INSTRUCTIONS General The manual describes the general characteristics of the START 350 starter, and gives instructions for the installation, commissioning and troubleshooting. Product indentification For detailed technical information, please refer to the relevant product leaflet. Rating plate In technical matters, always specify the article number P/N of the starter, see fig. a. Product description ‘START 350’ is a manual starter without any facilities for automatic operation, e.g. for level control. The pump is started manually by means of the handles,...
Open the catalog to page 3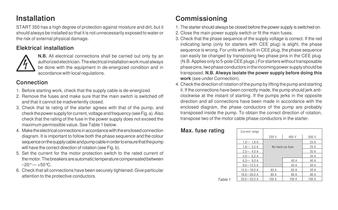
Installation Commissioning START 350 has a high degree of protection against moisture and dirt, but it should always be installed so that it is not unnecessarily exposed to water or the risk of external physical damage. 1. The starter should always be closed before the power supply is switched on. 2. Close the main power supply switch or fit the main fuses. 3. Check that the phase sequence of the supply voltage is correct. If the red indicating lamp (only for starters with CEE plug) is alight, the phase sequence is wrong. For units with built-in CEE plug, the phase sequence can easily be...
Open the catalog to page 4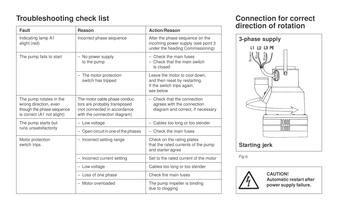
Troubleshooting check list Connection for correct direction of rotation Fault Reason Action/Reason Indicating lamp A1 alight (red) Incorrect phase sequence Alter the phase sequence on the incoming power supply (see point 3 under the heading Commissioning) The pump fails to start – No power supply – to the pump – Check the main fuses – Check that the main switch – is closed – The motor protection – switch has tripped Leave the motor to cool down, and then reset by restarting. If the switch trips again, see below The pump rotates in the wrong direction, even though the phase sequence is...
Open the catalog to page 5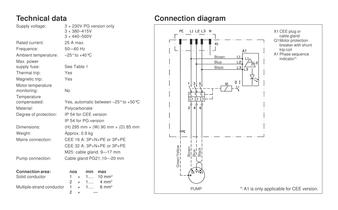
Technical data Dimensions: Weight: Mains connection: Pump connection: Connection area: Solid conductor Multiple-strand conductor Brown Blue Black See Table 1 Yes Yes X1 CEE plug or cable gland Q1Motor protection breaker with shunt trip coil A1 Phase sequence indicator*) No Yes, automatic between –25° to +50°C Polycarbonate IP 54 for CEE version IP 54 for PG version (H) 295 mm × (W) 90 mm × (D) 85 mm Approx. 0.9 kg CEE 16 A: 3P+N+PE or 3P+PE CEE 32 A: 3P+N+PE or 3P+PE M25: cable gland, 9—17 mm Cable gland PG21,10—20 mm nos 1 × 2 × 1 × 2 × min max 1…. 10 mm 2 1…. 4 mm2 1…. 6 mm2 — Brown Blue...
Open the catalog to page 6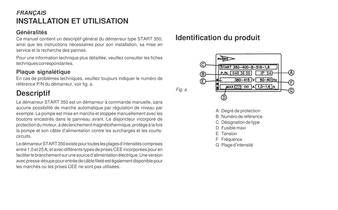
FRANÇAIS INSTALLATION ET UTILISATION Généralités Ce manuel contient un descriptif général du démarreur type START 350, ainsi que les instructions nécessaires pour son installation, sa mise en service et la recherche des pannes. Identification du produit Pour une information technique plus détaillée, veuillez consulter les fiches techniques correspondantes. Plaque signalétique En cas de problèmes techniques, veuillez toujours indiquer le numéro de référence P/N du démarreur, voir fig. a. Descriptif Le démarreur START 350 est un démarreur à commande manuelle, sans aucune possibilité de marche...
Open the catalog to page 7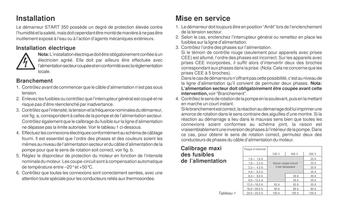
Installation Mise en service Le démarreur START 350 possède un degré de protection élevée contre l’humidité et la saleté, mais doit cependant être monté de manière à ne pas être inutilement exposé à l’eau ou à l’action d’agents mécaniques extérieurs. 1. Le démarreur doit toujours être en position “Arrêt” lors de l’enclenchement de la tension secteur. 2. Selon le cas, enclenchez l’interrupteur général ou remettez en place les fusibles sur la ligne d’alimentation. 3. Contrôlez l’ordre des phases sur l’alimentation. Si le témoin de contrôle rouge (seulement pour appareils avec prises CEE) est...
Open the catalog to page 8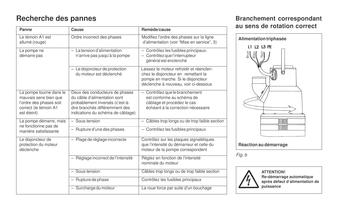
Recherche des pannes Modifiez l’ordre des phases sur la ligne d’alimentation (voir “Mise en service”, 3) La pompe ne démarre pas – La tension d’alimentation – n’arrive pas jusqu’à la pompe – Contrôlez les fusibles principaux. – Contrôlez que l’interrupteur – général est enclenché – Le disjoncteur de protection – du moteur est déclenché Laissez le moteur refroidir et réenclenchez le disjoncteur en remettant la pompe en marche. Si le disjoncteur déclenche à nouveau, voir ci-dessous La pompe tourne dans le mauvais sens bien que l’ordre des phases soit correct (le témoin A1 est éteint) Deux des...
Open the catalog to page 9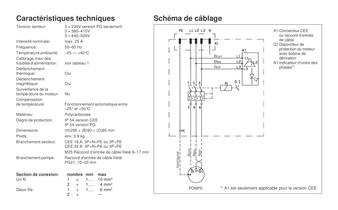
Caractéristiques techniques Matériau: Degré de protection: Dimensions: Poids: Branchement secteur: Branchement pompe: Section de conexion: Un fil Deux fils Brun Bleu Noir voir tableau 1 X1 Connecteur CEE ou raccord d’entrée de câble Q1Disjoncteur de protection du moteur avec bobine de dérivation A1 Indicateur d’ordre des phases*) Oui Oui No Fonctionnement automatique entre –25° et +50°C Polycarbonate IP 54 version CEE IP 54 version PG (H)295 × (B)90 × (D)85 mm env. 0.9 kg CEE 16 A: 3P+N+PE ou 3P+PE CEE 32 A: 3P+N+PE ou 3P+PE M25 Raccord d’entrée de câble fileté 9–17 mm Raccord d’entrée de...
Open the catalog to page 10All FLYGT catalogs and technical brochures
-
Flygt 2610
2 Pages
-
Flygt 2400.402
2 Pages
-
Flygt 2201.011
2 Pages
-
Flygt 2125.320
2 Pages
-
Flygt 2125.181
2 Pages
-
Flygt 2075.324
2 Pages
-
Flygt 2071.010
2 Pages
-
Flygt FGC 400
3 Pages
-
Liquid Manure Technology
20 Pages
-
Flygt C-pumps 3068–3800
8 Pages
-
Flygt mid-size mixers
4 Pages
-
Flygt Top-Entry Agitators
8 Pages
-
Flygt low-speed mixers
8 Pages
-
Flygt jet mixers
8 Pages
-
compact mixers
8 Pages
-
Hydrovar®
8 Pages
-
PumpSmart, PS200
8 Pages
-
AquaView
2 Pages
-
APP 500
4 Pages
-
ATU Alarm transmitters
4 Pages
-
Flygt compit pump stations
4 Pages
-
Flygt Epsilon range
8 Pages
-
Flygt widethroat W range
8 Pages
-
Flygt D-8000
4 Pages
-
Flygt D-8200
4 Pages
-
Flygt N-pump series
16 Pages
-
Flygt F-pump series
8 Pages
-
Flygt C-pumps 3068-3800
8 Pages


