Designing and profiling furniture front sections
1 /5Pages

Designing and profiling furniture front sections
1 /5Pages
Catalog excerpts
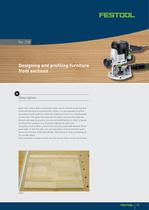
No. 228 Designing and profiling furniture front sections A Description Apart from classic door construction which can be carried out quickly and easily with facing and counterprofile cutters, it is also possible to profile laminated boards and thus create the impression that it is a counterprofile construction. This gives the carpenter the option of upvaluing materials that are very easy to process, such as laminated boards, in order to design furniture front sections, e.g. of kitchen cabinets or wall units. To produce such profiles, a basic distinction must be made between three work steps. In the first step, cuts are executed in vertical direction and in horizontal direction in the second step. The third work step is rounding off the outside edges. If you only wish to make vertical cuts, the second step is of course omitted. 228/01 1/5
Open the catalog to page 1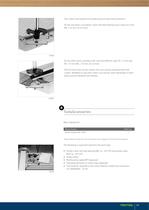
Two cutters are essential for producing such decorative elements. On the one hand, a roundover cutter with ball bearing and a radius of 6 mm (NL = 14 mm, D= 42 mm). 228/02 On the other hand, a profile cutter with two different radii, R1 = 6 mm and R2 = 12 mm (NL = 13 mm, D= 42 mm). The furniture front section shown here can only be produced with both cutters. Needless to say, both cutters can also be used individually in other areas and are therefore very flexible. 228/03 B Tools/accessories Basic equipment: Denomination Order no. Router (Festool OF 1010) * *Please obtain the Order No. from the...
Open the catalog to page 2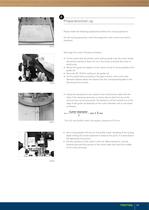
C Preparation/set-up Please make the following preparations before this routing operation: For all routing operations, mark the respective cutter centre line and its limitation. 228/05 Now align the router. Proceed as follows: 228/06 •• Fit the router with the profile cutter without guide ring; the router shank should be inserted at least 2.5 cm in the chuck to ensure the cutter is held firmly. •• Mount the guide rail adapter on the router so that it can be guided on the guide rail. •• Place the OF 1010 for setting on the guide rail. •• Set the speed level according to the type of wood, cutter...
Open the catalog to page 3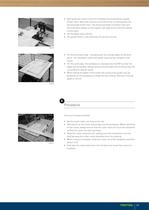
•• Now guide the router to the first limitation line and position a guide limiter there. Move the machine to the end of the cut and position the second guide limiter here. The previously drawn limitation lines and the millimetre display on the support can help ensure that this setting is very exact. •• Set the depth stop to 8 mm. •• The guide limiter is not necessary for vertical routing. 228/09 •• For the third work step - rounding over the outside edges of the workpiece - the roundover cutter with guide ring must be clamped in the router. •• For this work step, the workpiece is clamped onto...
Open the catalog to page 4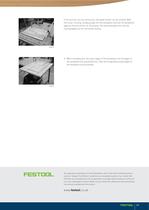
If the vertical cuts are continuous, the guide limiter can be omitted. With the router running, simply plunge into the workpiece and exit the workpiece again at the end of the cut. Otherwise, the same procedure for vertical routing applies as for horizontal routing. 228/12 •• When rounding over the outer edges of the workpiece, the lid edges of the workpiece are processed first. Then the longitudinal wood edges of the workpiece are processed. 228/13 Our application examples are recommendations which have been tried and tested in practice. However the different conditions are completely outside...
Open the catalog to page 5All Festool catalogs and technical brochures
 THE ISSUE FOR PAINTERS
44 Pages
 100Y Poster
2 Pages
 THE ANNIVERSARY EDITION
84 Pages


Archived catalogs
 Catalogue 2019
438 Pages
 Festool Catalogue 2017
434 Pages
 Catalogue 2020
352 Pages
 routing system brochure
36 Pages
 Edge trimming
3 Pages
 Circular saw TS 55 R
8 Pages
 Groove cutting
4 Pages
 EXTRACTION Product range
26 Pages
 SAWING Product range
28 Pages
 Festool Catalogue 2016
422 Pages
 CMS brochure
14 Pages
 sawing system brochure
28 Pages
 MFT 3 brochure
12 Pages
 p2010_broschfambs
14 Pages