Catalog excerpts

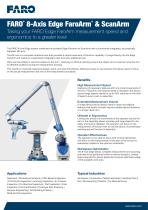
FARO 8-Axis Edge FaroArm & ScanArm ® Taking your FARO Edge FaroArm measurement speed and ergonomics to a greater level The FARO 8-Axis Edge system combines the portable Edge FaroArm (or ScanArm) with a functionally integrated, yet physically separate, 8th axis. The 8th axis is a complete rotational axis that provides a natural extension of FaroArm capability. It plugs directly into the Edge FaroArm and results in a seamlessly integrated, high-accuracy additional axis. Parts can be rotated in real-time relative to the Arm – meaning no difficult reaching around the object and no need to move the Arm to different locations during the measurement process. This results in improved measuring speed, reach, and user-friendliness, offering an easy-to-use solution that allows users to focus on the actual measurement and not on the measurement processes. Benefits High Measurement Speed Capturing of necessary features with only small movements of the Arm / ScanArm and reduced need to reposition the device around large objects results in up to 40% reduction in the time it takes to scan a part or assembly. Extended Measurement Volume A single device set-up allows users to reach and digitize features that would normally require multiple device locations, or a longer-reach arm. Limiting the amount of movements of the operator around the part or the assembly allows complex and large objects to be easily and quickly digitized. The operator can focus on the measurement of the part with no worries about uncomfortably reaching around the part or assembly. Operator Effectiveness The operator is now able to focus with minimal distraction and effort on the measurement of the part since the part is seamlessly rotated to the optimum orientation. Workspace Optimization The 8-Axis Edge allows complete measurement and scanning activities to be performed within a minimal footprint. Limited space required for device placement ensures optimized usage of the available work area. Typical Industries Alignment | Dimensional Analysis | CAD-Based Inspection | First Article Inspection | Incoming Inspection | In-Process Inspection | On-Machine Inspection | Part Inspection | Final Inspection | Part Certification | Prototype Part Scanning | Reverse Engineering | Tool Building & Setup | Mold and Die Inspection Aerospace | Automotive | Metal Fabrication | Molding/Tool & Die | Woodworking | Plastics | Toy Manufacturing
Open the catalog to page 1
FaroArm test methods - (Test methods are a subset of those given in the B89.4.22 standard.) *Single point articulation performance test (Max-Min)/2: The probe of the FaroArm is placed within a conical socket, and individual points are measured from multiple approach directions as specified by ASME the B89.4.22-2004 standard. Each individual point measurement is analyzed as a range of deviations in X, Y, Z. **Volumetric maximum deviation: Determined by using 20 traceable lengths measured at locations and orientations throughout the working volume of the FaroArm as specified by the ASME...
Open the catalog to page 2All FARO EUROPE catalogs and technical brochures
-
FARO® BuildIT Projector
8 Pages
-
RevEng Software
2 Pages
-
CAM2 Software
2 Pages
-
ScanPlan 2D Handheld Mapper
2 Pages
-
Focus Laser Scanner
2 Pages
-
Tech sheet SCENE
2 Pages
-
FARO Forensic ScanArm
2 Pages
-
Tech sheet CAM2 SmartInspect
2 Pages
-
Tech sheet - FaroArm Fusion
2 Pages
-
Tech Sheet FARO Prime
2 Pages


