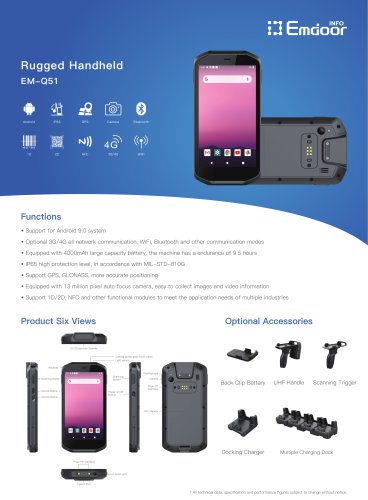
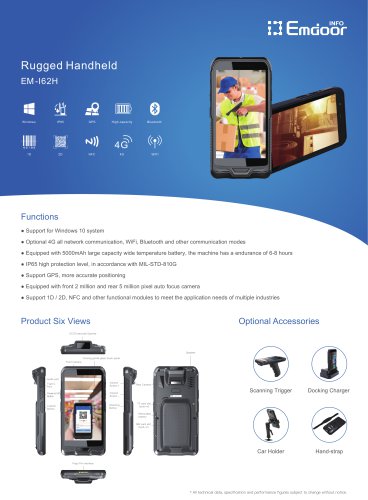
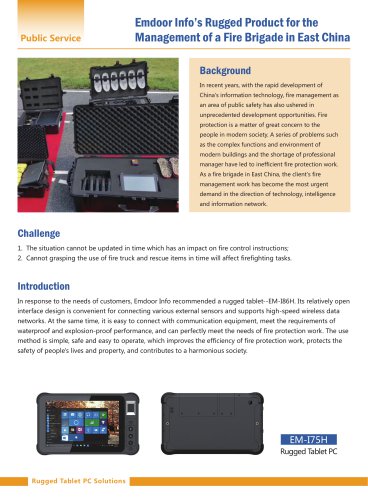
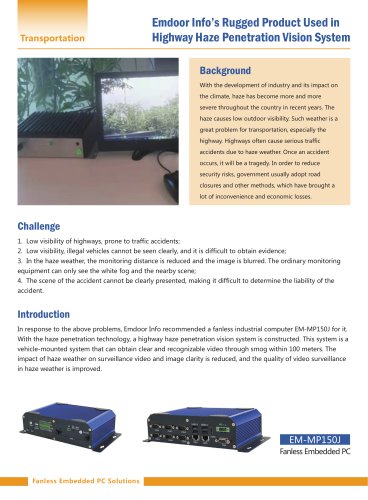
- Catalogs
- Emdoor Information Co., Ltd.
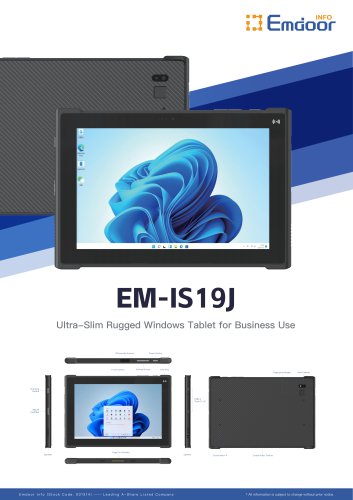
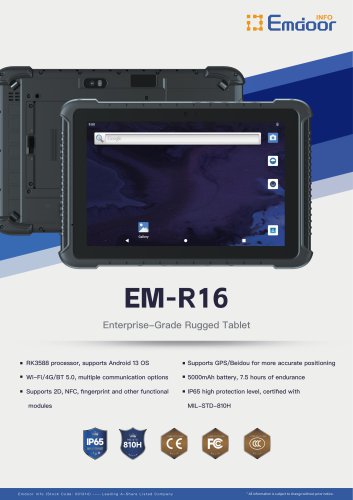
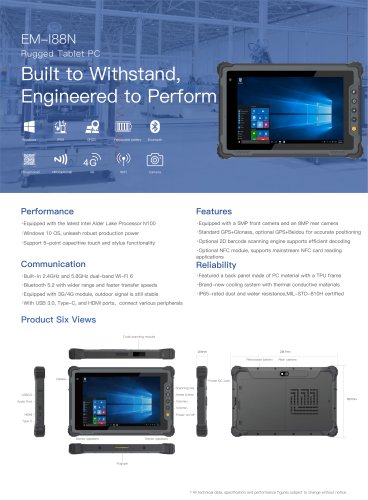
- EM-I18N User Manual Emdoor Info. Rugged Tablet PC
- Company
- Products
- Catalogs
- News & Trends
- Exhibitions
EM-I18N User Manual Emdoor Info. Rugged Tablet PC
1 /56Pages
EM-I18N User Manual Emdoor Info. Rugged Tablet PC
1 /56Pages
Catalog excerpts

Rugged Mobile Computing Solutions
Open the catalog to page 1
The information in this manual is subject to change without notice.
Open the catalog to page 2
This chapter first tells you step by step how to get the tablet up and running. Then, you will find a section briefly introducing the external components of the tablet.
Open the catalog to page 5
GET THE DEVICE RUNNING OPEN BOX TO CHECK After unpacking, you should see the following standard items: I18N Rugged Tablet PC Power Adapter
Open the catalog to page 6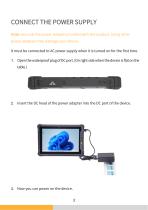
CONNECT THE POWER SUPPLY Note: Use only the power adapter provided with this product. Using other power adapters may damage your device. It must be connected to AC power supply when it is turned on for the first time. 1. Open the waterproof plug of DC port. (On right side when the device is flat on the table.) 2. Insert the DC head of the power adapter into the DC port of the device.
Open the catalog to page 7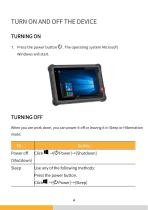
TURN ON AND OFF THE DEVICE TURNING ON 1. Press the power button Windows will start. . The operating system Microsoft When you are work done, you can power it off or leaving it in Sleep or Hibernation mode: Press the power button. Click
Open the catalog to page 8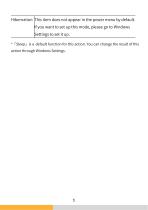
Hibernation This item does not appear in the power menu by default. If you want to set up this mode, please go to Windows Settings to set it up. *「Sleep」is a default function for this action. You can change the result of this action through Windows Settings.
Open the catalog to page 9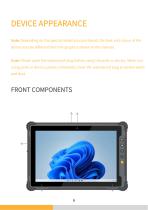
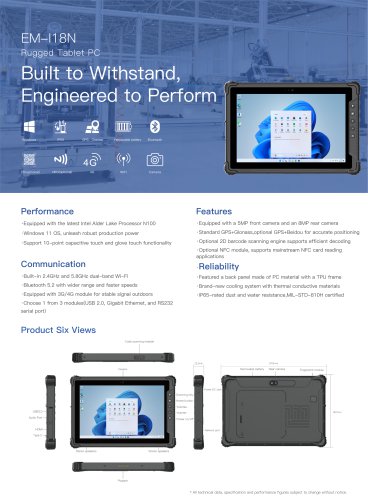
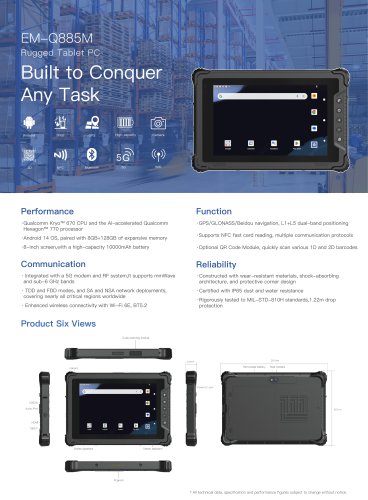
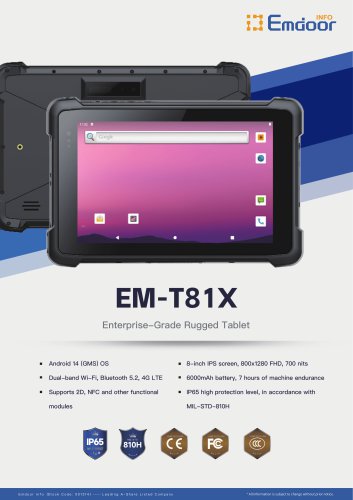
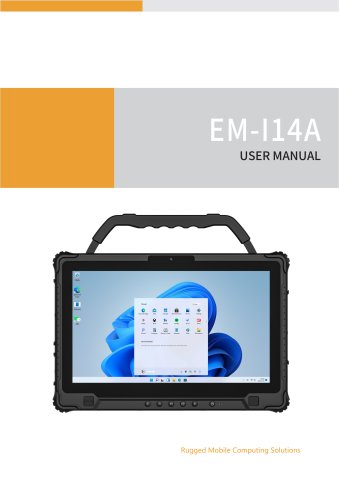
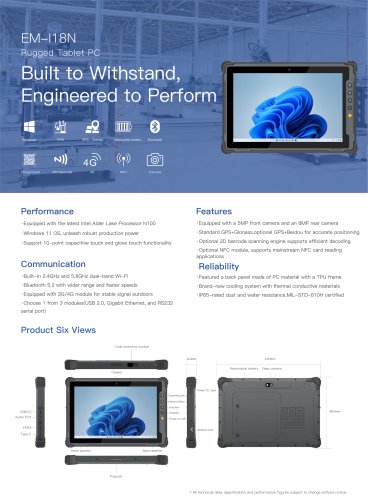
DEVICE APPEARANCE Note: Depending on the special model you purchased, the look and colour of the device may be different from the graphics shown in this manual. Note: Please open the waterproof plug before using the ports or device. When not using ports or device, please completely cover the waterproof plug to isolate water and dust.
Open the catalog to page 10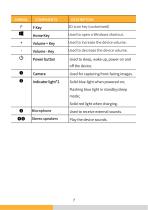
symbol compinents
Open the catalog to page 11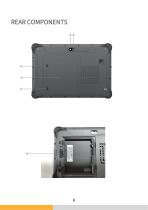
REAR COMPONENTS
Open the catalog to page 12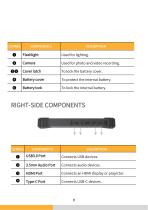
Cover latch To lock the battery cover. Battery cover Battery lock Used for photo and video recording. To protect the internal battery. To lock the internal battery. RIGHT-SIDE COMPONENTS HDMI Port Connects an HDMI display or projector. 3.5mm Audio Port Type-C Port Connects audio devices.
Open the catalog to page 13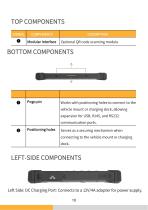
LEFT-SIDE COMPONENTS Left Side: DC Charging Port: Connects to a 12V/4A adapter for power supply.
Open the catalog to page 14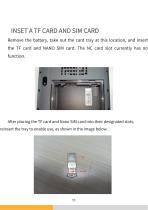
INSET A TF CARD AND SIM CARD Remove the battery, take out the card tray at this location, and insert the TF card and NANO SIM card. The NC card slot currently has no function. After placing the TF card and Nano SIM card into their designated slots, reinsert the tray to enable use, as shown in the image below.
Open the catalog to page 15
OPERATE YOUR DEVICE This chapter provides information about the use of the device. If you are new to device, reading this chapter will help you learn the operating basics. If you are already a Tablet user, you may choose to read only the parts containing information unique to your Tablet. Notes: ●Do not expose your skin to the Tablet when operating it in a very hot or cold environment. ● The Tablet can get uncomfortably warm when you use it in high temperatures. As a safety precaution in such a circumstance, do not place the Tablet on your lap or touch it with your bare hands for extended periods...
Open the catalog to page 16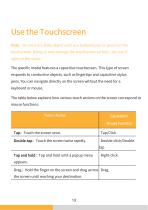
Note: Do not use a sharp object such as a ballpoint pen or pencil on the touchscreen. Doing so may damage the touchscreen surface. Use your fi ngers or the stylus. The specific model features a capacitive touchscreen. This type of screen responds to conductive objects, such as fingertips and capacitive stylus pens. You can navigate directly on the screen without the need for a keyboard or mouse. The table below explains how various touch actions on the screen correspond to mouse functions:
Open the catalog to page 17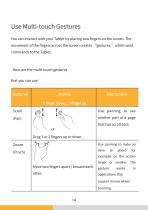
You can interact with your Tablet by placing two fingers on the screen. The movement of the fingers across the screen creates “gestures,” which send commands to the Tablet. Here are the multi-touch gestures that you can use:
Open the catalog to page 18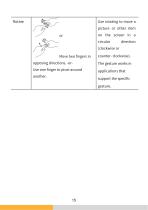
picture or other item on the screen in a Use one finger to pivot around another. counter- clockwise). The gesture works in applications that support the specific gesture.
Open the catalog to page 19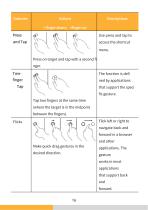
= finger down; =finger up Use press and tap to access the shortcut Press on target and tap with a second fi Two- that support the speci Tap two fingers at the same time (where the target is in the midpoint Flicks Flick left or right to navigate back and forward in a browser Make quick drag gestures in the desired direction. works in most applications that support back an
Open the catalog to page 20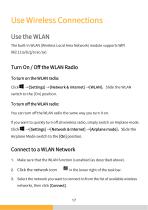
Use Wireless Connections Use the WLAN The built-in WLAN (Wireless Local Area Network) module supports WIFI 802.11(a/b/g/n/ac/ax). Turn On / Off the WLAN Radio To turn on the WLAN radio: Click →[Settings] →[Network & Internet] →[WLAN],Slide the WLAN To turn off the WLAN radio: You can turn off the WLAN radio the same way you turn it on. If you want to quickly turn off all wireless radio, simply switch on Airplane mode. →[Settings] →[Network & Internet] →[Airplane mode],Slide the Airplane Mode switch to the [On] position. Connect to a WLAN Network 1. Make sure that the WLAN function is enabled (as...
Open the catalog to page 21
4. Depending on the network settings, you may need to enter a password. Contact your network administrator or service provider for details. For more information on setting up wireless networks, refer to Windows online help.
Open the catalog to page 22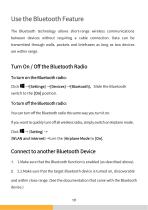
The Bluetooth technology allows short-range wireless communications between devices without requiring a cable connection. Data can be transmitted through walls, pockets and briefcases as long as two devices are within range. Turn On / Off the Bluetooth Radio To turn on the Bluetooth radio: Click →[Settings] →[Devices] →[Bluetooth],Slide the Bluetooth To turn off the Bluetooth radio: You can turn off the Bluetooth radio the same way you turn it on. If you want to quickly turn off all wireless radio, simply switch on Airplane mode. Click [WLAN and Internet]→turn the [Airplane Mode to [On]. Connect...
Open the catalog to page 23
→[Settings] →[Devices] →[Bluetooth]. 4. Select the device you want to connect from the search results. 5. Depending on the type of Bluetooth device that you want to connect to, you will need to enter the pertinent information. For detailed information on using the Bluetooth feature, see Windows online Help. MANAGE POWER Your device operates either on external Type-C power, DC or on internal battery power. This chapter tells you how you can effectively manage power. To maintain optimal battery performance, it is important that you use the battery in the proper way
Open the catalog to page 24All Emdoor Information Co., Ltd. catalogs and technical brochures
 EM-IS19J specification
3 Pages
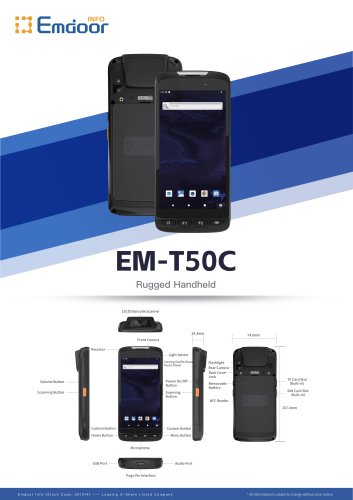 EM-T50C
3 Pages
 EM-D10R successful case
3 Pages
 EM-A15
3 Pages
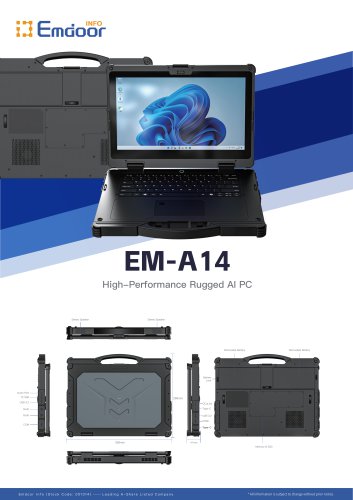 EM-A14
3 Pages
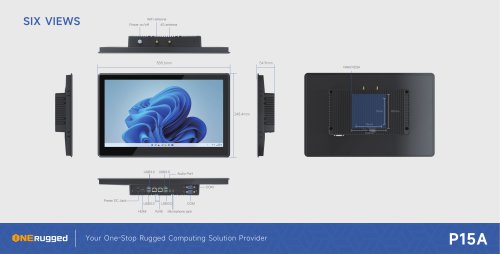 EM-P15A six views
1 Page
 EM-V12R USER MANUAL
2 Pages
 EM-P15A USER
2 Pages
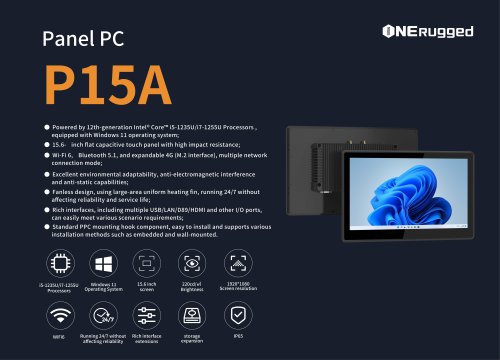 EM-P15A SPE
2 Pages
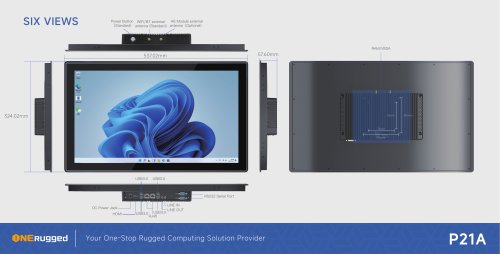 EM-P21A six views
1 Page
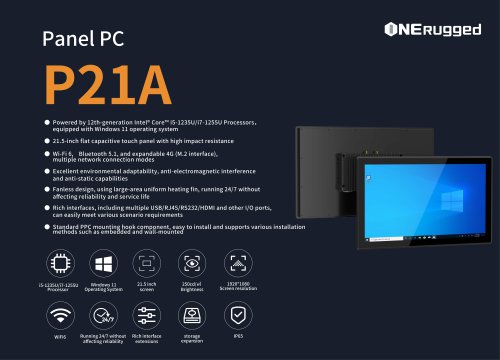 EM-P21A SPE
2 Pages
 EM-P21A user
2 Pages
 EM-V82T-EMC
13 Pages
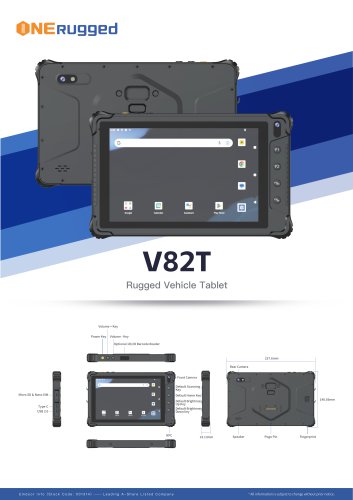 EM-V82T spe
4 Pages
 P2 PRO
2 Pages
 P2 PRO-SPE
2 Pages
 M82A- USER MANUAL
60 Pages
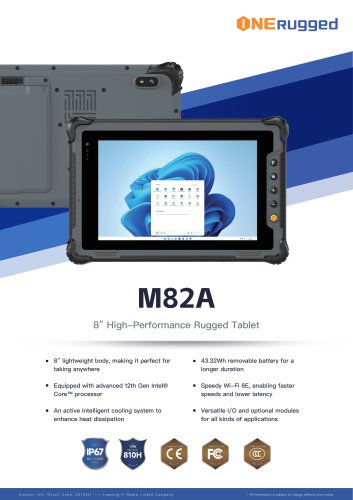 M82A-spe
2 Pages
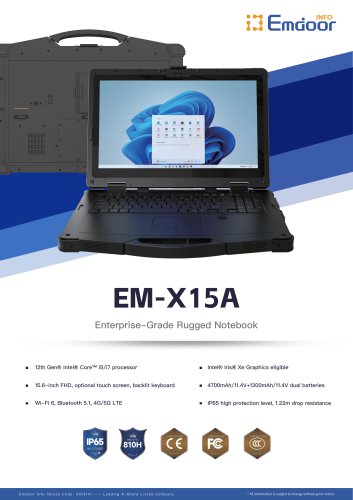
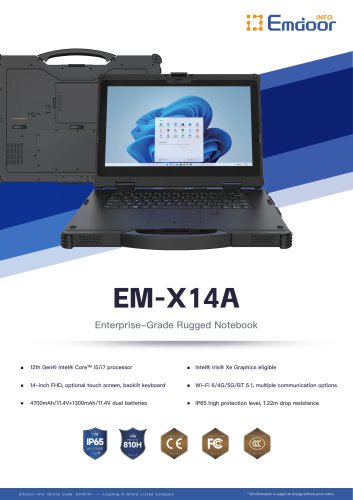
 EM-X15A User Manual
76 Pages
 EM-X15M Rugged AI PC uesr manual
76 Pages
 Emdoor Info. EM-I16J User Manual
57 Pages
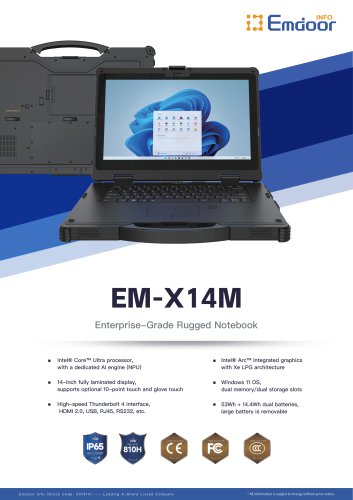
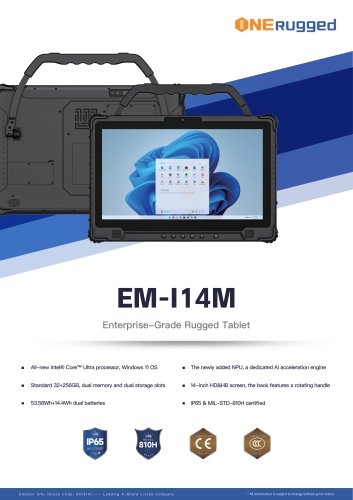 EM-I14M 14Inch Rugged AI PC
2 Pages
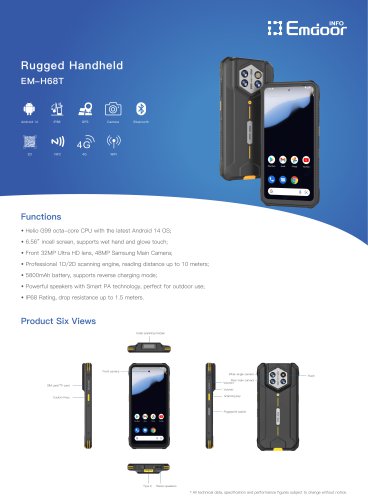 EM-H68T: Android 14 rugged PDA
2 Pages
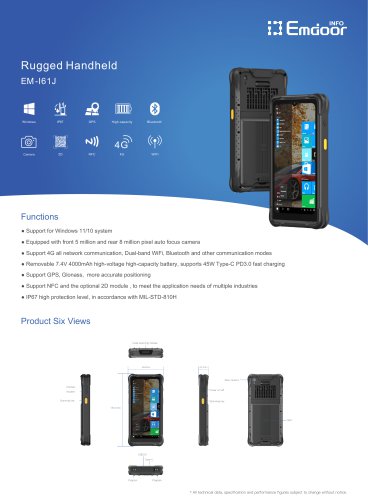
 EM -I61J Rugged Handheld
19 Pages
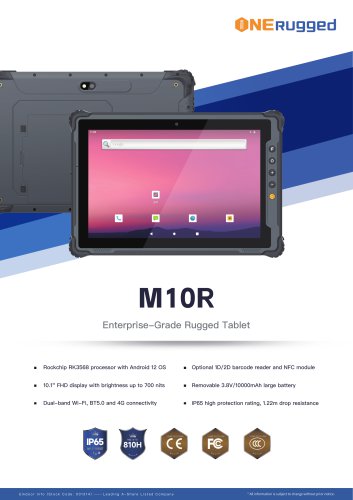 M10R Rugged Tablet RK3588
2 Pages
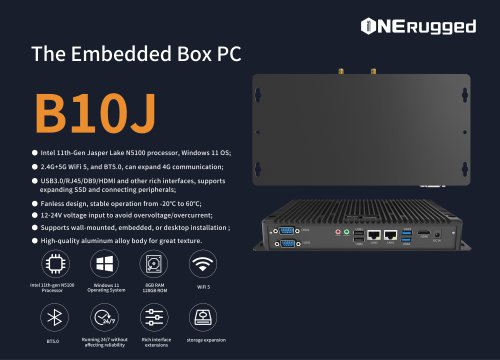 EM-B10J embedded box PC
3 Pages
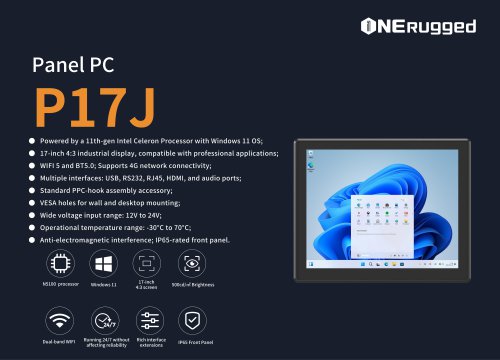 EM-P17J Panel PC
3 Pages
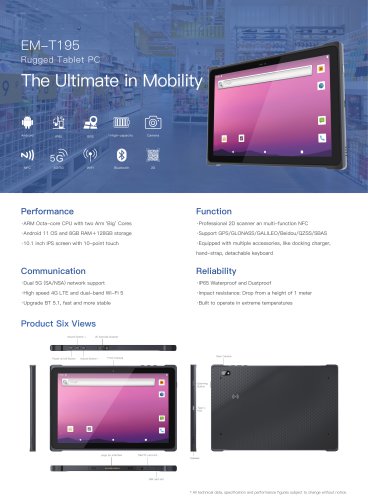 EM-T195 5G Rugged Tablet
2 Pages
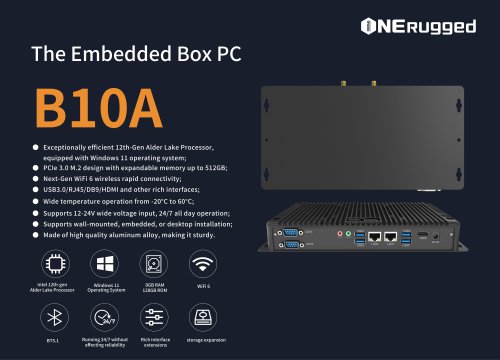 The Embedded Box PC-B10A
3 Pages
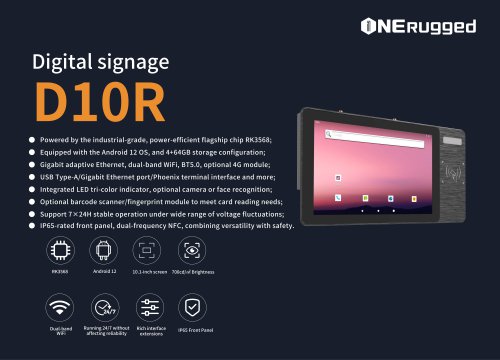 EM-D10R Digital signage
3 Pages
 EM-P1The Outdoor Rugged Phone
2 Pages
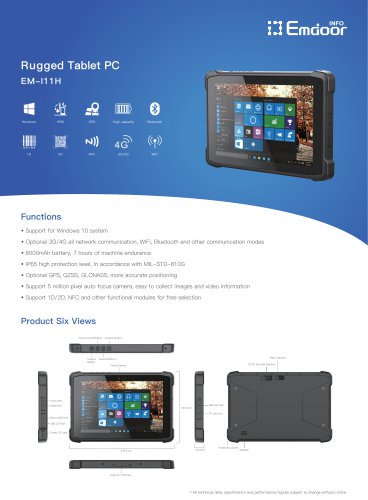 EM-I11H Rugged Tablet PC
2 Pages
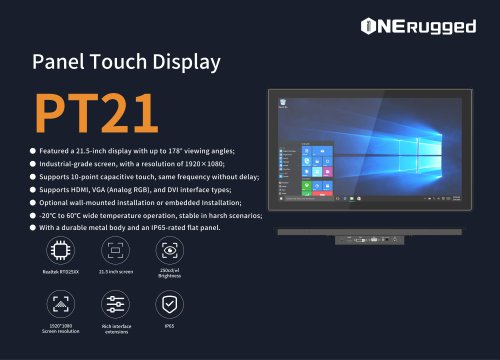 EM-PT21 Panel Touch Display
3 Pages
 Rugged Handheld H60T
2 Pages


- HS panel PC
- HS industrial panel PC
- HS panel PC with touch screen
- HS fanless panel PC
- HS LCD panel PC
- LCD display panel
- HS IP65 panel PC
- Intel® Core™ panel PC
- VESA mounting panel PC
- Housed panel PC
- Industrial display panel
- Windows 10 panel PC
- HS Windows panel PC
- HS wireless panel PC
- HS touch screen tablet
- Intel® Celeron® panel PC
- HS wireless tablet
- HMI panel PC
- Touch screen display panel