 Website:
Eltex of Sweden AB
Catalog excerpts

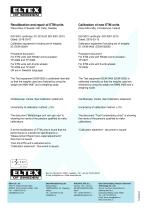
Calibration method. The Eltex Tension Monitors units (ETM) used for monitor the peak tension of the upper sewing thread on sewing machine are making a dynamic measurement of the force. To calibrate the ETM it is needed special equipment (EEM 0520) that is gently releasing and lifting a weight hanging in a low friction thread through the ETM unit sensor head. The ETM unit is during the calibration electronically set into a calibration mode. With an oscilloscope the tension graph is checked to ensure that the tension is zero at the time for the synchronizing pulse and that the weight is stable during the measuring sequence. When we calibrate a new ETM we check that the unit is fulfilling the specification mentioned in the documentation of the ETM unit. When we re-calibrate we check that the unit is fulfilling the same specification as when it was once produced. The calibration at Eltex is made in two locations. New units are calibrated before delivery at our production plant at Templemore Ireland. ETM units that are sent for recalibration / repair are calibrated at our sales / research / service office in Osby, Sweden. Both places have identical equipment. The calibration method is the same. The calibration method is in detail described in the procedure document. The equipment used for calibration are: • • • Calibration equipment Oscilloscope to check the graph of the tension value Set of weights The weights and the oscilloscope are calibrated with traceability to national or international standards The management systems are certified to comply with the ISO 9001:2015 standard at both places. As we are calibrating only our own products we are not certified to the ISO 17025 standard. The requirements for personnel making calibration is as follows: Knowledge about Eltex test system and test procedures. Basic knowledge about how the unit under test/calibration is used by the end customer Knowledge how to act when the unit under test does not perform as requested. Knowledge how to complete the Calibration Statement document and where to store it. The detailed Test Instruction contains all necessary information about equipment to use and information about
Open the catalog to page 1
Recalibration and repair of ETM units Place Eltex of Sweden AB, Osby, Sweden ISO 9001 certificate: G1-0216-02 ISO 9001-2015 Dated: 2018-03-07 Calibration equipment Including set of weights: ID: EEM 0520A Procedure document: For ETM units with RS422 communication: TP-0366 and TP-0383 For ETM units with thumb wheels: TP-0326 and TP-0337 (All are in Swedish language) The Test equipment EEM 0520 is calibrated internally so that the weights used are checked by using the weight set KMM 0087 and a weighing scale. Calibration of new ETM units Place Eltex Mfg, Templemore, Ireland ISO 9001...
Open the catalog to page 2All Eltex of Sweden AB catalogs and technical brochures
-
G3s Yarn break sensor
2 Pages
-
EyETM, yarn tension monitor.
2 Pages
-
ACT-R, weft tension control.
2 Pages
-
Eltex ETM Solo
2 Pages
-
Weft sensor E2071
2 Pages
-
Eltex weft sensor G3w
2 Pages


