
- Catalogs
- Cowell(Nanjing)Extrusion Machinery Co.,Ltd.
- CHANGE SCREW SEQUENCE (for co-rotation extruder)

CHANGE SCREW SEQUENCE (for co-rotation extruder)
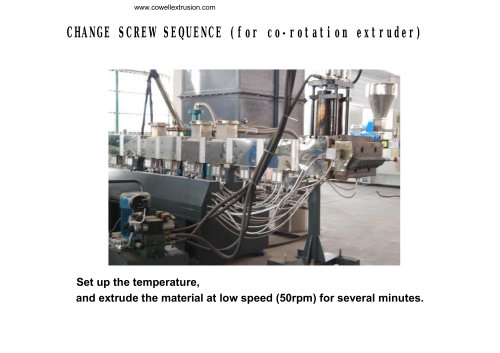
CHANGE SCREW SEQUENCE (for co-rotation extruder)
- Set the temperature and extrude material at a low speed of 50 rpm for several minutes.
- Switch off the heaters for the die head, filter, and last barrel zone. Confirm the switch-off with an electrician.
- Remove the temperature sensor and heater from the last barrel.
- Loosen connecting bolts between the barrel and filter, then remove the filter and die head without disconnecting wires.
- Remove the plug block on the barrel.
- Remove the coupling cover and ring lock, then loosen the coupling.
- Remove the feeding hopper and use a screwdriver to move the screw out of the barrel. If difficult, use additional tools from the venting port.
- If still hard, remove screw tips and use special tools to pull screws with assistance.
- Place the screw on a wood stick, clean with a steel brush, and remove screw tips. Lightly hit the screw out of the shaft using a copper or aluminum stick. Use heat if necessary to melt material inside the shaft.
- Do not loosen the last element as it serves as a benchmark for refitting.
- Clean each screw section with fine sandpaper and install screws according to the drawing.
- Apply heat-resistant grease on shafts when installing screw elements.
- Insert one screw into the barrel for cleaning, then blow out dust with compressed air.
- Ensure the last screw element is about 10mm longer than the shaft, then tighten screw tips and adjustable pads.
- Align two parallel screws with a 90-degree center line and rotate together for three circles to ensure smooth operation.
- Fix the screw coupling, rotate the main motor coupling slightly, and ensure smooth rotation for eight circles.
- Secure the ring lock and coupling, ensuring all components are tightly fixed.
- Clean all sections of the die head and barrel.
- Reattach the filter, die head, heater, and temperature sensor.
- Switch on the heaters.
Catalog excerpts
CHANGE SCREW SEQUENCE (for co-rotation extruder) Set up the temperature, and extrude the material at low speed (50rpm) for several minutes.
Open the catalog to page 1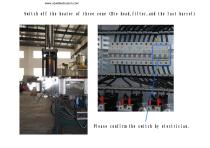
Switch off the heater of three zone(Die head,filter,and the last barrel) Please confirm the switch by electrician.
Open the catalog to page 2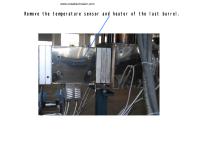
Remove the temperature sensor and heater of the last barrel.
Open the catalog to page 3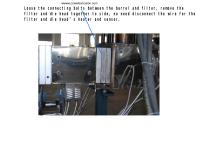
Loose the connecting bolts between the barrel and filter, remove the filter and die head together to side, no need disconnect the wire for the filter and die head’s heater and sensor.
Open the catalog to page 4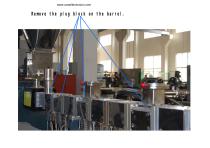
Remove the plug block on the barrel.
Open the catalog to page 5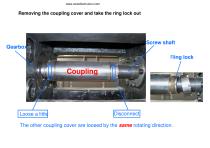
Removing the coupling cover and take the ring lock out Screw shaft Ring lock The other coupling cover are loosed by the same rotating direction.
Open the catalog to page 6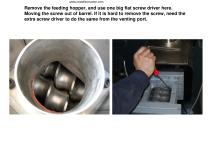
Remove the feeding hopper, and use one big flat screw driver here. Moving the screw out of barrel. If it is hard to remove the screw, need the extra screw driver to do the same from the venting port.
Open the catalog to page 7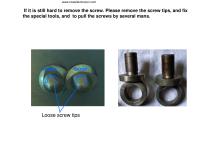
If it is still hard to remove the screw. Please remove the screw tips, and fix the special tools, and to pull the screws by several mans. Loose screw tips
Open the catalog to page 8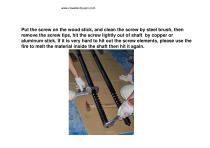
Put the screw on the wood stick, and clean the screw by steel brush, then remove the screw tips, hit the screw lightly out of shaft by copper or aluminum stick. If it is very hard to hit out the screw elements, please use the fire to melt the material inside the shaft then hit it again.
Open the catalog to page 9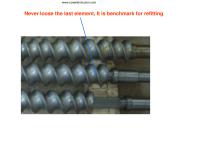
Never loose the last element, It is benchmark for refitting
Open the catalog to page 10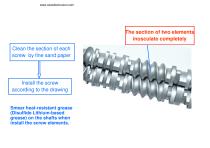
The section of two elements inosculate completely Clean the section of each screw by fine sand paper Install the screw according to the drawing Smear heat-resistant grease (Disulfide Lithium-based grease) on the shafts when install the screw elements.
Open the catalog to page 11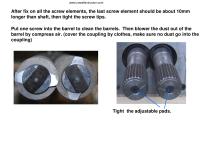
After fix on all the screw elements, the last screw element should be about 10mm longer than shaft, then tight the screw tips. Put one screw into the barrel to clean the barrels. Then blower the dust out of the barrel by compress air. (cover the coupling by clothes, make sure no dust go into the coupling) Tight the adjustable pads.
Open the catalog to page 12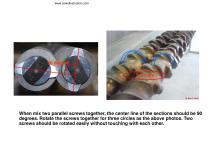
When mix two parallel screws together, the center line of the sections should be 90 degrees. Rotate the screws together for three circles as the above photos. Two screws should be rotated easily without touching with each other.
Open the catalog to page 13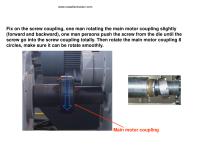
Fix on the screw coupling, one man rotating the main motor coupling slightly (forward and backward), one man persons push the screw from the die until the screw go into the screw coupling totally. Then rotate the main motor coupling 8 circles, make sure it can be rotate smoothly. Main motor coupling
Open the catalog to page 14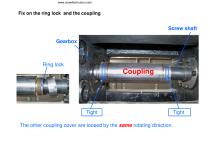
Fix on the ring lock and the coupling Screw shaft Gearbox Ring lock Tight The other coupling cover are loosed by the same rotating direction.
Open the catalog to page 15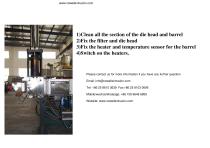
1)Clean all the section of the die head and barrel 2)Fix the filter and die head 3)Fix the heater and temperature sensor for the barrel 4)Switch on the heaters. Please contact us for more information if you have any further question Email: [email protected] Tel: +86 25 8615 3639 Fax:+86 25 8103 0096 Mobile/wechat/whatsapp: +86 159 9648 6859 Website: www.cowellextrusion.com
Open the catalog to page 16All Cowell(Nanjing)Extrusion Machinery Co.,Ltd. catalogs and technical brochures
 Catalog of COWELL EXTRUSION
12 Pages
- Dynamic agitator
- Batch agitator
- Feeder
- Homogenizer for the chemical industry
- Extrusion line
- Pelletizer
- Thermoplastic extrusion line
- Air dehumidifier
- Twin screw extruder
- Solid kneader
- High-speed blender
- Vibratory feeder
- Single screw extruder
- Kneader for the plastics industry
- Compact pelletizing system
- Panel extrusion line
- Multilayer extrusion line
- Compounding extruder
- Compact feeder