
- Catalogs
- Copley Controls
- Accelnet Module Development Kit

- Products
- Catalogs
- News & Trends
- Exhibitions
Accelnet Module Development Kit

Accelnet Module Development Kit
Overview
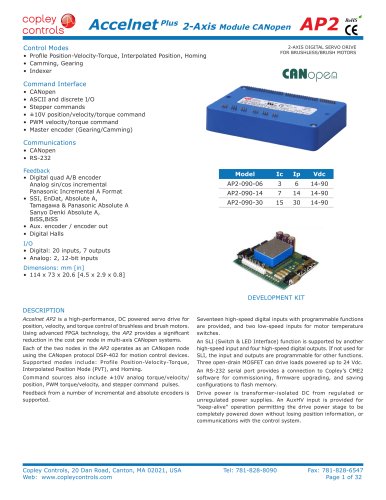
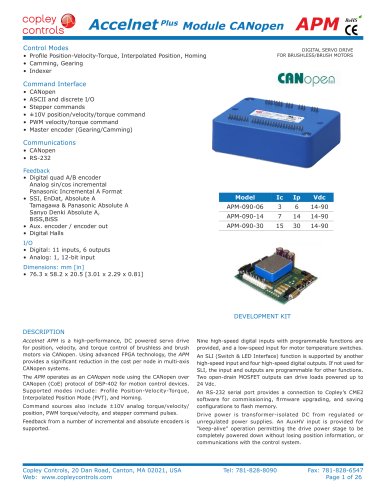
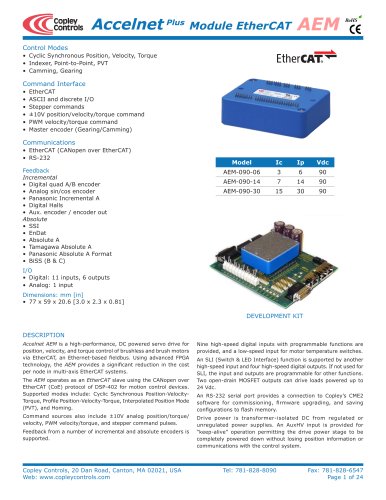
The Accelnet Development Kit by Copley Controls is designed to streamline the development, debugging, and testing of Accelnet modular servoamplifiers. It offers mechanical mounting, electrical connections, and configurable I/O interfaces to accelerate application development before transitioning designs to OEM PC boards.
Key Features
- Supports all Accelnet servoamplifier models.
- 16-position rotary switch for CANopen device address selection (recommended addresses 0x01 to 0x0F).
- Toggle switches simulate limit, capture, and home switch functions; jumpers allow disconnection for external I/O.
- Selectable 121 Ω termination resistors for encoder signals and CAN bus to reduce noise and signal ringing.
- Provision for mounting and connecting CANopen servoamplifiers.
- LED indicators for output status debugging, configurable via jumpers.
- RS-232 port for amplifier configuration using CME 2™ software.
CANopen Addressing and Communication
The rotary switch (SW6) sets CANopen addresses from 0x00 to 0x0F, with 0x00 reserved for network management. Addresses above 0x0F can be programmed via an offset in the amplifier. CAN connectors (J6 & J7) use Sub-D 9-pin male and female connectors compliant with CAN DS-102 physical layer, supporting daisy-chaining. Only CAN_H, CAN_L, and CAN_GND signals are used; CAN_GND is tied to circuit ground.
RS-232 Interface
The RS-232 port (J4) enables amplifier configuration in stand-alone mode or before CANopen network installation. It uses a 6-position modular connector with four active wires. A connector kit (SER-CK) is available for interfacing with standard 9-pin RS-232 ports.
Logic Inputs and Outputs
- Ten logic inputs: four dedicated to CAN address selection, five for switches or external equipment, and one for motor temperature sensor input.
- Inputs connect to onboard switches or external devices via jumpers (JP2 and JP3); only one jumper per input should be installed to avoid conflicts.
- Two logic outputs (FAULT and BRAKE) drive LEDs by default and can connect to external loads. Outputs are N-channel MOSFETs that sink current; flyback diodes are required when driving relays.
Encoder Connections
Supports single-ended and differential encoder signals. Pull-up resistors (10 kΩ) are provided on A, B, and X inputs. Jumper-selectable 121 Ω termination resistors are available for differential signals. Recommended wiring practices include twisted-pair and shielded cables for noise immunity. Encoder power is externally supplied at +5 Vdc, typically up to 250 mA, to support motor encoders and interpolator modules.
Power Supplies and Wiring
- Main amplifier power (+HV) is supplied via unregulated DC power supplies connected at J1, with clearly defined positive and negative terminals.
- HV wiring should be twisted and isolated from earth ground to minimize noise.
- Regenerative energy during motor deceleration must be managed with external storage capacitors or dissipaters to prevent amplifier shutdown.
- Switching power supplies require an isolating diode to block reverse current and an external storage capacitor for energy absorption.
- An auxiliary +24 Vdc supply can be connected at J8 to maintain amplifier power for communication and monitoring during emergency off (EMO) conditions when +HV is removed.
- Earth ground connection is recommended via J1-4 to equipment frame ground.
Connectors and Pinouts
- J1: Main power (+HV) and ground.
- J2: Motor encoder and Hall sensor signals.
- J3: Logic inputs and outputs for external device connection.
- J4: RS-232 communication port.
- J6 & J7: CANopen bus connectors (male and female Sub-D 9-pin).
- J8: Auxiliary +24 Vdc power input.
Installation and Configuration Recommendations
- Install CAN bus termination resistor jumper (JP4) only if the development kit is the last node on the CANopen network.
- Remove jumpers on JP6 to use logic inputs 7, 8, 9, or 10 as general-purpose inputs accessible via JP6 pins.
- Ensure only one jumper (JP2 or JP3) is installed per logic input to avoid conflicts.
- Use CME 2™ software via RS-232 for amplifier setup, including CAN address offset programming.
- Apply proper wiring techniques for encoder and power connections to minimize noise and signal degradation.
- Include flyback diodes when driving relays from logic outputs to protect the amplifier.
Ordering Information
The Accelnet Development Kit is ordered under part number 10-081-KDM. A connector kit (KC-KDM) is also available.
Summary
The Accelnet Development Kit offers a comprehensive platform for developing and debugging servo amplifier applications with flexible I/O, configurable CANopen addressing, and robust power and encoder interfacing. Correct jumper settings, wiring practices, and use of configuration software are essential for optimal operation and integration into CANopen networks.
Additional Document Overview
This document also includes software configuration details for the MOR-DC system, version 2.01, dated January 16, 2009, related to the KC-RES and 2EMC modules, focusing on accelerated development processes.
Specifications
Specifications are subject to change without prior notice, emphasizing the importance of consulting the latest documentation before implementation.
Key Components
- KC-RES: Core module or resource within the system.
- 2EMC: Subsystem or component related to configuration management or embedded control.
- MOR-DC Software Configuration: Main focus detailing configuration parameters and setup instructions.
Versioning and Updates
Version 2.01 indicates iterative improvements; the date stamp provides document currency reference.
Notes and Recommendations
Users should verify the latest specifications before configuration or deployment due to potential changes.
Catalog excerpts

Copley Controls, 20 Dan Road, Canton, MA 02021, USA Tel: 781-828-8090 Fax: 781-828-6547 Tech Support: E-mail: [email protected], Internet: http://www.copleycontrols.com Page 1 of 8 Accelnet Module ™ DEVELOPMENT KIT FEATURES • Works with all Accelnet Models • Develop & Debug Accelnet projects then transfer design to oem pc board. A 16-position rotary switch connects to Accelnet I/O pins for selection of the CANopen device address. Individual toggle switches are wired to other I/O pins to simulate limit, capture, and home switch functions. Jumpers permit these switches to be disconnected so that the I/O pins can connect to user equipment through the Sub-D connectors. Across-the-line encoder termination resistors can be switched in or out via another set of jumpers giving a 121Ù terminating impedance when high speed encoder signals could be susceptible to noise if wires were left open-circuit and subject to ringing. Another 121Ù resistor can be jumpered in or out as a terminator for the CAN bus signals if the development kit is the last device on a CANopen network. • Provides Mounting & Connections for Accelnet CANopen Servoamplifiers DESCRIPTION The Development Kit is a companion product to Copley Controls’ new Accelnet modular servoamplifiers. It provides mechanical mounting and electrical connections for the amplifier so users can quickly connect Accelnet and begin to develop applications. Euro style screw-terminal connector blocks simplify connections for power and motor phase-windings. Sub-D connectors use same pinouts as Accelus™ Panel amplifiers and carry motor encoder and Hall signals, and I/O signals. A connector is provided for +24V from an external power supply to power Accelnet as an auxiliary power supply. This enables Accelnet to “stay-alive” to monitor motor position and report back to the controller via the CANopen bus while +HV is removed for an E-stop condition. MODEL AMPLIFIER Ic Ip VDC MDK-180-01 ACM-055-18 ACM-090-09 ACM-180-09 ACM-180-18 ACM-180-20 6 3 3 6 10 18 9 9 18 20 55 90 180 180 180 Two led’s can be jumpered in or out to the Accelnet Out1 or Out2 pins. These give an easy read-out of the output status for debugging. Motor encoder signals are connected through from the motor connector to the signal connector eliminating split cables in cases where the Accelnet is operating in stand-alone mode as a torque amplifier. In these cases, the controller uses the encoder for position feedback, and Accelnet operates as a torque or force amplifier.
Open the catalog to page 1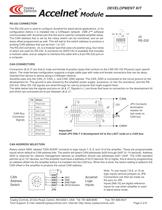
Copley Controls, 20 Dan Road, Canton, MA 02021, USA Tel: 781-828-8090 Fax: 781-828-6547 Tech Support: E-mail: [email protected], Internet: http://www.copleycontrols.com Page 2 of 8 Accelnet Module ™ DEVELOPMENT KIT CAN ADDRESS SELECTION Rotary switch SW6, labeled “CAN ADDR” connects to logic inputs 7, 8, 9, and 10 of the amplifier. These are programmable inputs which default to CAN address bits. The switch will select CAN addresses 0x00 through 0x0F (0~15 decimal). Address 0x00 is reserved for network management devices so amplifiers should use addresses 0x01~0x0F. The CAN standard permits...
Open the catalog to page 2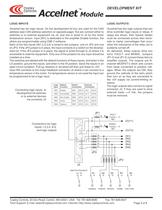
Copley Controls, 20 Dan Road, Canton, MA 02021, USA Tel: 781-828-8090 Fax: 781-828-6547 Tech Support: E-mail: [email protected], Internet: http://www.copleycontrols.com Page 3 of 8 Accelnet Module ™ DEVELOPMENT KIT Logic Input Default Function Switch Connection External Connection IN01 Enable SW1 JP2-A J3-5 JP3-A IN02 Fwd Enable SW2 JP2-B J3-17 JP3-B IN03 Rev Enable SW3 JP2-C J3-18 JP3-C IN04 Home SW4 JP2-D J3-4 JP3-D IN06 Capture SW5 JP2-E J3-3 JP3-E LOGIC OUTPUTS Accelnet has two logic outputs that can drive controller logic inputs or relays. If relays are driven, then flyback diodes...
Open the catalog to page 3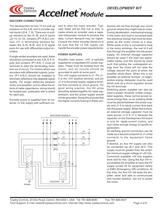
Copley Controls, 20 Dan Road, Canton, MA 02021, USA Tel: 781-828-8090 Fax: 781-828-6547 Tech Support: E-mail: [email protected], Internet: http://www.copleycontrols.com Page 4 of 8 Accelnet Module ™ DEVELOPMENT KIT ENCODER CONNECTIONS The development kit has 10 kÙ pull-up resistors on the A,B, and X encoder signal inputs (J2-8, 7, 6). There are no pullup resistors on the /A, /B, and /X inputs (J2-15,14,13). Jumpers JP1-A,B,C connect 121 Ù terminating resistors between the A-/A, B-/B, and X-/X signal pairs for use with differential-output encoders. If single-ended encoders are used, these...
Open the catalog to page 4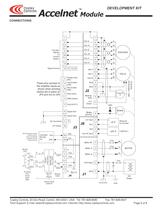
Copley Controls, 20 Dan Road, Canton, MA 02021, USA Tel: 781-828-8090 Fax: 781-828-6547 Tech Support: E-mail: [email protected], Internet: http://www.copleycontrols.com Page 5 of 8 Accelnet Module ™ DEVELOPMENT KIT CONNECTIONS Accelus Serial Cable Kit DC Power + - 5 4 J1 J3 9 /Motemp [IN5] Gnd 5 11 +5 V Output Hall W 4 Hall V 3 13 6 14 7 15 6 /Brake [OUT2] Gnd 10 W V U Motor W Motor V Motor U BRAKE +24V HALLS U V W ENCODER B /B X /X MOTOR +5 & Gnd for Encoder + Hall 15 Signal Gnd 24 16 Signal Gnd 25 11 J4 5 2 4 3 RxD TxD Gnd RJ-11 6 1 5 RS-232 signals connect to both J3 & J4. Only one...
Open the catalog to page 5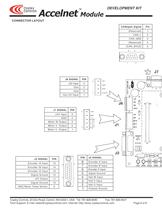
Copley Controls, 20 Dan Road, Canton, MA 02021, USA Tel: 781-828-8090 Fax: 781-828-6547 Tech Support: E-mail: [email protected], Internet: http://www.copleycontrols.com Page 6 of 8 Accelnet Module ™ DEVELOPMENT KIT CONNECTOR LAYOUT J1 SIGNAL PIN +HV Input 5 GND 4 Motor W Output 3 Motor V Output 2 Motor U Output 1 J8 SIGNAL PIN +5V Input 4 Gnd 3 Gnd 2 Aux HV Input 1 PIN J2 SIGNAL 8 Encoder A Input 7 Encoder B Input 6 Encoder X Input 5 Signal Ground 4 Hall W Input 3 Hall V Input 2 Hall U Input 1 Chassis Ground J2 SIGNAL PIN Encoder /A Input 15 Encoder /B Input 14 Encoder /X Input 13 Signal...
Open the catalog to page 6
Copley Controls, 20 Dan Road, Canton, MA 02021, USA Tel: 781-828-8090 Fax: 781-828-6547 Tech Support: E-mail: [email protected], Internet: http://www.copleycontrols.com Page 7 of 8 Accelnet Module ™ DEVELOPMENT KIT J3 SIGNAL PIN Chassis Ground 1 No Connection 2 Capture [IN6] 3 Home [IN4] 4 Enable Input [IN1] 5 Brake Output [OUT2] 6 Encoder X Output 7 Encoder B Output 8 Encoder A Output 9 Signal Ground 10 Fault Output [OUT1] 11 Signal Ground 12 Signal Ground 13 PIN J3 SIGNAL 14 No Connection 15 Signal Ground 16 Signal Ground 17 [IN2] Forward Enable Input 18 [IN3] Reverse Enable Input 19...
Open the catalog to page 7All Copley Controls catalogs and technical brochures
 XenusPLUS Compact EtherCAT XEC
30 Pages
 XenusPLUS Compact CANopen XPC
30 Pages
 Control Networks
8 Pages
 R-Series Guide
8 Pages
 Selection Guide
24 Pages
 Xenus R10
30 Pages
 Accelnet R23
24 Pages
 Accelnet R22
22 Pages
 Accelnet R21
24 Pages
 Accelnet R20
24 Pages
 Accelus Card Development Kit
6 Pages
 Accelus Card
8 Pages
 ASP-X2 Accelus Panel Dual
10 Pages
 Junus
Junus10 Pages
 CAN-PCI-02
2 Pages
 CAN-IPM-01
8 Pages
 Bantam
18 Pages
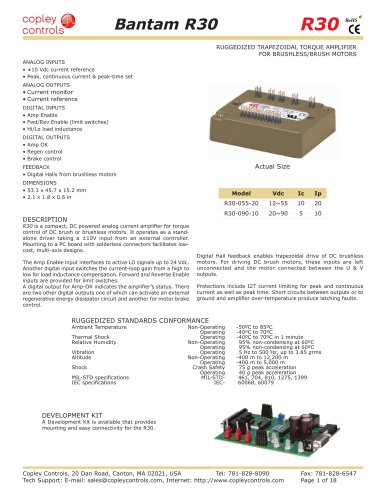 Bantam R30
18 Pages
 503
5036 Pages
 Power Supply Subsystem
8 Pages
 Shunt Regulator
2 Pages
 Xenus PLUS 2-Axis CANopen
34 Pages
 Xenus RoHS PLUS CANopen
28 Pages
 Xenus PLUS 2-Axis EtherCAT
34 Pages
 Xenus PLUS EtherCAT
28 Pages
 Xenus Edge Filter
16 Pages
 Regen Resistors
24 Pages
 Xenus Micro
24 Pages
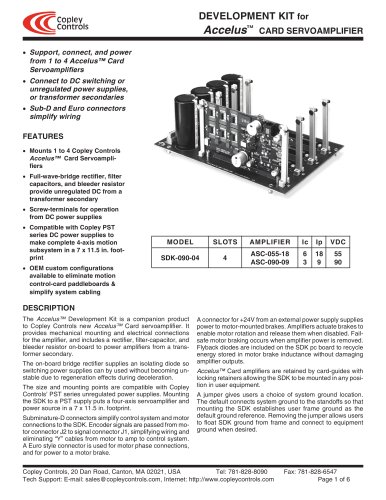 Accelus Card Development Kit
6 Pages
 Accelus Card
8 Pages
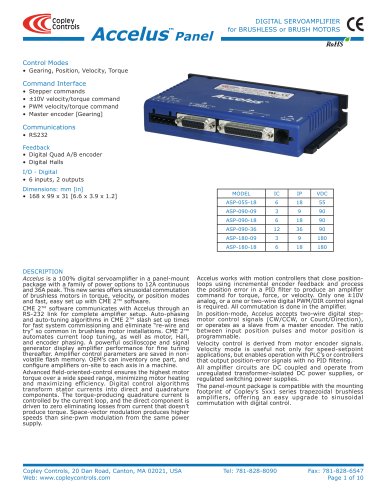 Accelus Panel
10 Pages
 Xenus XTL
30 Pages
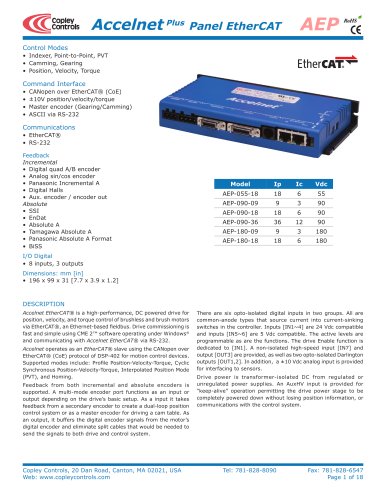 Accelnet Plus EtherCAT Panel
18 Pages
 Accelnet Micro Module and Kit
24 Pages
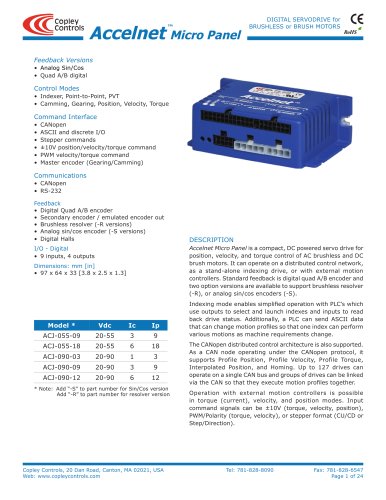 Accelnet Micro Panel
24 Pages
 Accelnet Module
14 Pages
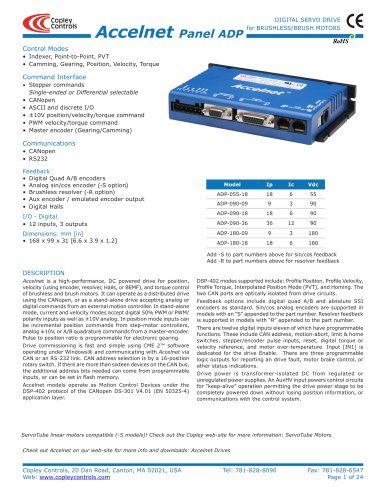 Accelnet Panel ADP
24 Pages





- Digital I/O
- Analog I/O
- Servo-amplifier
- Motor controller
- DC servo-amplifier
- Fieldbus servo-drive
- DC motor controller
- AC servo-amplifier
- Brushless servo-amplifier
- Stepper motor controller
- Communication interface card
- EtherCAT servo-amplifier
- Compact servo-amplifier
- CANopen servo-amplifier
- Digital servo-amplifier
- Stepper servo drive
- Industrial interface expansion card
- CANopen I/O
- Brushless motor control
- Digital input motor controller