- Catalogs
- CERTUS INVESTMENT POWDER
- FERRO-VEST
FERRO-VEST
1 /1Page

FERRO-VEST
1 /1Page
Catalog excerpts
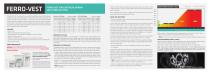
FERRO VEST FOR CASTING PLATINUM AND STAINLESS STEEL FERRO-VEST FERRO-VEST VHT is a superior two-part, high temperature investment developed to give premium results casting platinum, palladium & stainless steel alloys and metals that melt in excess of 1500°C. -2732°. Ferro-Vest VHT investment powder supplies superior, consistent results and unlike other two- part high temperature investments on the market, comes complete with special proprietary additives that eliminate air bubbles and will provide a far smoother cast surface that requires less finishing than with other brands. FEATURES • Easy to use • Mixes to a consistent, easy to pour slurry • Special additives to eliminates air bubbles on the cast surface • Lower rise under vacuum • Provides a smoother cast surface that far requires less finishing • Easier to remove than phosphate water mix and other two-part investments • Saves time & money BINDER PREPARATION Ferro-vest V.H.T. binder is concentrated and must be diluted before use. Warning: Always take the necessary safety precautions and wear protective glasses and gloves as the binder is acidic. It is important to always add the binder to the water. The binder is diluted at the ratio of 1 part binder to 19 parts distilled water by volume. To prepare, carefully add the binder concentrate to the water. If measuring the binder by weight, use the chart below: Ferro Vest comes in 22.5Kg. Plastic lined Poly Sacks or Ergonomic 22.5Kg. Plastic Drums package or 45Kg. Heavy duty reusable Plastic Drums for containment of used investment. Ferro-Vest VHT comes complete with enough binder concentrate to process entire quantity of powder. For 6 in xB.5 in Flasks Volume or Weight 8 X 3.5 inch Flasks Volume or Weight PREPARING THE FLASK Cut a piece of non-asbestos, or cellulose paper Vi" (1.2700 cm.) less that the height of the flask used. Roll the paper to form a cylinder and inset into the flask leaving an equal amount of space open at the top and bottom. Add a tape, or rubber removable extension to the top of the flask to keep the investment from over flowing the flask during vacuuming. PREPARING THE SPRUE BASE To prepare the base, there are two methods that can be used. A rubber sprue base with holes cut into the rubber around the button area, or you may use a non-asbestos absorbent paper only base with a wax cone attached for which to attach the sprue rod. a. Use a rubber sprue base which has been modified with large holes cut around the middle to allow the binder to be wicked out and removed. Then use a coffee filter, or piece of strong, absorbent paper with a hole in the center around the rubber cone to form the permeable seal to the base. Alternatively, remove the rubber cone and use a wax sprue with a wax cone attached to the paper, b. Use 2-3 automatic drip type coffee filters together only as the base. Cut a hole approx... Vi" in diameter into the center of the filter. Next, cut out a Vi hole into the center of the filter, center and wax on and seal a wax sprue button that is of a normal size. Note: (Although coffee filters work quite well, any good permeable, or cellulose paper may be used for the base). Place the metal flask around the tree and rubber base as normally. If using a paper base only, use thick, strong rubber bands to attach and hold the paper base to the flask. Use a masking tape extension, or rubber collar around the top of the flask to avoid spillover during vacuuming of the flask. MIXING THE INVESTMENT •The recommended powderto diluted binder solution is 100 parts powderto 28 - 30 parts solution by volume. • Use a heavy duty, high torque commercial mixer such as a Hobart, or Kitchen Aid to mix the investment. Add the require volume of solution to the bowl. • Slowly add the powder a little at a time to the mixing bowl while the mixer is running at a slow speed. The mix slurry will appear very thick at first, then will thin down with mixing, this is normal. After all the powder has been added, increase the speed to a medium setting and mix for an additional 10-20 minutes, or until the slurry appears smooth and creamy to the eye. • Place the mixed slurry bowl in a vacuum chamber and vacuum on full until the slurry rises, breaks and begins to boil. Continue vacuum for 1.5 - 2 minutes. • Pour investment slurry gently down the inside of the flask. Avoid directly hitting the patterns. Fill to just below the top of the flask. Use a removable flask extender such as masking tape. • Place the filled flasks in a vacuum chamber and vacuum for an additional 1.5 - 2 minutes. • After the mixing and vacuuming cycle is complete, place the flasks onto a 3" (7.6200cm.) bed of Ferro-Vest powder. A highly absorbent paper may also be used. Leave flasks undisturbed until the slurry becomes gelled and stiff. The time required to cure the slurry will depend on the size of flasks. The time can vary from 2 -3 hours for a four inch high flask, up to overnight for flasks that are 8" (20.320cm) in height. Note: The gelled, stiff investment will sink approx. 1 cm down from the top so always allow enough slurry to cover the top of the wax tree by at least 3 cm. • Allow two additional hours after the flask appears hard before carefully removing the rubber base and the paper or filter material. Reduce oven to the required casting temperature and hold for at least 1 hour, to stabilize the temperature throughout the flask before casting. Note: More time may be required for larger size flasks to stabilize temperature before casting. SAME DAY BURNOUT (SMALL FLASKS) Load the flask into a pilot, or room temperature oven. Set and raise temperature for 93C. (200F.) ramp up temperature 10-15 minutes. Hold temp, of 93C. for 2 hours. Next ramp up temp, to 175C. (350F.) over one (1) hour. Hold 175C. for one (1) hour. Next, ramp up oven to 870C. (1600F.) over a period of 4.5 - 5 hours. Hold temperature at 870C. until all pattern and sprue residue has been completely removed. The investment will appear completely white in color when a complete burnout has been achieved. The flask is now ready for casting.
Open the catalog to page 1All CERTUS INVESTMENT POWDER catalogs and technical brochures
 ALL SEASONS
1 Page
 ROYAL CAST
1 Page
 OPTIMA
1 Page
 SPARKLE
1 Page
 SIGMA
SIGMA1 Page
 UNICAST
1 Page
 ORO
ORO1 Page