 Website:
CAPACITEC
Group: Capacitec Us
Qualifying Capacitive Sensing Hole Measurement System Technology for Performing Gage R&R Studies
10Pages
Catalog excerpts

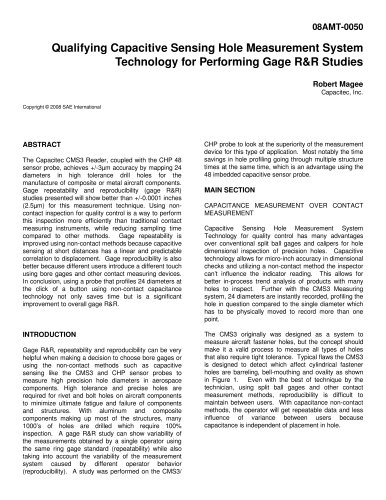
08AMT-0050 Qualifying Capacitive Sensing Hole Measurement System Technology for Performing Gage R&R Studies Robert Magee Capacitec, Inc. Copyright © 2008 SAE International ABSTRACT The Capacitec CMS3 Reader, coupled with the CHP 48 sensor probe, achieves +/-3µm accuracy by mapping 24 diameters in high tolerance drill holes for the manufacture of composite or metal aircraft components. Gage repeatability and reproducibility (gage R&R) studies presented will show better than +/-0.0001 inches (2.5µm) for this measurement technique. Using noncontact inspection for quality control is a way to perform this inspection more efficiently than traditional contact measuring instruments, while reducing sampling time compared to other methods. Gage repeatability is improved using non-contact methods because capacitive sensing at short distances has a linear and predictable correlation to displacement. Gage reproducibility is also better because different users introduce a different touch using bore gages and other contact measuring devices. In conclusion, using a probe that profiles 24 diameters at the click of a button using non-contact capacitance technology not only saves time but is a significant improvement to overall gage R&R. INTRODUCTION Gage R&R, repeatability and reproducibility can be very helpful when making a decision to choose bore gages or using the non-contact methods such as capacitive sensing like the CMS3 and CHP sensor probes to measure high precision hole diameters in aerospace components. High tolerance and precise holes are required for rivet and bolt holes on aircraft components to minimize ultimate fatigue and failure of components and structures. With aluminum and composite components making up most of the structures, many 1000’s of holes are drilled which require 100% inspection. A gage R&R study can show variability of the measurements obtained by a single operator using the same ring gage standard (repeatability) while also taking into account the variability of the measurement system caused by different operator behavior (reproducibility). A study was performed on the CMS3/ CHP probe to look at the superiority of the measurement device for this type of application. Most notably the time savings in hole profiling going through multiple structure times at the same time, which is an advantage using the 48 imbedded capacitive sensor probe. MAIN SECTION CAPACITANCE MEASUREMENT OVER CONTACT MEASUREMENT Capacitive Sensing Hole Measurement System Technology for quality control has many advantages over conventional split ball gages and calipers for hole dimensional inspection of precision holes. Capacitive technology allows for micro-inch accuracy in dimensional checks and utilizing a non-contact method the inspector can’t influence the indicator reading. This allows for better in-process trend analysis of products with many holes to inspect. Further with the CMS3 Measuring system, 24 diameters are instantly recorded, profiling the hole in question compared to the single diameter which has to be physically moved to record more than one point. The CMS3 originally was designed as a system to measure aircraft fastener holes, but the concept should make it a valid process to measure all types of holes that also require tight tolerance. Typical flaws the CMS3 is designed to detect which affect cylindrical fastener holes are barreling, bell-mouthing and ovality as shown in Figure 1. Even with the best of technique by the technician, using split ball gages and other contact measurement methods, reproducibility is difficult to maintain between users. With capacitance non-contact methods, the operator will get repeatable data and less influence of variance between users because capacitance is independent of placement in hole.
Open the catalog to page 1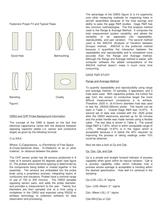
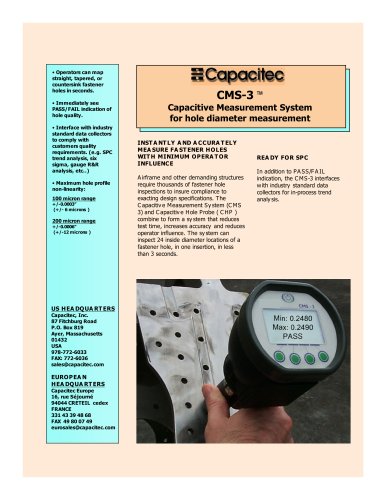
Fasteners Proper Fit and Typical Flaws Good Hole Belmouthing The advantage of the CMS3 (figure 3) is it’s superiority over other measuring methods for inspecting holes in aircraft assemblies because of the time savings and ability to pass the gage R&R studies. Gage R&R has two common methodologies. The first analysis method used is the Range & Average Method. It computes the total measurement system variability, and allows the variability to be separated into repeatability, reproducibility, and part variation. The second method used is the ANOVA (Analysis of Variation between Groups)...
Open the catalog to page 2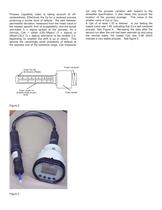
Process Capability index is taking account of offcenteredness. Effectively the Cp for a centered process producing a similar level of defects - the ratio between permissible deviation, measured from the mean value to the nearest specific limit of acceptability, and the actual one-sided 3 x sigma spread of the process. As a formula, Cpk = either (USL-Mean)/ (3 x sigma) or (Mean-LSL)/ (3 x sigma) whichever is the smaller (i.e. depending on whether the shift is up or down). This ignores the vanishingly small probability of defects at the opposite end of the tolerance range. Cpk measures Figure...
Open the catalog to page 3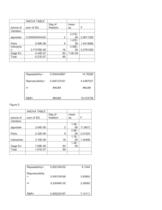
ANOVA TABLE Deg of freedom mean sq source of Variation sum of SQ appraiser 0.000000044242 2 Parts Interactio n Gage Err Total 9.59E-08 9 3.71578E-08 4.44E-07 6.21E-07 18 60 89 2.21E08 1.07E08 2.06E09 7.4E-09 F 2.9911358 1.4413896 0.2791299 Repeatability= 0.000442887 14.76289 Reproducibility= 0.000133161 4.4387027 I= #NUM! #NUM! R&R= #NUM! 15.415739 Figure 5. ANOVA TABLE source of Variation sum of SQ Deg of freedom mean sq appraiser 3.04E-08 2 Parts 2.32E-08 9 Interaction 3.10E-08 18 Gage Err Total 7.69E-08 1.61E-07 60 89 1.5E08 2.6E09 1.7E09 1.3E09 F 11.8673 2.01224 1.34499 Repeatability=...
Open the catalog to page 8
Figure 6. Two Way ANOVA Method Using the Analysis of variance method (ANOVA) is the most accurate for determining Gage R&R for the CMS3. The ANOVA method also allows the variability of the interaction between appraisers and parts to be looked at. The ANOVA method should be similar in results but will be slightly different. The first Gage R&R with the ANOVA method the result was 15.5% which is slightly higher than the result from using the range and average method. When the data was taken after the ½ hour warm up time and added remote probe handle the result was 7.14% which is slightly...
Open the catalog to page 9All CAPACITEC catalogs and technical brochures
-
508-SW SWITCHING AMPLIFIER
2 Pages
-
520 AMPLIFIER
4 Pages
-
HPC-500
5 Pages
-
HPC-375
5 Pages
-
HPC-150
5 Pages
-
HPC-75
5 Pages
-
HPT-40
3 Pages
-
HPB-500
7 Pages
-
HPB-150
7 Pages
-
HPB-75
7 Pages
-
HPB-40
4 Pages
-
HPC-500
4 Pages
-
HPC-375
4 Pages
-
HPC-150
4 Pages
-
HPC-75
4 Pages
-
HPC-40
3 Pages
-
GapmanGen3 Brochure
4 Pages
-
Coater Bargrafx Software
5 Pages
-
GAPMANGEN3
4 Pages
-
Aerospace
8 Pages
-
Capteura® 200 Series System
4 Pages
-
Slot Die Coater Brochure
4 Pages
Archived catalogs
-
Disc Brake
4 Pages
-
Standard products
12 Pages

