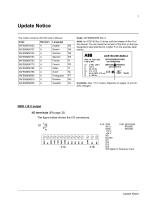
Update Notice: The manual includes a new +10 V output for I/O terminals, with updated diagrams on pages 14 and 32. This update is valid for ACS150 Rev C drives until the release of Rev B of the manual.
Safety Instructions: Emphasizes the importance of following safety instructions to prevent injury or equipment damage. Only qualified electricians should install and maintain the drive, ensuring no voltage is present before working on it. The drive is not field repairable.
Installation and Maintenance: Provides detailed instructions for installation and maintenance, including ensuring sufficient cooling and preventing dust from entering the drive during installation.
Operation and Start-up: Before starting the drive, ensure the motor and equipment are suitable for the speed range. Avoid using automatic fault reset functions in dangerous situations and do not control the motor with an AC contactor.
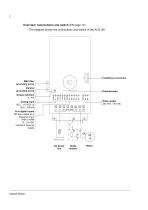
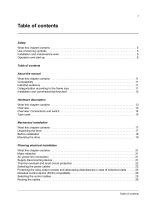
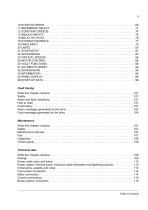
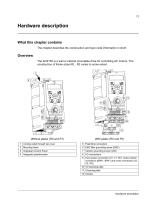
Hardware Description: Includes an overview of connections and switches, detailing the type code and mechanical installation procedures.
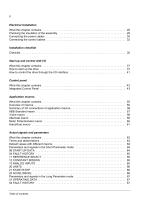
Electrical Installation: Instructions for checking insulation, connecting power and control cables, and an installation checklist are provided.
Control and Start-up: Explains how to start up the drive and control it through the I/O interface, including using the integrated control panel.
Application Macros: Describes various macros such as ABB Standard, 3-wire, Alternate, Motor Potentiometer, and Hand/Auto macros, with a summary of I/O connections.
Parameters and Signals: Details parameters and signals in both Short and Long Parameter modes, including start-up data, fault history, reference select, constant speeds, and analog inputs.
Technical Data and Specifications: Provides detailed technical data and specifications for electrical installations, focusing on motor power ratings, AC power line connections, and safety requirements. Emphasizes the need for a fixed connection to the AC power line due to high leakage current, as per IEC 61800-5-1 standards.
Supply Disconnecting Device: A hand-operated input disconnecting device is required between the AC power source and the drive. In Europe, it must comply with EN 60204-1 standards, using specific types of disconnectors or circuit breakers. In other regions, local safety regulations apply.
Thermal Overload and Short-Circuit Protection: The drive includes built-in protection against thermal overload and short-circuits, provided cables are dimensioned according to the drive's nominal current. Additional protection is necessary for multiple motor connections.
Input Power Cable Protection: Fuses must protect the input cable, sized according to local regulations and the drive's rated current. Specifies the use of IEC gG or UL type T fuses and highlights the importance of fuse operating time being under 0.5 seconds.
Power Cable Selection: Cables must be dimensioned according to local regulations, capable of carrying the drive load current, and rated for at least 70°C. Symmetrical shielded motor cables are recommended to meet EMC requirements and reduce electromagnetic emissions.
Motor Cable Shielding: The shield must have a conductivity of at least 1/10 of the phase conductor to suppress radio-frequency emissions effectively. Provides guidelines for US-specific requirements and conduit usage.
Relay Output Protection: Inductive loads should be equipped with noise attenuating circuits to minimize EMC emissions. Protective components should be installed close to the inductive load.
Residual Current Device Compatibility: Different ACS150 drive models are compatible with specific types of residual current devices, with additional protective measures recommended for certain models.
Control Cable Selection: Analog control cables must be shielded, with specific recommendations for cable types and routing to minimize interference. Advises on separating different voltage signals and proper grounding techniques.
Electrical Installation Procedures: The installation process must be conducted by qualified electricians, following safety instructions. Outlines steps for checking insulation, connecting power cables, and grounding requirements.
Connection Diagrams and Procedures: Detailed diagrams and step-by-step procedures are provided for connecting power and control cables, ensuring proper grounding and compliance with safety standards.
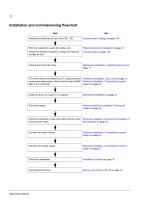
Electrical Installation: Outlines the procedures for the electrical installation of a drive system. Emphasizes the importance of checking both mechanical and electrical installations before start-up, with a checklist provided to ensure all conditions are met. Key points include ensuring ambient operating conditions are suitable, the drive is securely mounted, cooling air flows freely, and the motor and equipment are ready for start-up. For electrical installation, it is crucial to disconnect the internal EMC filter for ungrounded systems, reform capacitors if stored over two years, and ensure proper grounding and voltage matching.
Start-up and Control with I/O: Provides instructions for starting up the drive and controlling the motor through the I/O interface. Includes safety precautions, such as ensuring the start-up is performed by a qualified electrician and checking installations against the checklist. The procedure involves applying input power, selecting application macros, entering motor data, and setting parameters for speed and direction. Details how to change the motor's direction and set acceleration/deceleration times.
Control Panel: Describes the functions and operations of the Integrated Control Panel used with the ACS150 drive. Explains the use of various keys and display fields for controlling, monitoring, and changing settings. The panel allows switching between local and remote control, starting/stopping the drive, changing motor direction, and setting frequency references. Provides a detailed guide on navigating through different panel modes and performing common tasks.
Control Modes and Operations: Outlines the procedures for switching between local and remote control modes of a drive system. In local control, the potentiometer sets the reference, while in remote control, external signals are used. The transition between these modes can be smooth or abrupt depending on the difference between local and remote references.
Frequency Reference Setting: The frequency reference can be set using the integrated potentiometer or keypad, depending on the parameter settings. Provides detailed steps for adjusting the reference value in both local and remote control modes.
Output Mode Monitoring: In Output mode, users can monitor up to three operating data signals. Explains how to browse and select these signals for monitoring, including setting display formats and units.
Reference Mode Operations: Reference mode allows users to view and set the frequency reference, and switch control modes. Details the steps for adjusting the reference value using either the potentiometer or keypad.
Parameter Modes: There are Short and Long Parameter modes for viewing and changing parameter values. Provides instructions for selecting and modifying parameters, including reverting to default values.
Changed Parameters Mode: This mode lists parameters that have been altered from their default values. Users can view and edit these parameters, with instructions provided for saving or canceling changes.
Application Macros: Describes various application macros, which are preprogrammed parameter sets for different speed control applications. Each macro is suited for specific applications, such as ordinary speed control, alternate speed control, and hand/auto switching.
Summary of I/O Connections: A table summarizes the default I/O connections for all application macros, highlighting the control connections for digital and analog inputs/outputs.
Overview: Provides detailed technical specifications and configurations for ABB's motor control systems, focusing on various application macros and their default I/O connections. Includes information on parameter settings, signal definitions, and operational modes for different control scenarios.
1. Application Macros:- ABB Standard Macro: Default configuration for general-purpose I/O with three constant speeds. Parameters are set to default values as specified in the document.
- 3-Wire Macro: Utilized for control via momentary push-buttons, offering three constant speeds. Activation requires setting parameter 9902 to 2.
- Alternate Macro: Configures I/O for alternating drive rotation direction. Enabled by setting parameter 9902 to 3.
- Motor Potentiometer Macro: Provides a cost-effective interface for PLCs using digital signals to vary drive speed. Enabled by setting parameter 9902 to 4.
- Hand/Auto Macro: Allows switching between two external control devices. Enabled by setting parameter 9902 to 5.
2. Default I/O Connections: Each macro has specific default I/O connections, detailed in the document, including signal cable shielding, frequency reference inputs, auxiliary voltage outputs, and digital input configurations.
3. Parameters and Signals:- Actual Signals: These are signals measured or calculated by the drive, which can be monitored but not adjusted by the user.
- Parameter Settings: User-adjustable instructions for drive operation, categorized into groups for easy reference.
- Default Values: When changing application macros, parameter values reset to defaults specific to each macro.
4. Operational Modes: Outlines different operational modes, including Short and Long Parameter modes, detailing how to select and adjust parameters for optimal drive performance.
5. Fault and Signal Monitoring: Includes sections on fault history and signal monitoring, providing insights into troubleshooting and performance tracking.
6. Technical Specifications: Detailed specifications for motor voltage, current, frequency, and other critical parameters are provided to ensure proper setup and operation.
Specifications and Parameters:- Process Variables: Defined by parameter group 34 PANEL DISPLAY, including variables 1, 2, and 3.
- Elapsed Time and Counters: Includes RUN TIME, MWH COUNTER, and REVOLUTION CNTR, with specific reset conditions.
- Drive On Time: Measured in days and 2-second ticks, non-resettable.
- Digital Inputs and Outputs: Status of digital inputs (DI 1-5) and relay output (RO).
Fault History:- Latest Fault: Includes fault code, time, motor speed, frequency, voltage, current, torque, and drive status at the time of the fault.
- Previous Faults: Fault codes for the 2nd and 3rd latest faults.
Control Commands:- Start/Stop/Direction: External control sources defined for EXT1 and EXT2, with various digital input configurations.
- Jogging Function: Activated by digital inputs, overrides constant speeds, and requires specific ramp shape settings.
Reference Selection:- Panel and External References: Various sources including analog input, potentiometer, and frequency input, with scaling options.
- Constant Speeds: Seven positive constant speeds selectable via digital inputs, overriding external speed references.
Constant Speed Activation: Parameters 1202 to 1208 define constant speeds activated through inverted digital inputs DI1 to DI5. Each input has a specific speed associated with it, and the activation is determined by the state of these inputs (0 = active, 1 = inactive). Provides a detailed table showing the combinations of DI inputs and the corresponding constant speed operations.
Analog Input Configuration: Parameters 1301 to 1303 define the processing of analog input signals. The minimum and maximum values for AI1 are specified in terms of percentage of the full signal range, with examples provided for clarity. A filter time constant is also defined to manage signal changes.
Relay Outputs: Relay outputs are used to indicate drive status, with various conditions such as fault, alarm, and motor direction being monitored. Parameters 1401 to 1405 detail the selection and delay settings for relay outputs.
System Controls: Parameters 1601 to 1611 cover system controls including run enable signals, parameter locks, fault reset sources, and local control mode locks. Specifies how these controls are activated and managed.
Frequency Input Processing: Parameters 1801 to 1803 define the processing of frequency input signals, including minimum and maximum input values and filter time constants.
Drive Operation Limits: Parameters 2003 to 2008 set the operational limits for the drive, including maximum current, overvoltage and undervoltage control, and frequency limits. These parameters ensure safe and efficient drive operation.
Start and Stop Modes: Parameter 2101 outlines the motor starting methods, including automatic start, DC magnetization, and torque boost options. Each method has specific conditions and warnings associated with its use.
Motor Thermal Protection: The drive calculates motor temperature based on assumptions such as ambient temperature and motor load curve. It can trigger a fault or alarm if the motor temperature exceeds certain thresholds. The thermal time constant is defined by parameter 3006, and the load curve is adjusted using parameters 3007, 3008, and 3009.
Stall Function: The drive can react to motor stall conditions by tripping a fault or generating an alarm. Parameters 3010 to 3012 define the stall function, frequency limit, and time.
Underload Function: This function activates if motor torque falls below a defined curve and the output frequency is above a certain level. Parameters 3013 to 3015 manage this function.
Supply Phase Loss: The drive can trip a fault or generate an alarm when excessive DC voltage ripple is detected. Parameter 3016 defines the reaction to supply phase loss.
Earth Fault: The drive can trip a fault when an earth fault is detected in the motor or cable. This is controlled by parameter 3017.
Automatic Reset: Parameters 3101 to 3108 manage automatic fault resets for various conditions, including overcurrent, overvoltage, and undervoltage.
Signal Supervision: The drive monitors user-selectable variables to ensure they remain within defined limits. Parameters 3201 to 3209 define the supervision settings.
Information and Display: Parameters 3301 to 3405 provide information on firmware versions, drive ratings, and control panel display settings.
Overview: Provides detailed technical specifications and operational guidelines for configuring and troubleshooting a drive system. Includes parameter settings, unit selections, fault tracing, and alarm messages.
Parameter Settings: Outlines various parameters for signal display and control, such as SIGNAL1, SIGNAL2, and SIGNAL3 PARAM, which define the signals to be displayed on the control panel. Parameters like OUTPUT1 MIN/MAX and OUTPUT2 MIN/MAX set the minimum and maximum display values for these signals. Specifies unit selections for signals, including options like Ampere, Volt, Hertz, and Celsius.
Application Macros: Describes different application macros for motor setup, such as ABB STANDARD for constant speed applications, 3-WIRE for constant speed applications, and MOTOR POT for digital signal speed control. These macros help in customizing the drive's operation based on specific application needs.
Motor Specifications: Key motor parameters include MOTOR NOM VOLT (nominal motor voltage), MOTOR NOM CURR (nominal motor current), MOTOR NOM FREQ (nominal motor frequency), and MOTOR NOM SPEED (nominal motor speed). These parameters must match the motor's rating plate to ensure proper operation.
Fault Tracing: Provides a comprehensive list of alarm and fault messages, their causes, and corrective actions. Common issues include overcurrent, overvoltage, undervoltage, and motor temperature alarms. Advises on checking motor load, acceleration time, and ambient conditions to resolve these issues.
Safety and Maintenance: Only qualified electricians should maintain the drive. Emphasizes safety precautions and provides instructions for resetting the drive after a fault. Details how to access fault history and interpret alarm messages to diagnose and correct issues.
Fault Codes and Troubleshooting: Several fault codes are listed, each with a specific cause and recommended action. For example, F0021 indicates a drive internal fault due to current measurement being out of range, and the recommended action is to contact an ABB representative. Other faults, such as F0022, suggest checking input power line fuses and supply imbalance.
Maintenance Instructions: Outlines preventive maintenance instructions, emphasizing safety precautions. Maintenance intervals are specified, such as fan replacement every five years and capacitor reforming every two years if stored. Detailed steps for fan replacement are provided, including disconnecting power and replacing the fan holder.
Technical Specifications: The technical data section includes specifications for current and power ratings, cooling requirements, and derating factors. Details the input and output voltage ranges, current ratings, and power limits. Derating factors are provided for temperature, altitude, and switching frequency.
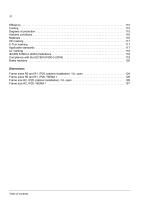
Cooling and Heat Dissipation: Cooling air flow requirements are specified, with heat dissipation values for different drive types. Provides details on the main and control circuit heat dissipation and the necessary air flow for cooling.
Power Cable and Fuse Specifications: Cable dimensions and fuse types for short-circuit protection are listed. Advises on the maximum fuse currents and the importance of not exceeding specified fuse sizes.
Control Connections: Details on control connections include specifications for analog and digital inputs, relay outputs, and brake resistor connections. Specifies voltage ranges, input impedance, and maximum switching currents.
Specifications: Outlines the technical specifications for ABB drives, including compliance with standards such as IEC 60439-1, UL 508C, and IEC/EN 61800-3. The drives have a rated conditional short-circuit current of 100 kA and an efficiency of approximately 95 to 98% at nominal power levels. Cooling methods vary by model, with natural convection or internal fan cooling.
Environmental Conditions: The drives are designed for use in heated indoor environments with specific ambient conditions. They can operate at altitudes up to 2000 m and temperatures between -10 to +50°C. Humidity should not exceed 95% without condensation, and contamination levels must adhere to IEC standards.
Protection and Safety: The drives offer IP20 protection and must be installed in a cabinet for shielding. Compliance with CE and UL standards is required, and specific installation guidelines are provided for safety, including the use of emergency-stop devices and supply disconnecting devices.
EMC Compliance: The drives comply with EMC standards for both first and second environments, with specific installation instructions to minimize electromagnetic interference. Drives of category C2 and C3 have defined usage environments and emission limits.
Brake Resistors: Brake resistors are integral to the drive's braking system, with selection criteria based on maximum braking power and resistance calculations. Installation guidelines emphasize safety, including mandatory circuit protection and resistor placement.
Dimensions and Installation: Dimensional drawings for various frame sizes (R0, R1, R2) are provided, detailing installation requirements for both IP20 and NEMA 1 enclosures. Proper installation ensures optimal performance and safety compliance.
Recycling and Disposal: Highlights the importance of recycling drive components to conserve resources. Specific instructions are provided for handling hazardous materials like electrolytic capacitors and printed circuit boards.
Contact Information: For further assistance, contact details for ABB offices in Finland, the USA, and the UK are provided.


 Brox General Product Catalogue
 GENERAL PRODUCT CATALOG
 boiler and burner company
 boiler and burner company
 Combustion System Catalogue
 Solution for any size of burner
 gas safety & sontrol solutions
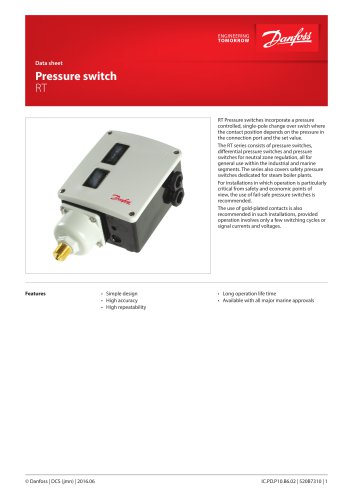 Pressure switch RT
 NATURAL GAS BURNERS
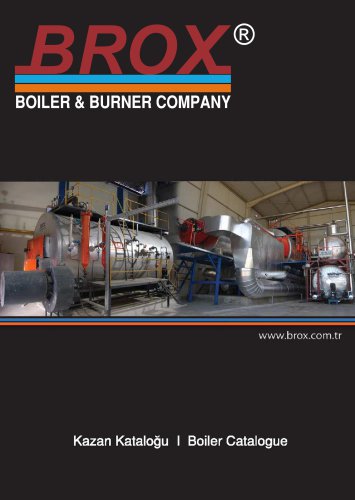 BOILER CATALOGUE
 BROX Burners Catalogue
 ACS350
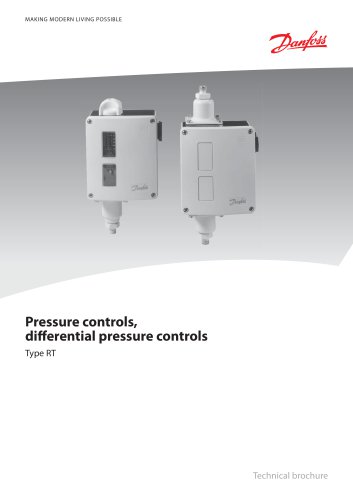 Type RT
 Water Tube Boiler
 STEAM GENERATOR CATALOGUE