

S-7220C

S-7220C
This manual provides essential instructions for the safe and effective use of the Brother S-7220C sewing machine, emphasizing the importance of understanding safety instructions and machine operations before use.
- Indications and Symbols: Terms like DANGER, WARNING, and CAUTION indicate hazard severity. Symbols denote actions to be taken or avoided.
- General Safety: Wait five minutes after power-off before opening the control box to avoid electric shock. Keep liquids away from the machine.
- Environmental Requirements: Use in environments free from electrical noise, with stable power supply and within specified temperature and humidity ranges.
- Installation: Qualified technicians should perform installation. The machine weighs approximately 46 kg and requires careful handling.
- Operation: Only trained operators should use the machine. Protective goggles are recommended.
- Maintenance: Conducted by qualified personnel using genuine Brother parts.
The S-7220C is designed for medium to heavy-weight materials with a maximum sewing speed of 5,000 stitches per minute, featuring a microprocessor control circuit and an AC servo motor.
- Table Processing: Includes diagrams and instructions for setting up the machine table.
- Lubrication: Proper lubrication is crucial, with specific instructions for applying grease and oil.
- Electrical Connections: Guidelines for safely connecting cords and securing the machine.
- Basic Operations: Instructions for starting and ending stitches, sewing continuous and fixed stitches, and using the lower thread counter.
- Advanced Operations: Adjustments for needle stop position and resetting settings.
- Cleaning: Daily cleaning procedures and grease application are outlined.
- Adjustments: Standard adjustments for safety switch position, needle bar height, and feed mechanism timing.
- Troubleshooting: Common sewing issues and error codes with solutions.
The manual provides comprehensive guidance on the safe operation, installation, and maintenance of the Brother S-7220C sewing machine, ensuring optimal performance and safety.
- Weight and Handling: The machine weighs approximately 46 kg and should be installed by two or more people. Ensure the power cord is not connected during installation.
- Table Stability: Secure the table to prevent movement when tilting the machine head.
- Location Considerations: Avoid setting up near electronic devices to prevent interference.
- Carrying Instructions: Carry the machine by the arm with two people, ensuring the motor cover is held.
- Machine Head Tilting: Use your foot to stabilize the table and both hands to tilt the machine head.
- Returning Machine Head: Clear tools from the table and gently return the machine head to its upright position.
- Table Processing: The table should be 40 mm thick and strong enough to support the machine's weight and vibration.
- Installation Components: Ensure all components are securely installed.
- Lubrication: Do not connect the power cord until lubrication is complete.
- Connecting Cords: Wait 5 minutes after turning off the power before opening the control box.
- Grounding: Ensure a secure ground connection.
The panel includes keys for setting stitch numbers, backtack functions, and sewing speed. Adjust settings before starting sewing.
Includes start and end backtack keys, continuous backtack key, fixed stitch key, pleat presser sewing key, thread trimming key, AUTO key, sewing speed control, and thread trimming lock key.
Used to set and reset the initial value for the lower thread counter, which helps monitor the remaining lower thread.
Activates the thread wiper when its indicator is illuminated.
- Sewing Start and End Backtack Stitches: Automatic thread trimming occurs at the beginning and end of sewing.
- Sewing Continuous Backtack Stitches: Performed in a cycle with automatic thread trimming and needle positioning.
- Sewing Fixed Stitches: Allows setting a specific number of stitches with options for automatic sewing and thread trimming.
- Sewing Name Labels: Involves setting stitch numbers for name labels with automatic thread trimming.
- Sewing Pleat Presser Stitches: Allows setting a number of stitches with manual thread trimming.
The counter decreases by 1 for every 10 stitches sewn, providing a warning when the count goes below zero.
- Slow Start Key: Initiates sewing at a slower speed for the first two stitches after trimming.
- Correction Key: Allows correction sewing at a slow speed.
- Needle Up/Down Key: Sets the needle bar position when sewing stops.
- Adjusting Needle Up Stop Position: Allows setting the needle up stop position with a range from -5 to 10.
- LOCK Key: Disables certain key operations to prevent accidental changes.
- Resetting Settings: Provides options to reset all settings to defaults if incorrect settings cause issues.
- Adjusting Presser Foot Floating Amount: Adjusts the presser foot for different materials by turning an adjustment screw.
- Sewing Condensed Stitches: Allows sewing with small stitch lengths by pressing the actuator switch or reverse lever.
- To adjust the stitch length for condensed stitches, release the dial lock lever, set the desired stitch length, and adjust the bolt to touch the solenoid lever.
- For sewing, revert the stitch length dial to normal, engage the lock, and start sewing.
- Always turn off the power before cleaning. Wear protective gear when handling lubricants.
- Daily cleaning includes checking and refilling oil levels in the oil tank and gearbox.
- Apply grease when the "GrEASEUP" notification appears.
- Replacement of fixed and movable knives should be done by a qualified technician.
- For the fixed knife, remove the hook stopper and knife, and sharpen if necessary.
- For the movable knife, remove the needle plate and screws to access and replace the knife.
- Adjustments should be performed by qualified personnel.
- Adjust the safety switch position if there is excessive clearance between the machine head and table hole.
- Adjust the needle bar height and rotary hook timing to ensure proper alignment and operation.
- Adjust the feed dog height to the specified standard for optimal performance.
- Adjusting the Feed Dog Angle: The feed dog should be parallel to the needle plate when raised.
- Adjusting Needle and Feed Mechanism Timing: Ensure the needle tip is correctly positioned relative to the needle plate when the feed dog is raised.
- Adjusting Arm Thread Guide R: Position the arm thread guide R centrally.
- Adjusting Presser Foot Height: Set the presser foot to a standard height of 6 mm.
- Adjusting Rotary Hook Lubrication: Check and adjust the lubrication amount.
- Sewing Issues: Includes problems like loose threads, skipped stitches, and uneven seams.
- Thread Trimming Problems: Address incorrect trimming by checking knife conditions and needle installation.
- Machine Operation Issues: Includes problems like machine not operating or stopping during sewing.
This document provides a comprehensive troubleshooting guide for a specific machine model, detailing various error codes, their possible causes, and recommended solutions.
Common problems such as the operation panel display not functioning are addressed by checking connections within the control box.
The document lists numerous error codes, each with specific causes and solutions.
- E050, E051, E055: Issues related to the machine head being tilted back.
- E065, E066: Errors due to invalid key presses or actuator switch issues.
- E090, E091: Treadle connector issues or incorrect settings.
- E111, E112, E113: Problems with needle stop positions and thread trimming.
- E130, E131, E132: Motor operation issues.
- E150, E151: Motor overheating problems.
- E190, E191: Timeout errors related to continuous operation or thread trimming.
- E410, E440, E441: Communication and data errors with the operation panel or main PCB.
- E701, E705: Power supply voltage issues.
- E710, E791: Overcurrent issues in the motor or solenoids.
- E901: Incorrect DIP switch settings.
For errors not listed or unresolved issues, users are advised to contact the place of purchase for further assistance.
The document includes a note that the contents may differ slightly from the actual product due to improvements, and it is marked as the original instructions by Brother Industries, Ltd.
Catalog excerpts

INSTRUCTION MANUAL Please read this manual before using the machine. Please keep this manual within easy reach for quick reference. SINGLE NEEDLE DIRECT DRIVE NEEDLE FEED LOCK STITCHER WITH THREAD TRIMMER
Open the catalog to page 1
Thank you very much for buying a BROTHER sewing machine. Before using your new machine, please read the safety instructions and the explanations given in the instruction manual. With industrial sewing machines, it is normal to carry out work while positioned directly in front of moving parts such as the needle and thread take-up, and consequently there is always a danger of injury that can be caused by these parts. Follow the instructions from training personnel and instructors regarding safe and correct operation before operating the machine so that you will know how to use it correctly.
Open the catalog to page 2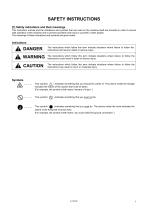
SAFETY INSTRUCTIONS [1] Safety indications and their meanings This instruction manual and the indications and symbols that are used on the machine itself are provided in order to ensure safe operation of this machine and to prevent accidents and injury to yourself or other people. The meanings of these indications and symbols are given below. The instructions which follow this term indicate situations where failure to follow the instructions will result in death or serious injury. The instructions which follow this term indicate situations where failure to follow the instructions could result...
Open the catalog to page 4
AWait at least 5 minutes after turning off the power switch and disconnecting the power cord from the wall outlet before opening the cover of the control box. Touching areas where high voltages are present can result in severe injury. Do not allow any liquids to get onto this sewing machine, otherwise fire, electric shocks or operating problems may occur. If any liquid gets inside the sewing machine (machine head or control box), immediately turn off the power and disconnect the power plug from the electrical outlet, and then contact the place of purchase or a qualified technician. Use the sewing...
Open the catalog to page 5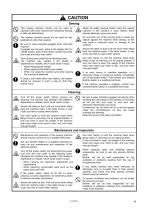
This sewing machine should only be used by operators who have received the necessary training in safe use beforehand. The sewing machine should not be used for any applications other than sewing. Be sure to wear protective goggles when using the machine. If goggles are not worn, there is the danger that if a needle breaks, parts of the broken needle may enter your eyes and injury may result. Turn off the power switch at the following times. The machine may operate if the treadle is depressed by mistake, which could result in injury. • When threading the needle • When replacing the bobbin and...
Open the catalog to page 6
The following warning labels appear on the sewing machine. Please follow the instructions on the labels at all times when using the machine. If the difficult to read, please contact your nearest Brother dealer. labels have been removed or are Touching areas where high voltages are present can result in severe injury. Turn off the power before opening the cover. ^ CAUTION Be careful not to get your hands caught when returning the machine head to its original position after it has been tilted. Be careful to avoid injury from the moving thread take-up. Be sure to connect the ground. If the ground...
Open the catalog to page 7
Transformer box (100 V/400 V system only)
Open the catalog to page 8
2. INSTALLATION CAUTION Machine installation should only be carried out by a qualified technician. Contact your Brother dealer or a qualified electrician for any electrical work that may need to be done. The sewing machine weighs approximately 46 kg (101 lb). The installation should be carried out by two or more people. Secure the table so that it will not move when tilting back the machine head. If the table moves, it may crush your feet or cause other injuries. Use both hands to hold the machine head when tilting it back or returning it to its original position. If only one hand is used, the...
Open the catalog to page 12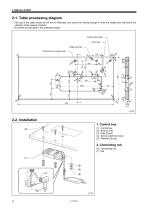
2-1. Table processing diagram The top of the table should be 40 mm in thickness and should be strong enough to hold the weight and with-stand the vibration of the sewing machine. Drill holes as indicated in the illustration below. Cotton stand hole Cord hole Head rest hole Control box mounting hole Control box Bolts [3 pcs] Nuts [3 pcs] Spring washers [3 pcs] Washers [3 pcs]
Open the catalog to page 13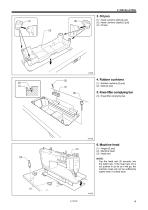
3. Oil pan (1) Head cushions (left) [2 pcs] (2) Head cushions (right) [2 pcs] (3) Oil pan 4. Rubber cushions (1) Rubber cushions [2 pcs] (2) Nails [4 pcs] 5. Knee lifter complying bar (3) Knee lifter complying bar 6. Machine head (1) Hinges [2 pcs] (2) Machine head (3) Head rest NOTE: Tap the head rest (3) securely into the table hole. If the head rest (3) is not pushed in as far as it will go, the machine head will not be sufficiently stable when it is tilted back.
Open the catalog to page 14
7. Operation panel (1) Operation panel (3) Screws [2 pcs] (Use the washers (2) and the screws (3) which are secured to the side plate.) 9. Cotton stand (1) Cotton stand NOTE: Securely tighten the nut (4) so that the two rubber cushions (2) and the washer (3) are securely clamped and so that the cotton stand (1) does not move.
Open the catalog to page 15
10. Knee lifter plate (1) Knee lifter plate (2) Bolt * Loosen the bolt (3) and the bolt (4), and then adjust the position of the knee lifter plate (1) so that it is easy to use. 1. Turn the machine pulley so that the feed dog is below the top of the needle plate. 2. Lower the presser foot (6) by using the lifting lever (5). 3. Loosen the nut (7). 4. Turn the screw (9) to adjust so that the amount of play in the knee lifter (8) is approximately 2 mm when the knee lifter plate (1) is gently pressed. 5. Securely tighten the nut (7). 6. Loosen the nut (10). 7. Turn the screw (11) until the distance...
Open the catalog to page 16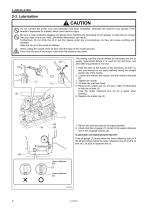
CAUTION Do not connect the power cord until lubrication has been completed, otherwise the machine may operate if the treadle is depressed by mistake, which could result in injury. Be sure to wear protective goggles and gloves when handling the lubricating oil and grease, so that they do not get into your eyes or onto your skin, otherwise inflammation can result. Furthermore, do not drink the oil or eat the grease under any circumstances, as they can cause vomiting and diarrhea. Keep the oil out of the reach of children. When cutting the nozzle of the oil tank, hold the base of the nozzle securely....
Open the catalog to page 17All Brother catalogs and technical brochures
 WF1
WF14 Pages
 T-8421C,T-8422C
12 Pages
 SL-777B
2 Pages
 RH-9820
4 Pages
 S-7300A DigiFlex Feed
8 Pages
 S-7250A
4 Pages
 BE-438HX/HS
4 Pages
 BAS-370H / BAS-375H
8 Pages
 HE-800C
2 Pages
 BAS-360H / BAS-365H
2 Pages
 BAS-311HN_326H
71 Pages
 BAS-300Series
8 Pages
 GT-3
GT-32 Pages
 S-7300A
108 Pages
 S-7100A
53 Pages
 KE-430FX / BE-438FX
6 Pages
 KE-430HX/HS
4 Pages
 S-1000A
2 Pages
 KE-430FS
2 Pages
 HE-800B
4 Pages
 BAS-311HN/-326H/-341H/-342H
8 Pages
 BE-438FX
6 Pages
 BAS-342G
6 Pages
 BAS-326G
6 Pages
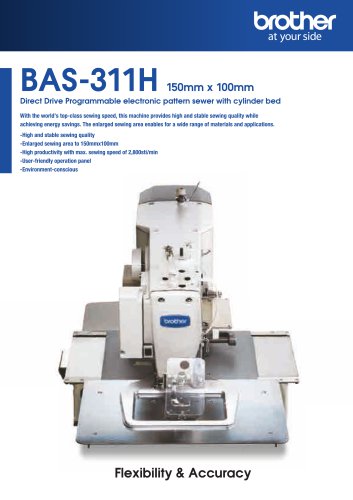 BAS-311H
6 Pages
 BAS-300G-484/484SF
2 Pages

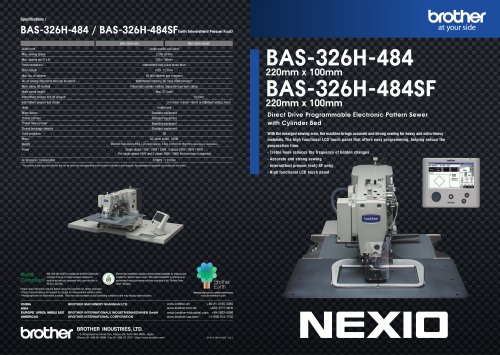
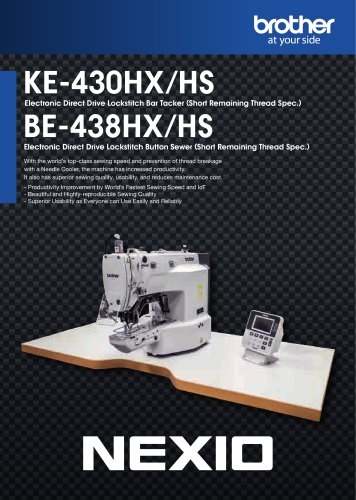
- Brother fixed sewing machine
- Industrial printer
- Brother fabric sewing machine
- Brother single-needle sewing machine
- Brother lockstitch sewing machine
- Brother single-thread sewing machine
- Ink
- Color printer
- Thermal transfer printer
- High-speed sewing machine
- Brother twin-needle sewing machine
- Brother direct-drive sewing machine
- Brother sewing machine with thread trimmer
- USB interface printer
- High-speed printer
- Brother electronic sewing machine
- Floor-standing printer
- High-quality printer
- Chain stitch sewing machine
- Brother programmable sewing machine