- Catalogs
- Beijing Breeze Technology Co.,Ltd
- BC205-E WIFI Datasheet
BC205-E WIFI Datasheet
1 /3Pages
BC205-E WIFI Datasheet
1 /3Pages
Catalog excerpts
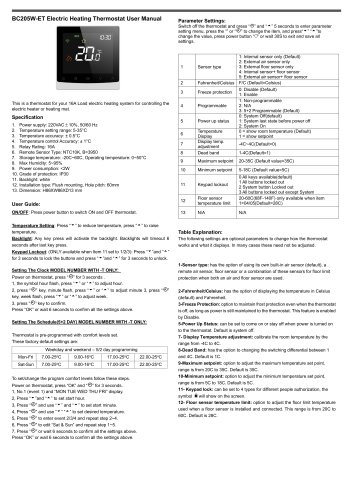
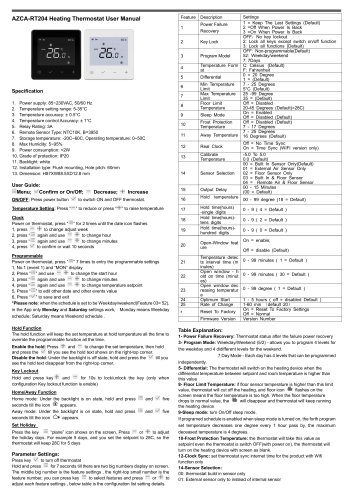
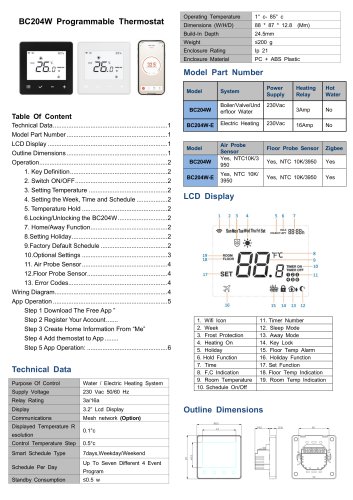
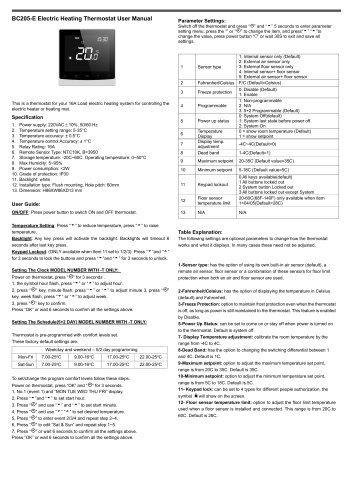
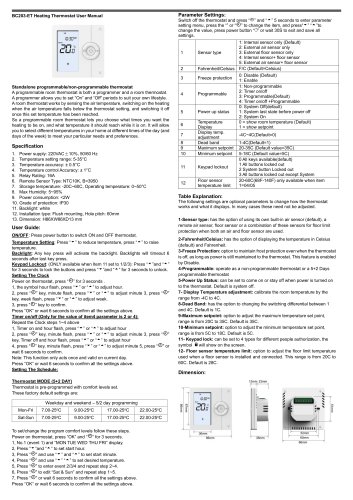
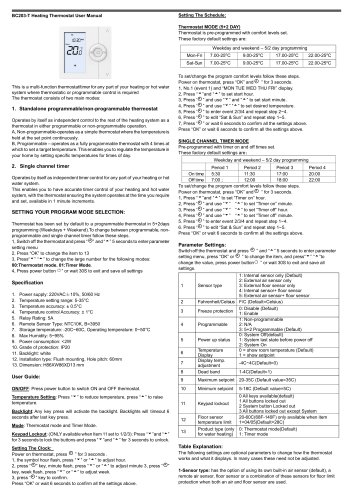
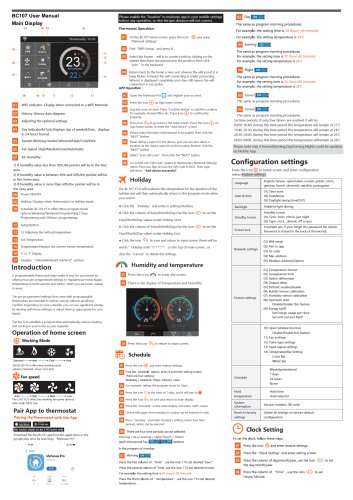
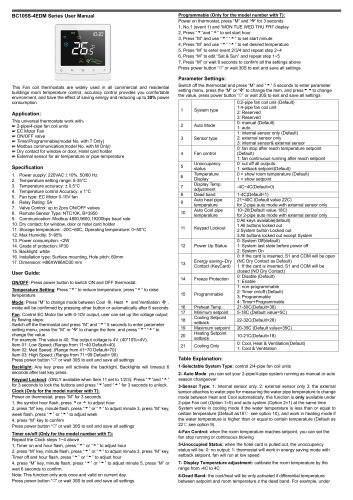
BC205W-ET Electric Heating Thermostat User Manual This is a thermostat for your 16A Load electric heating system for controlling the electric heater or heating mat. 2. Temperature setting range: 5-35°C 4. Temperature control Accuracy: ± 1°C 6. Remote Sensor Type: NTC10K, B=3950 7. Storage temperature: -20C~60C, Operating temperature: 0~50°C 12. Installation type: Flush mounting, Hole pitch: 60mm ON/OFF: Press power button to switch ON and OFF thermostat. Parameter Settings: Switch off the thermostat and Dress “©” and ” 5 seconds to enter parameter setting menu, press the or “©” to change the item, and press11'’'” “'*‘”to change the value, press power button “O” or wait 30S to exit and save all settings. Thermostat is pre-programmed with comfort levels set. These factory default settings are: Temperature Setting: Press “^ ” to reduce temperature, press “^ ” to raise temperature. Backlight: Any key press will activate the backlight. Backlights will timeout 6 seconds after last key press. Keypad Lockout: (ONLY available when Item 11 set to 1/2/3): Press “^”and “^” for 3 seconds to lock the buttons and press “^ "and “^ ” for 3 seconds to unlock. Setting The Clock MODEL NUMBER WITH -T ONLY: Power on thermostat, press “©” for 3 seconds . key, week flash, press ” or ” to adjust week. Press “OK” or wait 6 seconds to confirm all the settings above. Setting The Schedule(5+2 DAY) MODEL NUMBER WITH -T ONLY: To set/change the program comfort levels follow these steps. Power on thermostat, press “OK” and “©” for 3 seconds. 2, Press ’’and “'*■ ” to set start hour. 3, Press “©” and use and ” to set start minute. 4, Press “©” and use to set desired temperature. 5, Press “©” to enter event 2/3/4 and repeat step 2~4. 6, Press “©” to edit “Sat & Sun” and repeat step 1~5. 7, Press “©” or wait 6 seconds to confirm all the settings above. Press “OK” or wait 6 seconds to confirm all the settings above. The following settings are optional parameters to change how the thermostat works and what it displays. In many cases these need not be adjusted. 1- Sensor type: has the option of using its own built-in air sensor (default), a remote air sensor, floor sensor or a combination of these sensors for floor limit protection when both an air and floor sensor are used. 2- Fahrenheit/Celsius: has the option of displaying the temperature in Celsius (default) and Fahrenheit. 3- Freeze Protection: option to maintain frost protection even when the thermostat is off, as long as power is still maintained to the thermostat. This feature is enabled by Disable. 5-Power Up Status: can be set to come on or stay off when power is turned on to the thermostat. Default is system off. 7- Display Temperature adjustment: calibrate the room temperature by the range from -4C to 4C. 8- Dead Band: has the option to changing the switching differential between 1 and 4C. Default is 1C. 9- Maximum setpoint: option to adjust the maximum temperature set point, range is from 20C to 35C. Default is 35C. 10- Minimum setpoint: option to adjust the minimum temperature set point, range is from 5C to 18C. Default is 5C. 11- Keypad lock: can be set to 4 types for different people authorization, the symbol ri will show on the screen. 12- Floor sensor temperature limit: option to adjust the floor limit tempe
Open the catalog to page 1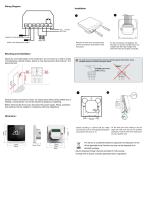
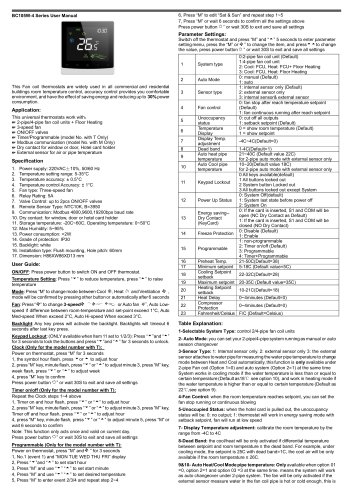
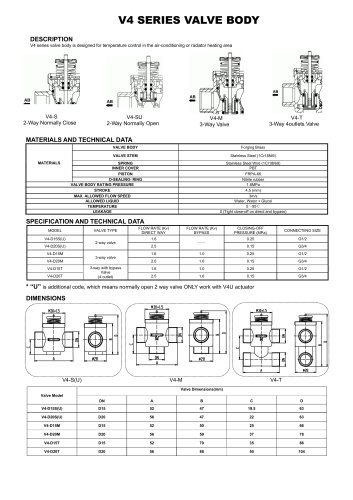
Wiring Diagram Remove the front cover by prying hooks with flat screwdriver at the bottom of the front panel For the convenience of installation, the first step is to wire the volt-free wires, lowvoltage wires then high-voltage wires. Check the wires are property connected. Mounting and Installation Mount the room thermostat on the conduit box. Do not mount on a wall in niches or bookshelves, behind curtains, above or near heat sources. Mount about 1.5 m above the floor Devices must be mounted on clean, dry indoor place without direct airflow from a heating / cooling device, and not be exposed...
Open the catalog to page 2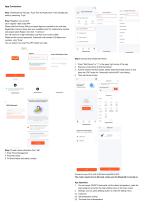
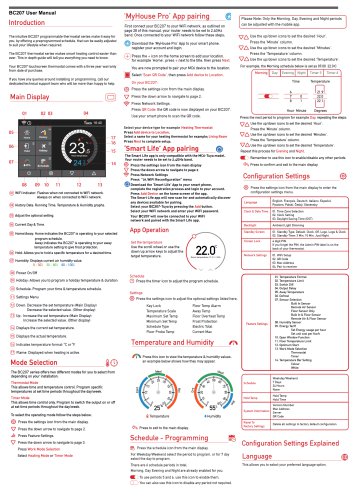
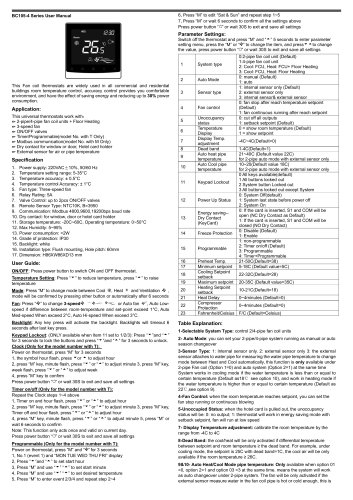
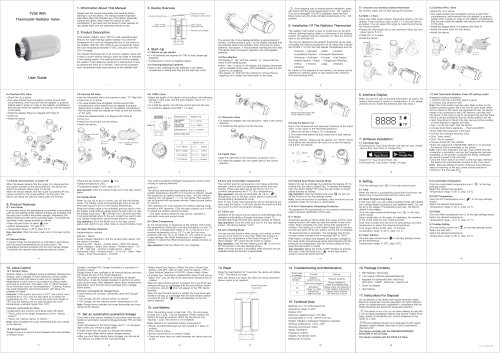
App Connection Step 1 Download the free app “Tuya” from the Apple store or the Google play store by searching “Tuya” Step 2 Register your account Click “register” after install APP Please read the Privacy Policy and press Agree to proceed to the next step. Registration account name uses your available Email Or mobile phone number, and please select Region, then click“Continue” You will receive a 6-digit verification code from your email or SMS Please set the account password, Password must contain 6-20 letters and numbers. click “Done” You can select if you want the APP collect your data Step...
Open the catalog to page 3All Beijing Breeze Technology Co.,Ltd catalogs and technical brochures
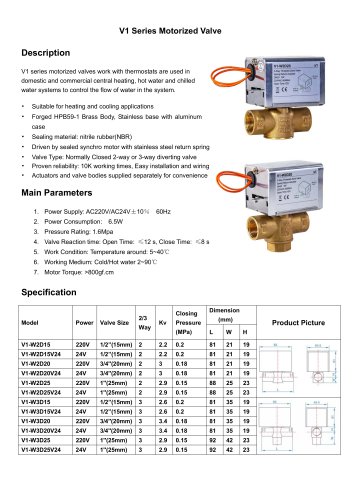 Breeze V1 Datasheet
2 Pages
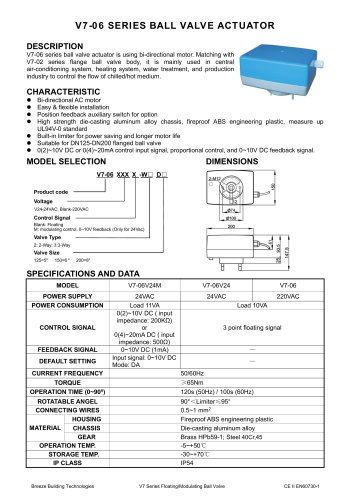 Breeze V7-06 Datasheet
2 Pages
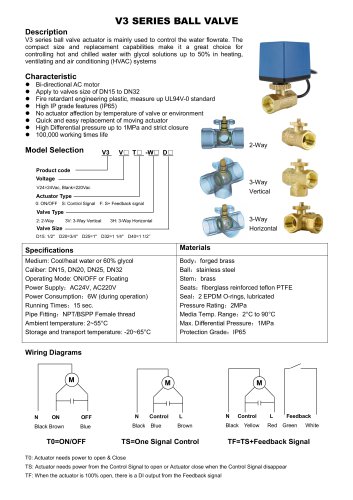
 Breeze Valve Datasheet
8 Pages
 Breeze V3-W3D15 Datasheet
2 Pages
 Breeze BC204 Datasheet
3 Pages
 Breeze BC204-E Datasheet
6 Pages
 Breeze BC207-E Datasheet
3 Pages
 BC207W-T
3 Pages
 Breeze BC205W-T Datasheet
3 Pages
 Breeze BC205-E Datasheet
2 Pages
 Breeze BC203-E Datasheet
2 Pages
 Breeze BC203 Datasheet
2 Pages
 Breeze BC35-4 Datasheet
2 Pages
 Breeze BC105W-4D Datasheet
2 Pages
 Breeze BC104W-4 Datasheet
2 Pages
 Breeze BC105-4DM Datasheet
2 Pages
 Breeze BC107-4EDM Datasheet
3 Pages
 Breeze BC107-2A/4A Datasheet
3 Pages
 Breeze BC107-4DM Datasheet
3 Pages
 Breeze BC103-4ADM Datasheet
2 Pages
 Breeze BC103-4EDM Datasheet
2 Pages
 Breeze BC103-4DM Datasheet
2 Pages
 Breeze BC105W-4ED datasheet
3 Pages

- Valve
- Control valve
- Water valve
- Ball valve
- Threaded valve
- Electric valve
- Standard valve
- Chrome-plated brass valve
- 2-channel valve
- Valve actuator
- 3-way valve
- Rotary valve actuator
- Flow control valve
- Heating valve
- Electric valve actuator
- Flow-control valve
- Adjustable thermostat
- Pipeline valve
- Waterproof thermostat
- HVAC valve