- Catalogs
- BeanAir GmbH
- Quickstart Beandevice AN-420/AN-V/AN-mV ( wireless DAQ device)
- Company
- Products
- Catalogs
- News & Trends
- Exhibitions
Quickstart Beandevice AN-420/AN-V/AN-mV ( wireless DAQ device)
1 /17Pages
Quickstart Beandevice AN-420/AN-V/AN-mV ( wireless DAQ device)
1 /17Pages
Catalog excerpts
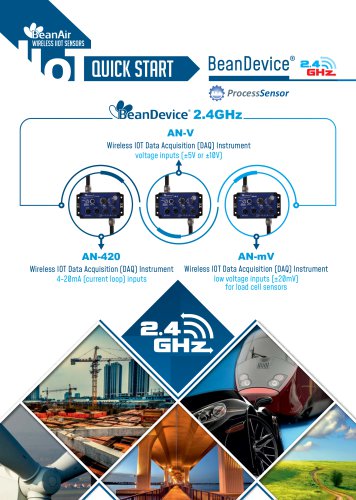
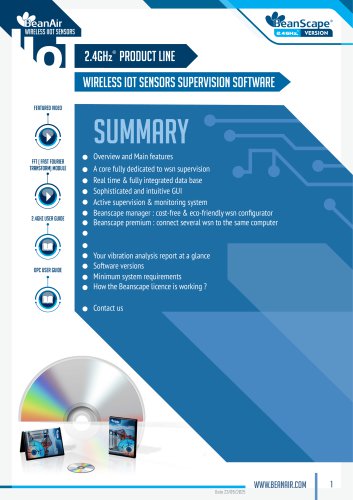
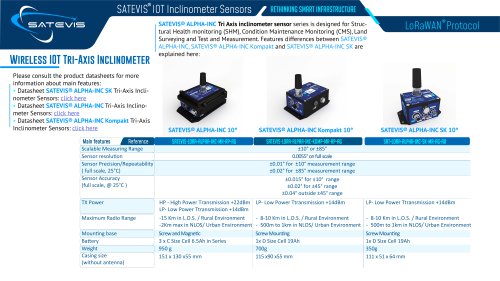
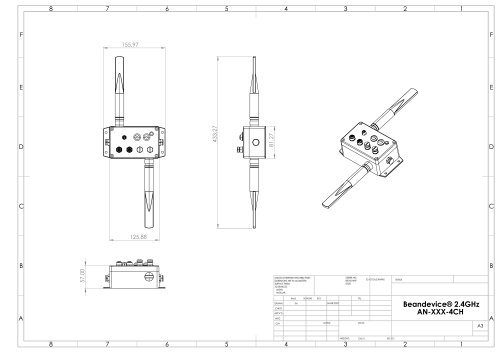
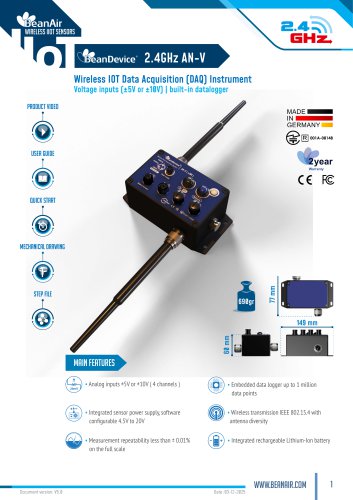
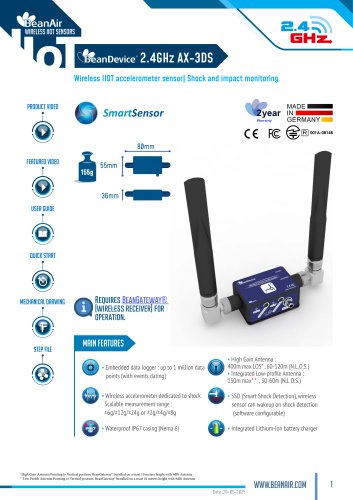
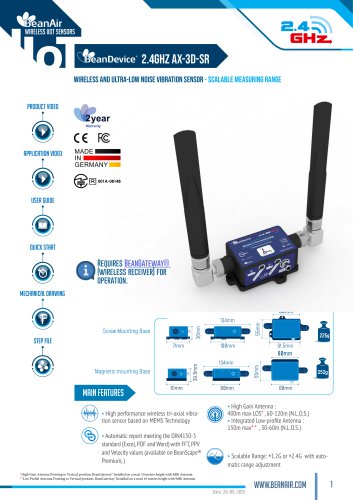
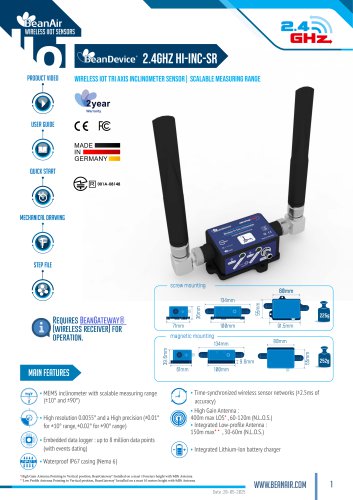
QUICK START ProcessSensor 2.4GHz AN-V Wireless IOT Data Acquisition (DAQ) Instrument voltage inputs (±5V or ±10V) Wireless IOT Data Acquisition (DAQ) Instrument 4-20mA (current loop) inputs Wireless IOT Data Acquisition (DAQ) Instrument low voltage inputs (±20mV) for load cell sensors
Open the catalog to page 1
Figure 01 Figure 02 Figure 03 Figure 04 Figure 05 Figure 06 Figure 07 Figure 08 Figure 09 Figure 10 Figure 11 Figure 12 Figure 13 Figure 14 Figure 15 Figure 16 Figure 17 Figure 18 Figure 19 Figure 20 Figure 21 Figure 22 Figure 23 Figure 24 Figure 25 Figure 26 Figure 27 Figure 28 Figure 29 Figure 30 Figure 31 Figure 32 Figure 33
Open the catalog to page 2
1. TECHNICAL SUPPORT For general contact, technical support, to report documentation errors and to order ® manuals, contact BeanAir Technical Support Center (BTSC) at: [email protected] The information contained in this document is the proprietary information of BeanAir . ® The contents are confidential and any disclosure to persons other than the officers, employees, agents or subcontractors of the owner or licensee of this document, without the prior written consent of BeanAir GmbH, is strictly prohibited. For detailed information about where you can buy the BeanAir equipment/software...
Open the catalog to page 3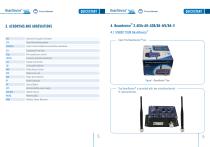
Bean Device®e Sensor Bean Device® yH-^ Sensor 4. Beandevice® 2.4GHz AN-420/AN-MV/AN-V 4.1 UNBOX YOUR BeanDevice® The BeanDevice® is provided with two omnidirectionnal N-Typeantennas.
Open the catalog to page 4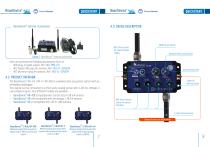
BeanDevice® optional accessories M8-3 Pins socket for external power supply ® Figure 2 : BeanDevice optional accessories ON/Off push button Network Reset push button User can purchase the following accessories from us : - Wall plug-in power supply, Ref : M8-PWR-12V - M12 Plastic ABS plug for sensors, Ref : M12-PL-SENSOR - M12 Aluminum plug for sensors, Ref : M12-AL-SENSOR The BeanDevice® AN-mV / AN-V / AN-420 is a wireless data acquisition system with an embedded datalogger. This device can be connected to a third-party analog sensor with 4-20 mA, Voltage or Low voltage outputs. Four different...
Open the catalog to page 5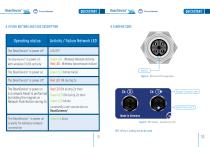
BeanDevice® Sensor 4.5 WIRING CODE 4.4 PUSH BUTTONS AND LEDS DESCRIPTION M12-4Pins A-coding should be used
Open the catalog to page 6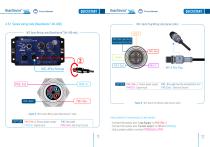
4.5.1 Sensor wiring code (BeanDevice® AN-420) M12-4pins Plug Wiring code (sensor side) ® M12 4pins Wiring code (BeanDevice AN-420 side ) NOTCH PIN 2:Not used must be connected to Gnd PIN1: Pwr+ CAPTION PIN1 ( Pwr+) : Sensor power supply PIN1 ( Pwr+): Sensor power supply PIN4 (SI): Signal input PIN2 : Not used must be connected to Gnd PIN3 (Gnd) : Electrical Ground Figure 6 : M12-4pins Plug Wiring code (sensor side) Figure 5 : M12 socket Wiring Code (BeanDevice® side) Instructions for connecting a 2-wire sensor : PIN2: Not used PIN3 (Gnd): Electrical Ground - Connect the sensor wire “Loop Supply”...
Open the catalog to page 7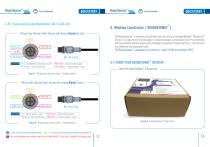
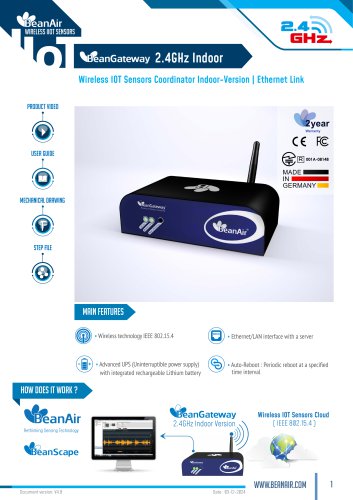
4.5.2 Sensor wiring code (BeanDevice® AN-V & AN-mV) 5. Wireless Coordinator ( BEANGATEWAY ) Wiring Code (Sensor Side)-Sensor with Analog Unipolar Output The BeanGateway is a wireless coordinator used to build and manage Beanair Wireless IOT Sensors. It supports the conversation of data exchanged, compression and IP connectivity with the network thereby reducing the intelligence required in these platforms, maintenance and therefore the associated cost. ® The BeanGateway is available in two versions : Indoor (IP40) and Outdoor (IP67) CAPTION PIN 2 : Connected to Electrical Ground PIN 3 (Gnd) :...
Open the catalog to page 8
The BeanGateway Outdoor is provided with a wall plug-in power supply, a power adapter for your country, a N-Type antenna, a Wall mounting kit and an Ethernet cable. Figure 12 : BeanGateway Indoor version Figure 10 : BeanGateway accessories ® 5.2 UNBOX YOUR BEANGATEWAY INDOOR The BeanGateway Indoor is provided with a wall plug-in power supply, a power adapter for your country, a RPSMA antenna and an Ethernet cable. Figure 13 : BeanGateway Indoor Accessories Figure 11 : BeanGateway Indoor Box
Open the catalog to page 9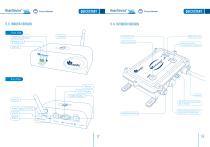
Front View Antenna Wireless Link ON/OFF Push Button WSN Activity LED Network push button ( Restores factory settings ) Rear View Ethernet RS232 / ModBus Antenna M8-3Pins Power Supply Socket (DC 8-28 Volts) Power Supply 8-28 VDC OFF/ON Reboot RJ45 connector integrated in a cable gland (IP67 Waterproof) Reboot Made in Ger many RoHS Lea d free ID : TY OJN514
Open the catalog to page 10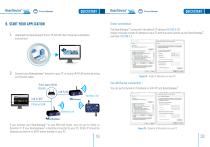
6. START YOUR APPLICATION The BeanGateway comes with the default IP address 192.168.4.123 ® Assign manually a static IP address to your PC with the same subnet as your BeanGateway , example: 192.168.4.2 Download the BeanScape® from FTP ACCESS then follow the installation instructions Connect your Beangateway directly to your PC or to your WIFI/LAN router by using an Ethernet cable. Third-party WLAN Router Figure 14 : Static IP allocation on your PC You can go for Dynamic IP address on both PC and BeanGateway Ethernet LAN Wireless link R If you connect your BeanGateway to your WIFI/LAN router,...
Open the catalog to page 11
BeanDeViCe ProcessSensor full 3. Make sure that your BeanScape® software is already installed on your PC and running. 4. Turn on the BeanGateway® by pushing on the ON/OFF button if you are using the outdoor version or slide the ON/OFF button to the right side if you are using the indoor version. Via LAN Router connection : Make sure that DHCP check box is enabled Direct connection: Allocate a static IP to your BeanGateway® before to click on validate Go to Tools tab then select BeanGateway® Ethernet/LAN Config. and select your PC IP address from the scroll down menu then click on localize. Your...
Open the catalog to page 12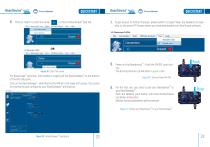
Click on “Start” to start the server 8. Figure 18 : Start the Server ® The Beanscape launches, and creates a mapping of the BeanGateway on the bottom of the left side pane. ® Click on the BeanGateway identified by the PAN ID in the lower left screen. the screen ® for monitoring and configuring your BeanGateway will show up. To get access to further features, please switch to Expert View. the Password is available on the same FTP Access where you have downloaded your BeanScape software. Power on the Beandevice : Push the ON/OFF push button. The Activity/Failure Led will blink in green color. Figure...
Open the catalog to page 13All BeanAir GmbH catalogs and technical brochures
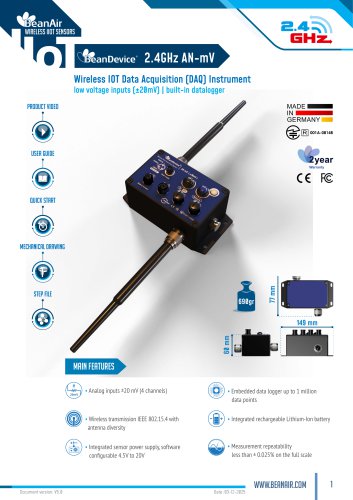 BeanDevice® 2.4GHz AN-mV
11 Pages
 BeanDevice® 2.4GHz AN-420
12 Pages
 BeanScape 2.4GHz Version
8 Pages
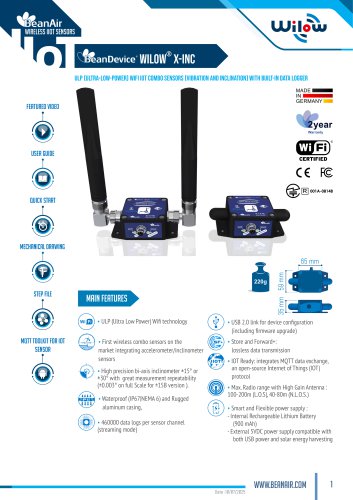 BeanDevice Wilow X-Inc
10 Pages
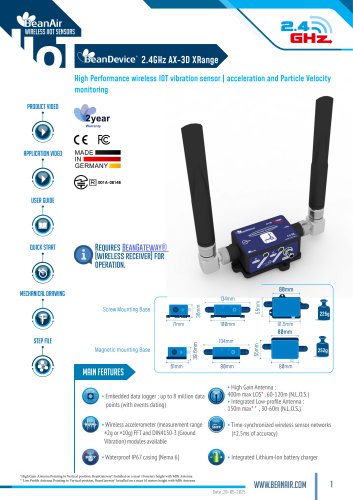 BeanDevice® 2.4GHz AX-3D Xrange
12 Pages
 Beanair Product Catalog 2025
17 Pages
 BeanDevice 2.4GHz AX3DS
11 Pages
 Starterkit ONE-TH
3 Pages
 Starterkit ONE-T
3 Pages
 Starterkit AN-V ( ±10V )
3 Pages
 Starterkit AN-V ( ±5V )
3 Pages
 Starterkit AN-mV
3 Pages
 Starterkit AN-420
3 Pages
 Starterkit 2.4GHz AX-3D-SR
3 Pages
 BeanGateway® Modbus Outdoor
7 Pages
 BeanGateway Modbus Indoor
7 Pages
 BeanScape Wilow Version
6 Pages
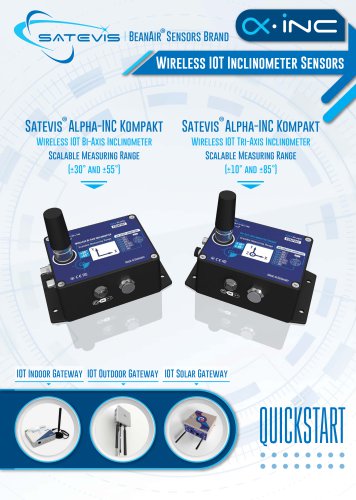
 2.4GHz Hi-Inc
10 Pages
 BeanGateway® 4G
9 Pages
 Digital T/H Sensor B-TH-01
6 Pages
 2.4GHz ONE-T
10 Pages
 2.4GHz ONE-TH
9 Pages
 MQTT Communication Protocol
97 Pages


- Electrical cable
- Sanxing Electric temperature sensor
- Acceleration sensor
- Communication gateway
- Waterproof temperature sensor
- Tilt sensor
- Humidity and temperature probe
- Relative humidity and temperature sensor
- Wireless gateway
- Triaxial acceleration sensor
- Digital inclination sensor
- IoT gateway
- Compact accelerometer
- 2-axis tilt sensor
- MEMS inclination sensor
- Waterproof humidity and temperature sensor
- Coaxial electrical cable
- Digital humidity and temperature sensor
- Multi-axis tilt sensor