- Catalogs
- BeanAir GmbH
- BeanDevice® Wilow® - Wifi sensor for Industrial Internet of Things - QuickStart
- Company
- Products
- Catalogs
- News & Trends
- Exhibitions
BeanDevice® Wilow® - Wifi sensor for Industrial Internet of Things - QuickStart
1 /15Pages
BeanDevice® Wilow® - Wifi sensor for Industrial Internet of Things - QuickStart
1 /15Pages
Catalog excerpts

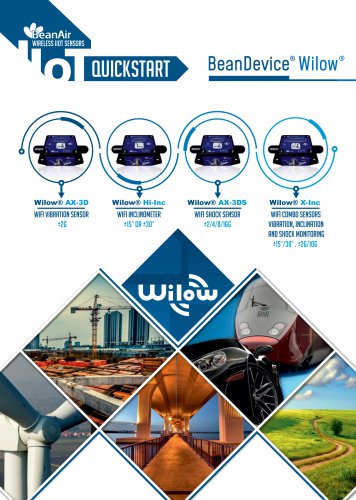
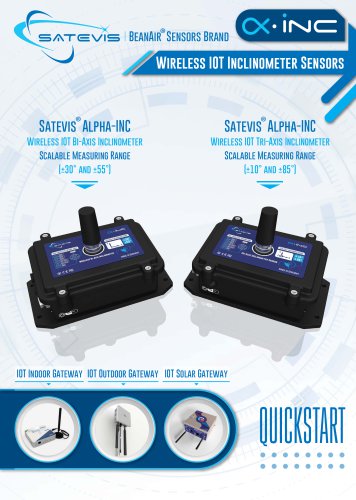
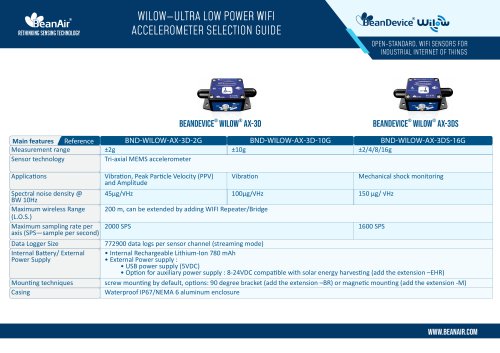
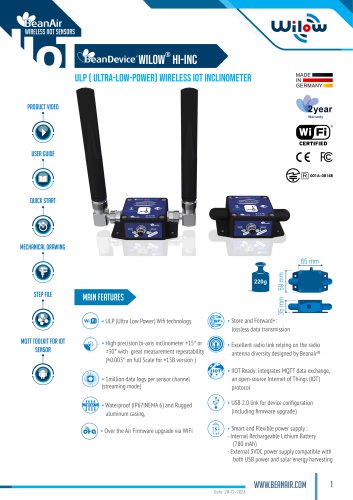
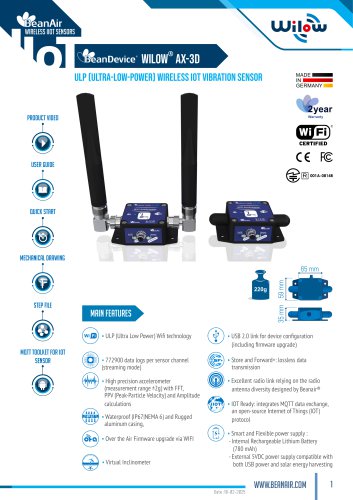
Wilow® Hi-Inc Wilow® X-Inc Wifi Combo Sensors Vibration, Inclination and Shock Monitoring ±1
Open the catalog to page 1
BeanDevice® Wilow® WMmmW BeanDevice® Wilow® 2. VISUAL SYMBOLS DEFINITION. 5. HOW TO CONNECT MY BEANDEVICE® WILOW® TO MY WIFI NETWORK. 6. A QUICK OVERVIEW ABOUT DEVICE SETTINGS.. 8 .4 Topic for Dynamic measurement. Figure 10 : Connecting BeanDevice® WiLow® to a PC through
Open the catalog to page 2
The information contained in this document is the proprietary information of BeanAir. For general contact, technical support, to report documentation errors and to order manuals, contact BeanAir Technical Support Center (BTSC) at: [email protected] The contents are confidential and any disclosure to persons other than the officers, employees, agents or subcontractors of the owner or licensee of this document, without the prior written consent of BeanAir GmbH, is strictly prohibited. For detailed information about where you can buy the BeanAir equipment/software or for recommendations on...
Open the catalog to page 3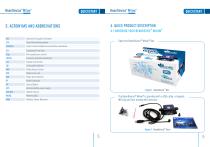
BeanDevice® Wilow® Open the BeanDevice® Wilow® Box hot Figure 1 : BeanDevice BoxThe BeanDevice® Wilow® is provided with a USB cable, a magnet, M8 Cap and four screws with locknutsFigure 2 : BeanDevice® Pack v
Open the catalog to page 4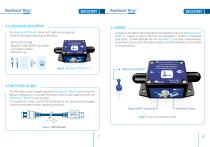
4.2 ACCESSORIES DESCRIPTION BeanDevice® The comes with additional accessories, useful for the proper functioning of the device : To avoid any accidental misconfiguration while installing and using the BeanDevice® Wilow® ,a magnet is used to command the BeanDevice® instead of mechanical push button. To Power ON/Power OFF the BeanDevice® or to make a Network Reset, all you have to do is to point the magnet toward one of the two white circles as shown on the next picture. • M8 to USB 2.0 Cable • Magnet to Power ON/OFF your device • Four screws+Locknut • M8 Plastic Cap Figure 3 : BeanDevice® Wilow®...
Open the catalog to page 5
4.7 CONNECTORS AND LEDS 4.5 LOCKNUTS AND SCREWS \ Inside the packet, you will find four screws and four locknuts that will be used to mount the BeanDevice® WiLow® on the four sides. A correct mounting is essential to the success of your monitoring system. 4.6 M8 PROTECTION CAP _ The plastic cap is used to cover the connector of the BeanDevice® WiLow® as a protection. It should be removed when connecting the USB 2.0 cable. Do not turn the Radome Antenna , you will unscrew it from its base and the device will not work properly M8-6PINS SOCKET ( MALE. A-CODING] - PIN ASSIGNATION Do not forget to...
Open the catalog to page 6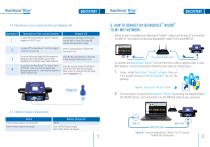
4.7.1 Operations on non-contact buttons and Network LED 5. HOW TO CONNECT MY BEANDEVICE® WILOW® TO MY WIFI NETWORK 1 Before to start to configure your Beandevice® wilow®, make sure that your PC is connected to a WIFI AP. You need to connect your Beandevice® wilow® to the same WIFI AP. To connect the BeanDevice® WiLow®, for the first time or after a network reset, to your WIFI Network, it is recommended to follow the next steps of configuration: 1. Firstly, install BeanScape® WiLow® software, then run it by double clicking on the BeanScape® icon on the desktop. Figure 9 : BeanScape® WiLow® RA...
Open the catalog to page 7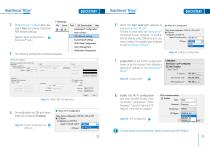
BeanDevice® Wilow® On BeanScape® software Menu bar, select Tools and choose the option WIFI Network settings Figure 11 : WLAN Configuration on BeanScape® menu 6. Select the right serial port assigned to your BeanDevice® WiLow®. If there is more than one BeanDevice® connected to your computer, or another kind of devices using COM serial port, you have to select the suitable port assigned to your BeanDevice® WiLow®. Wilow Wi-Fi configuration 7. 5. On configuration via COM port frame, select your Computer IP address <0 Wilow Wi-Fi configuration Wilow Sensor configuration: COM Port. UDP or WIFI (•)...
Open the catalog to page 8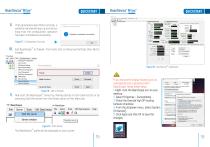
BeanDevice® Wilow® 9. If all parameters were filled correctly, a validation window will pop up and let you know that the configuration operation has been completed successfully. Figure 17 : Configuration Success 10. Add BeanScape® to firewall, from tools click on Advanced Settings then Add to Firewall. 11. Now start the BeanScape® Server by clicking directly on the Green button or by selecting Start the server from the Server option on the Menu bar Figure 19 : Start Server If you encounter display issues (such as overlapping text or graphics) with BeanScape, follow these steps: 1- Right-click...
Open the catalog to page 9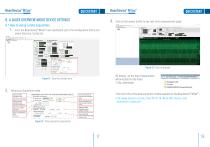
6. A QUICK OVERVIEW ABOUT DEVICE SETTINGS 6.1 How to setup a data acquisition Click on the sensor profile to see real-time measurement graph From the Beandevice® Wilow® main dashboard, go to the configuration frame and select Data Acq. Config tab Figure 23 : Real-time graph By default, all the data measurement will be located on the folder C:\log_beanscape Figure 21 : Data Acq Config frame Setup your Acquisition mode Find more info on the data acquisition modes available on the BeanDevice® Wilow® : http://www.beanair.com/wa_files/TN-RF-18-Wilow-Wifi-Sensor-data -acquisition-modes.pdf Figure 22...
Open the catalog to page 10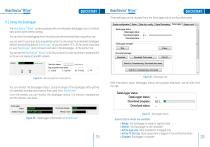
BeanDevice® Wilow® 6.2 Using the datalogger The BeanDevice® Wilow® comes equipped with an embedded datalogger up to 5 millions data points (with events dating). You can start the datalogging from the previously demonstrated data acquisition tab. you can select Log only as data acquisition option for only using the embedded datalogger without transmitting data to BeanScape or you can select TX & LOG for jointly save data on your BeanScape Host computer and also in the datalogger at the same time. You can set the BeanDevice® WiLow® to SA (Stand Alone) in order to perform measurement on its own...
Open the catalog to page 11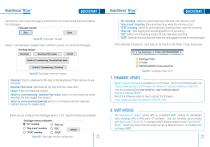
Two buttons ,one to stop the logging and the other is to erase stored data and initialize the Datalogger “SC” recording : Switch to commissioning mode when the memory is full “stop at end” recording: Data recording stops when the memory is full “SCDE”recording: Switch to commissioning ,Download then erase the recording “Stop Log”: Stop logging and recording(switch to TX recording) “SDC”:Switch commissioning mode and then download recording “SDER”:Download the recording then erase the data logged then restart recording again Figure 28 : DataLogger manager After download completion , data logs...
Open the catalog to page 12All BeanAir GmbH catalogs and technical brochures
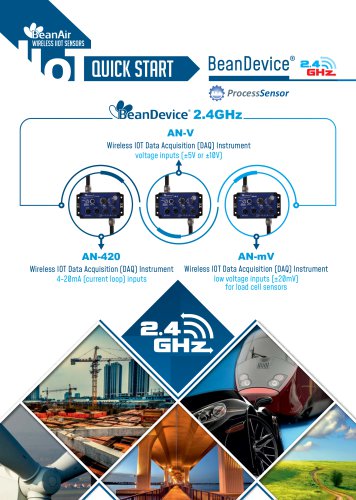
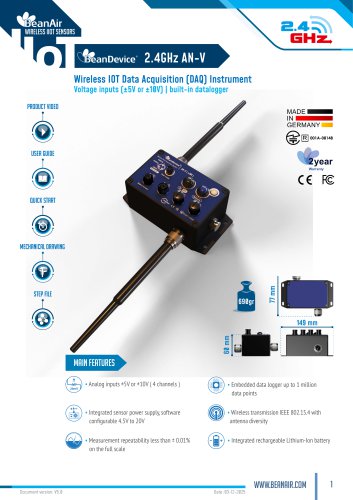
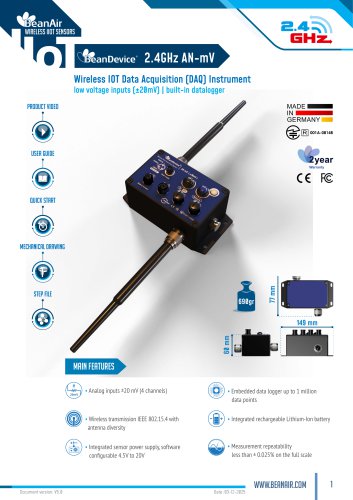 BeanDevice® 2.4GHz AN-mV
11 Pages
 BeanDevice® 2.4GHz AN-420
12 Pages
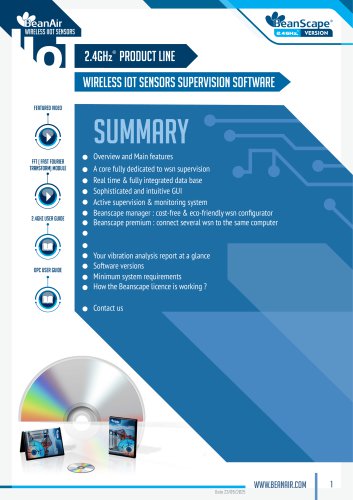 BeanScape 2.4GHz Version
8 Pages
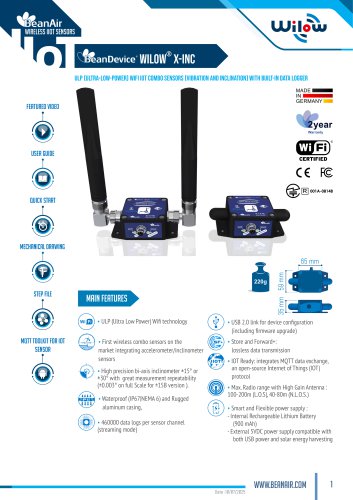 BeanDevice Wilow X-Inc
10 Pages
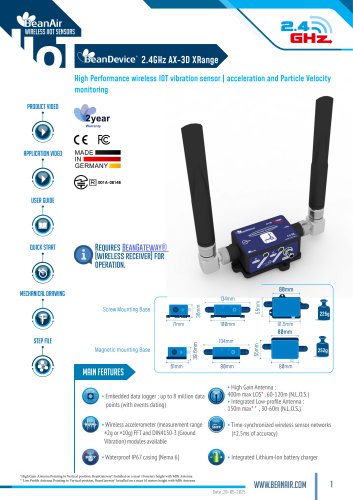 BeanDevice® 2.4GHz AX-3D Xrange
12 Pages
 Beanair Product Catalog 2025
17 Pages
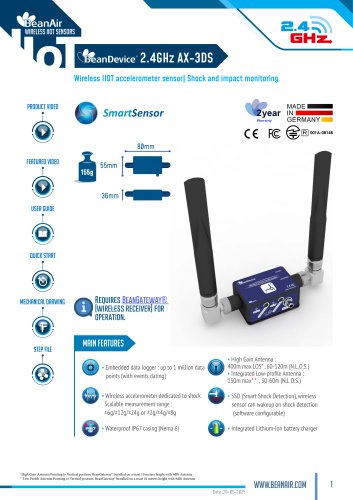
 BeanDevice 2.4GHz AX3DS
11 Pages
 Starterkit ONE-TH
3 Pages
 Starterkit ONE-T
3 Pages
 Starterkit AN-V ( ±10V )
3 Pages
 Starterkit AN-V ( ±5V )
3 Pages
 Starterkit AN-mV
3 Pages
 Starterkit AN-420
3 Pages
 Starterkit 2.4GHz AX-3D-SR
3 Pages
 BeanGateway® Modbus Outdoor
7 Pages
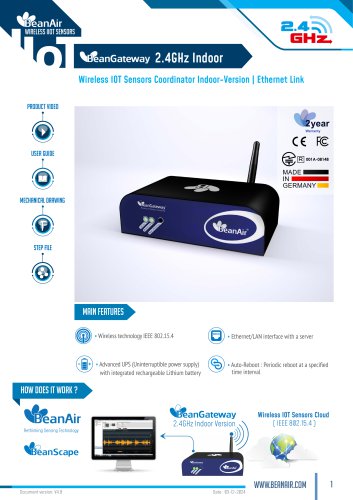
 BeanGateway Modbus Indoor
7 Pages
 BeanScape Wilow Version
6 Pages
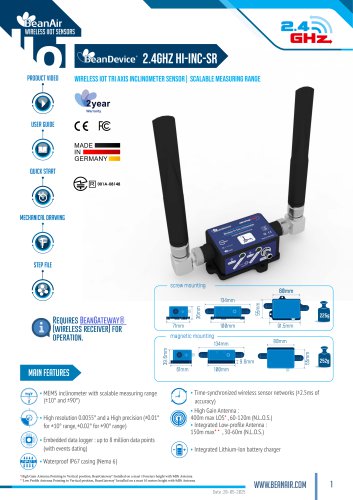
 2.4GHz Hi-Inc
10 Pages
 BeanGateway® 4G
9 Pages
 Digital T/H Sensor B-TH-01
6 Pages
 2.4GHz ONE-T
10 Pages
 2.4GHz ONE-TH
9 Pages
 MQTT Communication Protocol
97 Pages


- Electrical cable
- Sanxing Electric temperature sensor
- Acceleration sensor
- Communication gateway
- Waterproof temperature sensor
- Tilt sensor
- Humidity and temperature probe
- Relative humidity and temperature sensor
- Wireless gateway
- Triaxial acceleration sensor
- Digital inclination sensor
- IoT gateway
- Compact accelerometer
- 2-axis tilt sensor
- MEMS inclination sensor
- Waterproof humidity and temperature sensor
- Coaxial electrical cable
- Digital humidity and temperature sensor
- Data acquisition unit
- Multi-axis tilt sensor