- Catalogs
- B9Creations
- Step 2 - X Axis (XA) Assembly
Step 2 - X Axis (XA) Assembly
1 /31Pages

Step 2 - X Axis (XA) Assembly
1 /31Pages
Catalog excerpts
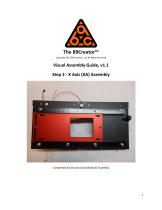
The B9Creator™ Copyright 2013 B9Creations, LLC All Rights Reserved Visual Assembly Guide, v1.1 Step 2 - X Axis (XA) Assembly Completed XA (Horizontal Slide Base) Assembly
Open the catalog to page 1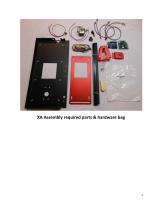
XA Assembly required parts & hardware bag
Open the catalog to page 2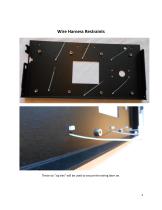
Wire Harness Restraints These six "zip ties" will be used to secure the wiring later on.
Open the catalog to page 3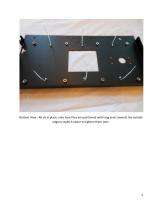
Bottom View - All six in place, note how they are positioned with long ends towards the outside edge to make it easier to tighten them later.
Open the catalog to page 4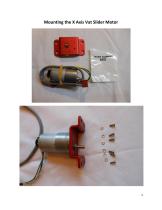
Mounting the X Axis Vat Slider Motor
Open the catalog to page 5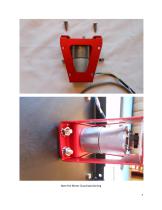
Note the Motor Guard positioning 7
Open the catalog to page 7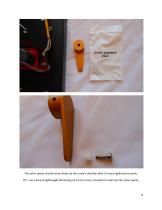
The nylon spacer should rotate freely on the screw's shoulder after it's been tightened securely. TIP: Use a drop of lightweight lubricating oil on the screw's shoulder to lubricate the nylon spacer.
Open the catalog to page 8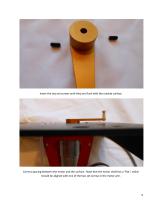
Insert the two set screws until they are flush with the outside surface. Correct spacing between the motor and the surface. Note that the motor shaft has a "flat", which should be aligned with one of the two set screws in the motor arm.
Open the catalog to page 9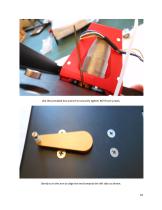
Use the provided hex wrench to securely tighten BOTH set screws. Gently turn the arm to align the end towards the left side as shown.
Open the catalog to page 10
Mounting the Z Axis Stepper Motor The Z Axis stepper motor is suspended under the X Axis plate using the four spacers.
Open the catalog to page 11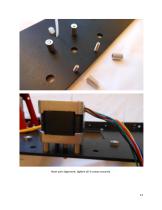
Note wire alignment, tighten all 4 screws securely.
Open the catalog to page 12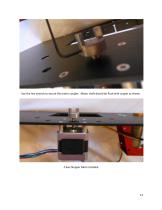
Use the hex wrench to secure the motor coupler. Motor shaft should be flush with couper as shown. Z Axis Stepper Moto Installed
Open the catalog to page 13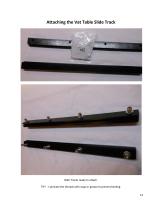
Attaching the Vat Table Slide Track Both Tracks ready to attach. TIP! - Lubricate the threads with soap or grease to prevent binding. 14
Open the catalog to page 14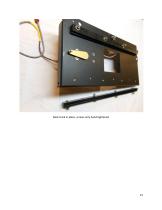
Back track in place, screws only hand tightened
Open the catalog to page 15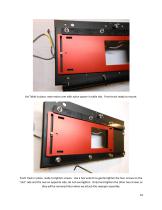
Vat Table in place, note motor arm with nylon spacer in table slot. Front track ready to mount. Front track in place, ready to tighten screws. Use a hex wrench to gently tighten the four screws on the "slot" side and the two on opposite side, do not overtighten. Only hand tighten the other two screws as they will be removed later when we attach the sweeper assembly. 16
Open the catalog to page 16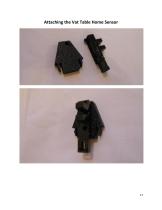
Attaching the Vat Table Home Sensor
Open the catalog to page 17
Vat Table Home Sensor snapped into place.
Open the catalog to page 19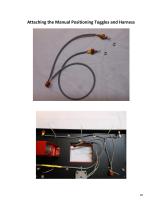
Attaching the Manual Positioning Toggles and Harness
Open the catalog to page 20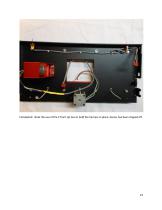
Completed. Note the use of the 3 front zip ties to hold the harness in place. Excess has been clipped off.
Open the catalog to page 22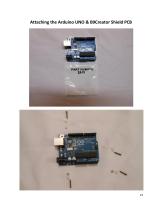
Attaching the Arduino UNO & B9Creator Shield PCB
Open the catalog to page 23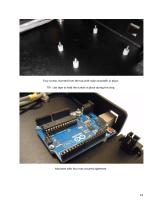
Four screws inserted from the top with nylon standoffs in place. TIP: Use tape to hold the screws in place during this step. Mounted with four nuts securely tightened.
Open the catalog to page 24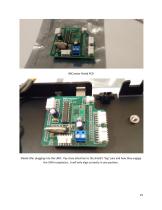
Shield after plugging into the UNO. Pay close attention to the shield's "leg" pins and how they engage the UNO receptacles , it will only align correctly in one position.
Open the catalog to page 25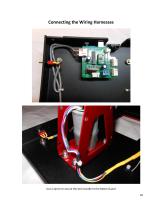
Connecting the Wiring Harnesses Use a zip tie to secure the wire bundle to the Motor Guard 26
Open the catalog to page 26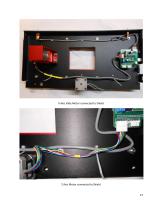
X Axis Slide Motor connected to Shield Z Axis Motor connected to Shield 27
Open the catalog to page 27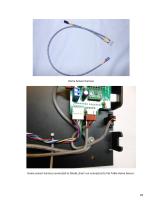
Home Sensor harness Home sensor harness connected to Shield, short run connected to Vat Table Home Sensor.
Open the catalog to page 28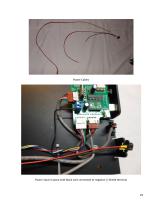
Power Cables Power input in place with black wire connected to negative (-) Shield terminal
Open the catalog to page 29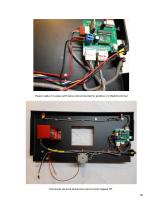
Power cable 2 in place with bare end connected to positive (+) Shield terminal Harnesses secured and excess zip tie ends clipped off. 30
Open the catalog to page 30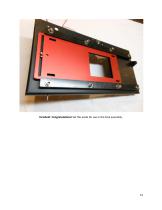
Finished! Congratulations! Set this aside for use in the final assembly.
Open the catalog to page 31All B9Creations catalogs and technical brochures
 B9Creator Technology
2 Pages
 Step 6 - Final Assembly (2 of 2)
27 Pages
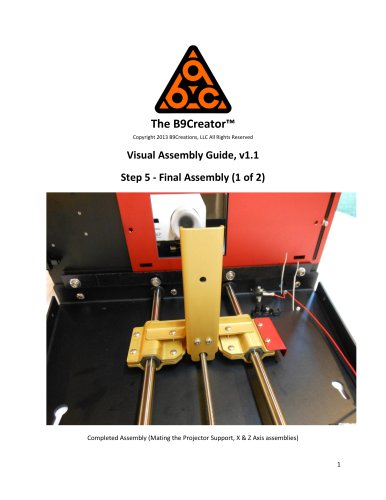 Step 5 - Final Assembly (1 of 2)
10 Pages
 Step 3 - Z Axis (ZA-A) Assembly
13 Pages
 B9Clean
2 Pages
 B9 Core 530
1 Page
 B9 Scan 350
1 Page
 B9Creator v1.2
1 Page
 B9 Core 550
1 Page
 Black Resin
3 Pages
 Gray Resin
3 Pages


- Additive manufacturing machine
- Industrial 3D printer
- Plastic additive manufacturing machine
- 3D scanning system
- Prototyping 3D printing machine
- High-speed 3D printer
- 3D printing resin
- Curing system
- Medical 3D printing machine
- Dental additive manufacturing machine
- UV curing system
- Polymer 3D printing resin
- Resin 3D printer
- Industrial 3D printing resin
- DLP 3D printer
- Black 3D printing resin
- Cleaning station
- Red 3D printing resin
- Green 3D printing resin
- Yellow 3D printing resin