
- Catalogs
- Anlidar Industrial - MyTorq
- PROGRAMMABLE CORDLESS IMPACT WRENCH


PROGRAMMABLE CORDLESS IMPACT WRENCH
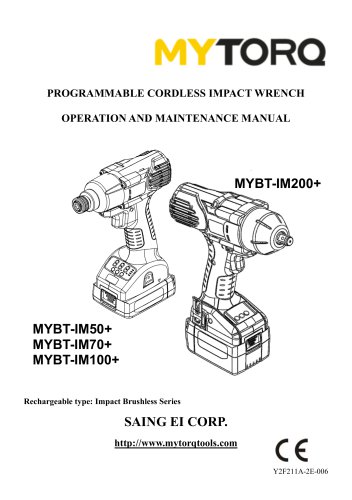
PROGRAMMABLE CORDLESS IMPACT WRENCH
Catalog excerpts
PROGRAMMABLE CORDLESS IMPACT WRENCH OPERATION AND MAINTENANCE MANUAL MYBT-IM50+ MYBT-IM70+ MYBT-IM100+ Rechargeable type: Impact Brushless Series SAING EI CORP. http://www.mytorqtools.com Y2F211A-2E-006
Open the catalog to page 1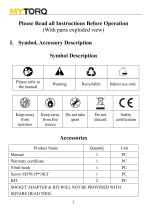
(With parts exploded view)
Open the catalog to page 4
Before using the Battery Screwdriver, please check if the main parts/accessories are missing or broken and read thoroughly the operating instructions carefully. Please follow the following precautions/operation instructions and basic safety measures to avoid fire, electric shock and personal injury etc. 1. Keep the workplace clean. 1.1 Cluttered areas and workplaces are prone to injury. 1.2 Do not operate or charge the chargeable tools in rain or water (humid environment). Avoid danger and short-circuit damage to the Battery Screwdriver. 2. Pay attention to the environment of the workplace. 2.1...
Open the catalog to page 5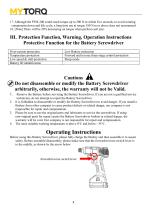
17. Although the PTM-200 could reach torque up to 200 N.m within five seconds, to avoid wearing components down and life cycle, a long time use at torque 180 N.m or above does not recommend. 18. [Note] There will be 20% decreasing on torque when perform soft join. III. Protection Function, Warning, Operation Instructions Protective Function for the Battery Screwdriver Do not disassemble or modify the Battery Screwdriver arbitrarily, otherwise, the warranty will not be Valid. Remove the Battery before servicing the Battery Screwdriver. If you are not a qualified service technician, do not attempt...
Open the catalog to page 6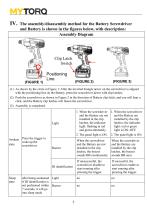
IV. The assembly/disassembly method for the Battery Screwdriver _and Battery is shown in the figures below, with description:Assembly Diagram (FIGURE 1) Clip Latch Switch (1) As shown by the circle in Figure 1: After the inverted triangle arrow on the screwdriver is aligned with the positioning line on the Battery, press the screwdriver down with clip latches. (2) Push the screwdriver as shown in Figure 2 in the direction of Battery clip latch, and you will hear a click, and the Battery clip latches will fasten the screwdriver. Press the trigger to wake up the screwdriver after being awakened...
Open the catalog to page 7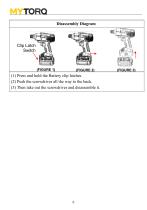
Disassembly Diagram Clip Latch Switch (1) Press and hold the Battery clip latches. (2) Push the screwdriver all the way to the back. (3) Then take out the screwdriver and disassemble it.
Open the catalog to page 8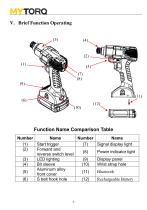
Function Name Comparison Table Number
Open the catalog to page 9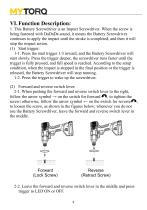
1. This Battery Screwdriver is an Impact Screwdriver. When the screw is being fastened with DaDaDa sound, it means the Battery Screwdriver continues to apply the impact until the stroke is completed, and then it will stop the impact action. (1) Start trigger: 1-1. Press the start trigger 1/3 inward, and the Battery Screwdriver will start slowly. Press the trigger deeper, the screwdriver runs faster until the trigger is fully pressed, and full speed is reached. According to the setup condition, when the impact is stopped in the final position or the trigger is released, the Battery Screwdriver...
Open the catalog to page 10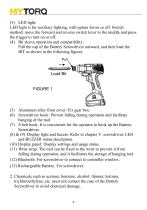
LED light is for auxiliary lighting, with option for on or off. Switch method: move the forward and reverse switch lever to the middle and press the trigger to turn on or off. (4) Bit sleeve operation and compatibility: Pull the cap of the Battery Screwdriver outward, and then load the BIT as shown in the following figures. (5) Aluminum alloy front cover: Fix gear box. (6) Screwdriver hook: Prevent falling during operation and facilitate hanging of the tool. (7) S belt hook: It is convenient for the operator to hook up the Battery Screwdriver. (8) & (9) Display light and buzzer: Refer to chapter...
Open the catalog to page 11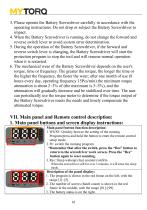
3. Please operate the Battery Screwdriver carefully in accordance with the operating instructions. Do not drop or subject the Battery Screwdriver to impact. 4. When the Battery Screwdriver is running, do not change the forward and reverse switch lever to avoid system error determination. 5. During the operation of the Battery Screwdriver, if the forward and reverse switch lever is changing, the Battery Screwdriver will start the protection program to stop the tool and will resume normal operation when it is restarted. 6. The mechanical wear of the Battery Screwdriver depends on the user's torque,...
Open the catalog to page 12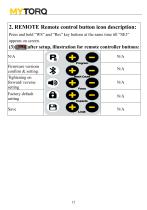
2. REMOTE Remote control button icon description: Press and hold “WS” and “Res” key buttons at the same time till “SE3” appears on screen. (3)|p**lf]|after setup, illustration for remote controller buttons: Firmware versions confirm & setting. Tightening on forward/ reverse setting_ Factory default setting Batch Count
Open the catalog to page 14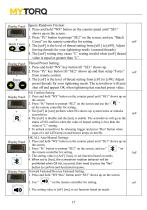
Ignore Rundown Friction: 1. Press and hold “WS” button on the counter panel until “SE1” shows up on the screen. 2. Press “Pc” button to prompt “SE2” on the screen, and use “Batch Count” on the remote controller for setting. 3. The [uoF] is the level of thread setting from [u01] to [u99]. Adjust forcing threads for your tightening needs. (ensured threads) 4. The [uoF] setting may cause “L” setting invalid when [uoF] thread value is equal or greater than “L”. Thread Preset Setting: 1. Press and hold “WS” key button till “SE1” shows up. 2. Press “Pc” key button till “SE2” shows up and then setup...
Open the catalog to page 17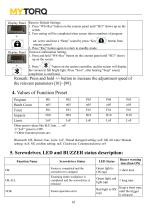
Reset to Default Settings: 1. Press “WS+Res” button on the counter panel until “SE3” shows up on the screen. 2. Your setting will be completed when screen shows numbers of program set/ screw and hear a “Beep” sound by press “Key ft ” button from remote control 3. Press “Res” button again to return to standby mode. Version Confirmation Setting: 1. Press and hold “WS+Res” button on the counter panel until “SE3” shows up on the screen. 2. Press “ * ” button on the remote controller, and the screen will display the version in full bright light. Press “Save”, after hearing “beep” sound, completion...
Open the catalog to page 18
IX. Other Instructions: 1. The optimal use of this Battery Screwdriver is no more than 8 hours per day. 2. The repair and maintenance of the Battery Screwdriver can be sent to the designated after-sales service center or the local service center via the original dealer. If the product is disassembled by the customer, our company will not be responsible for repairs. 3. If the customer sends the Battery Screwdriver to a service center that is not designated by our company for repair or self-disassembly, the resulting quality issue will not be covered by the warranty. 4. It is the responsibility...
Open the catalog to page 20All Anlidar Industrial - MyTorq catalogs and technical brochures
 BSP-C32HL
16 Pages
 MYCS-ID120
10 Pages
 MYBT-IM50 MYBT-IM100
10 Pages
 OPERATION AND MAINTENANCE MANUAL
14 Pages
 MYP40-500N
7 Pages
 MYP40-500
10 Pages
 MYP32-300
8 Pages
 MYP32-60
8 Pages
 Torque Display User Manual
18 Pages
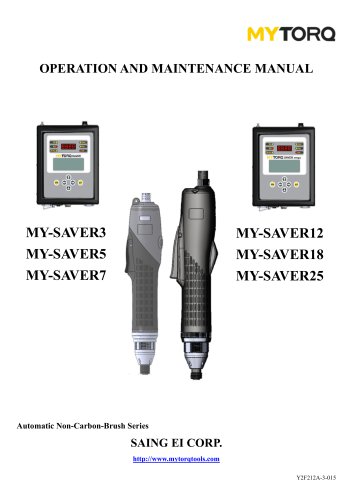 OPERATION AND MAINTENANCE MANUAL
11 Pages
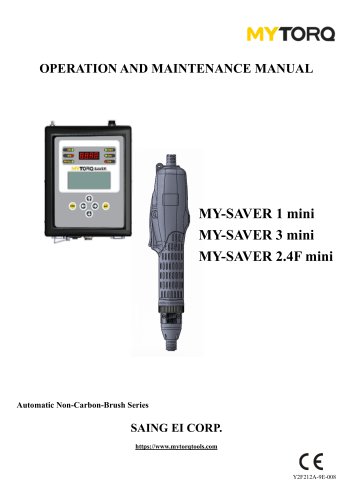 OPERATION AND MAINTENANCE MANUAL
10 Pages
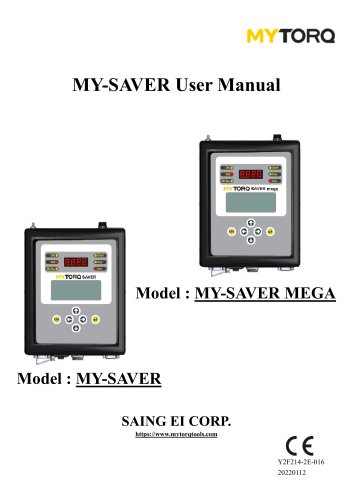 MY-SAVER User Manual
21 Pages
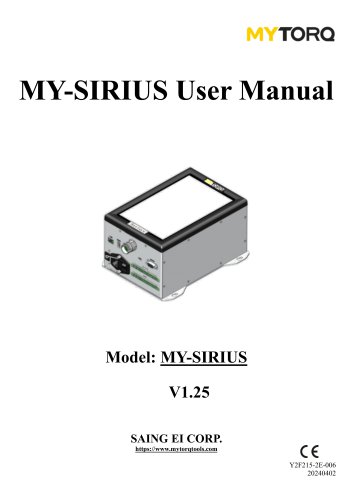 MY-SIRIUS User Manual
49 Pages
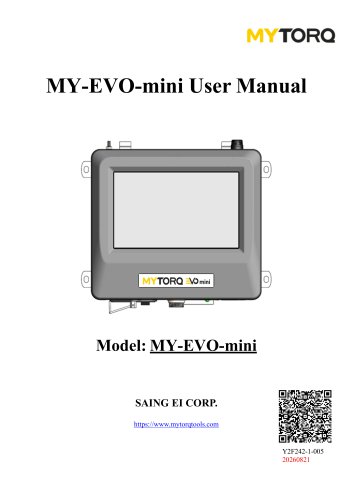 MY-EVO-mini User Manual
29 Pages
 Smart tools
8 Pages
Archived catalogs
 ACCESSORIES
2 Pages
 Power Shark
18 Pages
 MYTORQ High Torque
35 Pages
 MYTORQ Low Torque
32 Pages

- Electrical cable
- Feeder
- Battery charger
- Electric screwdriver
- Lithium battery
- 12 V battery
- Brushless electric screwdriver
- Corded electric screwdriver
- Straight electric screwdriver
- Automated feeder
- CE battery
- Pistol impact wrench
- Signal conditioner
- Charging post
- DC electric screwdriver
- Lithium battery charger
- Torque meter
- Pistol electric screwdriver
- Cordless electric screwdriver