
- Catalogs
- Anlidar Industrial - MyTorq
- Automatic Industrial Cordless Brushless Power Torque Screwdrivers Series


Automatic Industrial Cordless Brushless Power Torque Screwdrivers Series

Automatic Industrial Cordless Brushless Power Torque Screwdrivers Series
Catalog excerpts

Automatic Industrial Cordless Brushless Power Torque Screwdrivers Series OPERATION AND MAINTENANCE MANUAL CAUTION!! EP0612/EP0309 SERIES ARE ADVANCEMENT IN HIGH TORQUE MOTORS DESIGN. TO BE MORE SAFTY, ASSEMBLE THE AUXILIARY HANDLE BEFORE OPERATION. Rechargeable -Type Automatic Brushless Series ANLIDAR INDUSTRIAL CO., LTD. http://www.anlidar.com Y2F174A-2-001
Open the catalog to page 1
Before you use the Cordless Screwdriver for the first time, it is essential to read and understand the manual completely (including the spare parts view). The term “Cordless Screwdriver” in all of the warning listed below refers to your main operated appliance. 2. Observe caution and safety notes. 5. Do not expose to wet or rain conditions. 6. Do not operate in an explosive atmosphere. 8. Forbid to throw away.
Open the catalog to page 2
Read all instructions and make sure the appearance of the device has no damage before you use it. Failure to follow all instructions listed below may result in electric shock fire and/or serious 1. Keep the working area nice and clean. 1.1 Mess and dark areas may cause of accidents. 1.2 Keep the device away from rain or moisture to decrease the risk of electric shock or short-circuiting occurred. 2. Be alert to workplace safety 2.1 Use the device under a well lit and clean environment. 2.2 Keep children and other people away unless the person has been assigned for the task to avoid the danger...
Open the catalog to page 3
Protection Function ▉Over electric current protection ▉Thermal Protector ▉Prevent from low power ▉Stall protection ▉Slow rotation protection ▉Reverse control protection ▉Battery Identification ▉Sleeping mode Warning Do not attempt to repair or disassemble this cordless screwdriver, the warranty will be considered void. 1. This rechargeable screwdriver maintenance make sure to remove the battery pack before maintaining or repairing the device by a qualified technician. 2. Do not attempt to disassemble or reassemble the device at will which may result in poor performance or danger of injury, the...
Open the catalog to page 4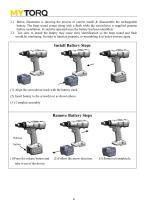
2.1 Below illustration is showing the process of correct install & disassemble the rechargeable battery. The beep sound comes along with a flash while the screwdriver is supplied genuine battery installation. It could be operated once the battery has been identified. 2.2 Too slow to install the battery may cause error identification so the beep sound and flash would be continuing. In order to function properly, re-assembling it as below process again. Install Battery Steps (1) Align the screwdriver track with the battery track. (2) Insert battery to the screwdriver as shown above. (3 ) Complete...
Open the catalog to page 5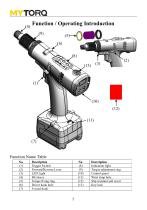
(7) Function Name Table
Open the catalog to page 6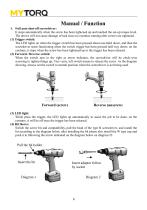
Manual / Function 1. Full auto shut-off screwdriver: It stops automatically when the screw has been tightened up and reached the set-up torque level. The device will not cause damage of task since no continue running after screws are tightened. (1) Trigger switch: The LED lights on when the trigger switch has been pressed about one-third down, and then the screwdriver starts functioning when the switch trigger has been pressed half way down; on the contrary, it stops when the screw has been tightened up or the trigger has been released. (2) Forward / Reverse switch: When the switch turn to the...
Open the catalog to page 7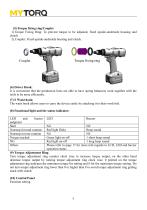
1) .Torque Fixing Ring: To prevent torque to be adjusted, fixed upside-underside housing and clutch. 2) .Coupler: Fixed upside-underside housing and clutch. Torque fixing ring(6) Driver Hook: It is convenient that the production lines are able to have spring balancers work together with the tools to be more efficiently. The waist hook allows users to carry the device easily by attaching it to their work belt. (8) Functional light and the status indicator: Turn torque adjustment ring counter clock wise to increase torque output, on the other hand decrease torque output by turning torque adjustment...
Open the catalog to page 8
Enable to install the wrist band which is more convenient and safer for users. Prevent slip and help user grip the screwdriver Torque setting identification. Three colors: blue, yellow, and red can help identify different torque setting by the users. . Lock and unlock panel, avoid changing settings. For easier use of the screwdriver, there is a handle for assisting purpose. Please follow instruction below. A Warning, this power screwdriver delivers high torque, please install the handle before doing work in order to avoid danger. We are not responsible for any damage or injury caused by using...
Open the catalog to page 9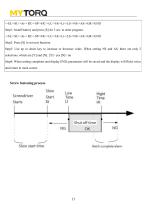
->SL->SC->At-> RC->SP->HC->LC->Ht->Lt->LS->NS->AS->GR->END Step1: Install battery and press [S] for 3 sec. to enter program. ->SL->SC->At-> RC->SP->HC->LC->Ht->Lt->LS->NS->AS->GR->END Step2: Press [S] to set next function. Step3: Use up or down key to increase or decrease value. When setting NS and AS, there are only 2 selections, which are [Y] and [N]. [Y]= yes [N]= no Step4: When setting completes and display END, parameters will be saved and the display will flicks twice and return to main screen. Screw fastening process
Open the catalog to page 14
1. The best condition of using the tool is under 8 hours a day, do not over loaded. 2. Do not attempt to repair or disassemble this cordless screwdriver without authorization. Always have the device serviced by assigned factory or qualified person in order to have the warranty effective continually. 3. Anlidar is not responsible for any poor performance or damage caused by customers own modification of the tool. 4. It is necessary for the management to have individual operators read and follow up all instructions in this manual. Do not attempt to repair or disassemble this cordless screwdriver...
Open the catalog to page 17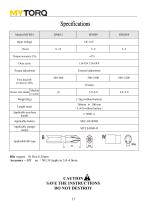
Specifications Model (MYBT-) Torque accuracy (%) Torque adjustment External adjustment Duty cycle Free load n0: (r/min) )±10% Applicable auxiliary handle Applicable battery Applicable charger station Bits :square B: Hex 6.35mm Accessory ~ BIT no.:NO.3# Apply to 3.0~4.0mm CAUTION SAVE THE INSTRUCTIONS DO NOT DESTROY
Open the catalog to page 18All Anlidar Industrial - MyTorq catalogs and technical brochures
 BSP-C32HL
16 Pages
 MYCS-ID120
10 Pages
 MYBT-IM50 MYBT-IM100
10 Pages
 OPERATION AND MAINTENANCE MANUAL
14 Pages
 MYP40-500N
7 Pages
 MYP40-500
10 Pages
 MYP32-300
8 Pages
 MYP32-60
8 Pages
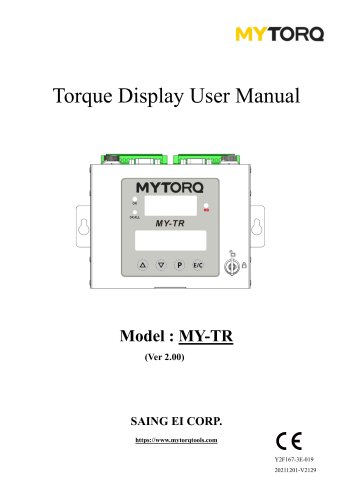 Torque Display User Manual
18 Pages
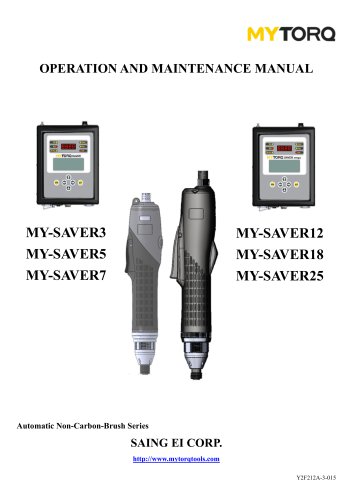 OPERATION AND MAINTENANCE MANUAL
11 Pages
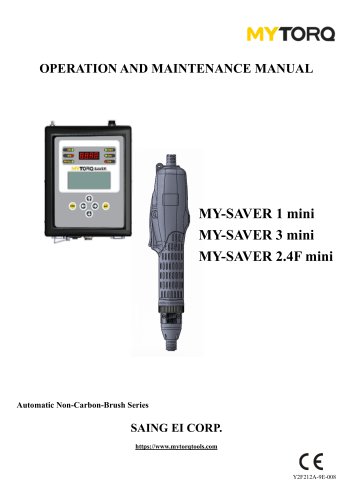 OPERATION AND MAINTENANCE MANUAL
10 Pages
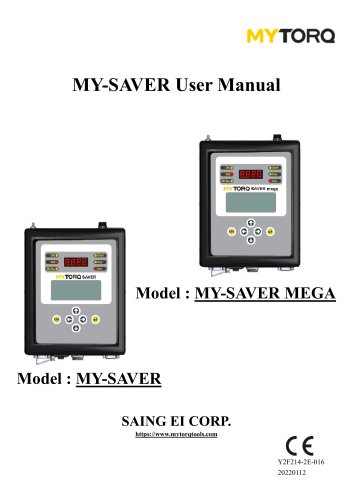 MY-SAVER User Manual
21 Pages
 MY-SIRIUS User Manual
49 Pages
 MY-EVO-mini User Manual
29 Pages
 Smart tools
8 Pages


Archived catalogs
 ACCESSORIES
2 Pages
 Power Shark
18 Pages
 MYTORQ High Torque
35 Pages
 MYTORQ Low Torque
32 Pages

- Electrical cable
- Feeder
- Battery charger
- Electric screwdriver
- Impact wrench
- Lithium battery
- 12 V battery
- Brushless electric screwdriver
- Corded electric screwdriver
- Straight electric screwdriver
- Automated feeder
- CE battery
- Pistol impact wrench
- Signal conditioner
- Charging post
- DC electric screwdriver
- Lithium battery charger
- Torque meter
- Pistol electric screwdriver
- Cordless electric screwdriver