- Catalogs
- Airgain, Inc.
- Combined Adhesive & Bolt (Q) Mount Antenna Installation Guide
Combined Adhesive & Bolt (Q) Mount Antenna Installation Guide
1 /2Pages

Combined Adhesive & Bolt (Q) Mount Antenna Installation Guide
1 /2Pages
Catalog excerpts
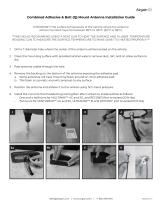
Combined Adhesive & Bolt (Q) Mount Antenna Installation Guide IMPORTANT! The surface temperature of the vehicle where the antenna will be mounted must be between 85°F to 100°F (30°C to 38°C). ***WE HIGHLY RECOMMEND USING A HEAT GUN TO HEAT THE SURFACE AND A LASER TEMPERATURE READING GUN TO MEASURE THE SURFACE TEMPERATURE TO MAKE SURE IT IS HEATED PROPERLY.*** 1. Drill a 1" diameter hole where the center of the antenna will be located on the vehicle. 2. Clean the mounting surface with provided alcohol wipe to remove dust, dirt, and oil. Allow surface to dry. 3. Pass antenna cables through the hole. 4. Remove the backing on the bottom of the antenna exposing the adhesive pad. a. Some antennas will have mounting foam around an inner adhesive pad. b. This foam is cosmetic and will compress to any surface. 5. Position the antenna and adhere it to the vehicle using firm hand pressure. 6. Install the nut onto the threaded lug and tighten after contact to inside surface as follows: • One and a half turns for MULTIMAX™ 4G and 5G, and RECON13 (Not to exceed 20 ft-lbs). • Two turns for CENTURION™ 4G and 5G, ULTRAMAX™ B, and OPTOMX® (not to exceed 12 ft-lbs).
Open the catalog to page 1
• The antenna Installer may encounter various obstacles with individual vehicle designs that may require different placement, routing of antenna cables or drilling of holes to complete the mounting procedure. • Mount the antenna on the outside of the vehicle (roof or trunk). • The antenna must be mounted on a metal surface to work correctly. If the surface is not metal, the antenna must be ordered with a built in metal ground plane. • The antenna must be mounted horizontally - parallel to the ground (not mounted on a vertical surface). • The antenna must be mounted to a flat, clean dry surface....
Open the catalog to page 2All Airgain, Inc. catalogs and technical brochures
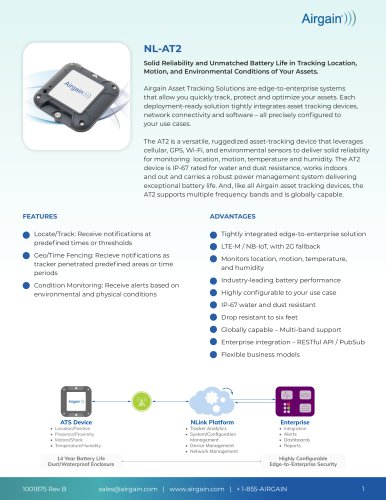 NL-AT2
3 Pages
 ET56AGBJA External Antenna
2 Pages
 NimbeLink 4G LTE CAT 1 NA
3 Pages