NetLink manual
1 /15Pages

NetLink manual
1 /15Pages
Catalog excerpts
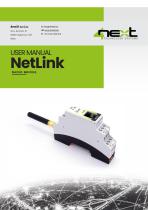
USER MANUAL NetLink RADIO BRIDGE
Open the catalog to page 1
OWNERSHIP AND CONDITIONS The information in this document may be subject to change without notice. Unless otherwise specified, any reference to companies, organizations, products, domain names, e-mail addresses, logos, people, places and events mentioned in this document is purely coincidental. No association with any real company, organization, product, domain name, e-mail address, logo, person, place or event can therefore be inferred from it. Compliance with all applicable copyright laws is the sole responsibility of the user. Due to all rights covered by copyright, no part of this document...
Open the catalog to page 2
1. General Description NetLink is an Ethernet – Serial radio bridge that can be used as a replacement for the cable for long distance connection. It allows devices with serial / Ethernet port to communicate between each other wirelessly up to 1 km. At the same time, it also allows the conversion between different communication channels. Thanks to the point-to-multipoint configuration, NetLink allows users to create a real data collection network that is quick and easy to install. NetLink can be purchased in the following versions. Single product: Data can be transferred from Ethernet to serial,...
Open the catalog to page 3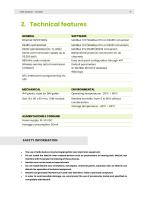
2. Technical features GENERAL ModBus TCP/ModBus RTU on RS485 conversion ModBus TCP/ModBus RTU on RS232 conversion Serial communicazion speed up to Bidirectional protocol conversions on all Easy and quick configuration through APP Wireless remote data transmission Default parameters: IP41 plastic case for DIN guide Relative humidity: from 0 to 80% without condensation Storage temperature: -40°C ÷ 60°C ALIMENTAZIONE E CONSUMI Power supply: 10-30 VDC Average consumption: 30mA SAFETY INFORMATION The use of radio devices may be inappropriate near electronic equipment. Do not install the NetLink near...
Open the catalog to page 4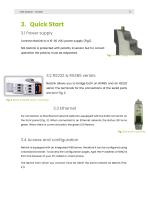
3. Quick Start 3.1 Power supply Connect NetLink to a 10-30 VDC power supply (Fig.1). N.B. NetLink is protected with polarity inversion but for correct operation the polarity must be respected. Fig. 1 Power supply connection 3.2 RS232 & RS485 serials NetLink allows you to bridge both an RS485 and an RS232 serial. The terminals for the connections of the serial ports are as in Fig. 2. Fig. 2 RS232 & RS485 serial connection 3.3 Ethernet For connection to the Ethernet network, NetLink is equipped with the RJ45 connector on the front panel (Fig. 3). When connected to an Ethernet network, the status...
Open the catalog to page 5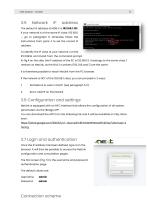
The default IP address of MDB-E is 192.168.1.101. If your network is of the same IP class: 192.168.1 Fig. 4 Verifica indirizzo IP de proprio PC ..., go to paragraph 5, otherwise follow the instructions from point 4 to set the correct IP address. To identify the IP class of your network, run the IPCONFIG command from the command prompt. In Fig.4 on the side, the IP address of the PC is 192.168.1.5. It belongs to the same class / network as NetLink, as the first 3 numbers (192, 168 and 1) are the same. It is therefore possible to reach NetLink from the PC browser. If the network is NOT of the 192.168.1...
Open the catalog to page 6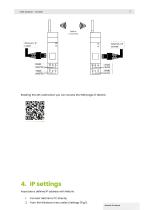
Reading the QR code below you can access the WEB page of NetLink: 4. IP settings Associate a defined IP address with NetLink. 1. Connect NetLink to PC directly. From the Windows menu select Settings (Fig.1).
Open the catalog to page 7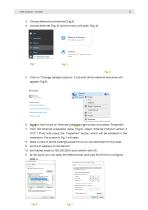
Choose Network and Internet (Fig.2). 4. Choose Ethernet (Fig. 3) and the menu will open (Fig. 4). 5. Click on “Change adapter options”. A tab with all the network resources will appear (Fig.5). 6. Position the mouse on Ethernet, press the right button and select "Properties". Fig. 4 Fig. 5 7. From the Ethernet properties menu (Fig.6), select “Internet Protocol version 4 (TCP / IPv4) and press the “Properties” button which will be enabled in the meantime. The screen in Fig. 7 will open. 8. Make a note of all the settings present that you will need later for the reset. 9. Set the IP address on...
Open the catalog to page 8
12. Log in with username and password. Default values are: Username: 13. Select “Network” from the Configurations menu to set the MDB-E network parameters in accordance Fig. 8 Login browser screen with those of your Ethernet network. For example, if in the original screen of 192.168.10.1, set MDB-E to 192.168.10.101 (Fig.9). 14. Save the new MDB-E configuration. 15. Restore the values on the PC. 16. MDB-E is ready to be used in the same network as your PC. 5. Programming Main menu 5.1 Bridge After logging in, you access the configuration menu. The first screen, the one shown in the figure below,...
Open the catalog to page 9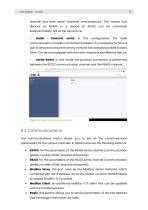
channel and both serial channels simultaneously. This means that devices on RS485 or a device on RS232 can be connected indiscriminately. Not at the same time. • Radio - Ethernet, serial: communication module is activated if present. It is necessary to have a pair of devices to ensure that they transmit the received packets to each other. The device equipped with the radio module is identified as NetLink. • Serial-Serial: In this mode the protocol conversion is performed between the RS232 communication channel and the RS485 channel. Fig. 5.1 Bridge mode selection screen 5.2 Communications The...
Open the catalog to page 10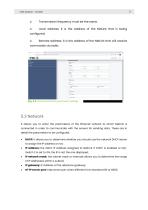
Transmission frequency must be the same. Local address: it is the address of the NetLink that is being Remote address: it is the address of the NetLink that will receive Fig. 5.2 Communications parameter settings 5.3 Network It allows you to enter the parameters of the Ethernet network to which NetLink is connected in order to communicate with the servers for sending data. These are in detail the parameters to be configured: • DHCP: it allows you to determine whether you should use the network DHCP server to assign the IP address or not; IP address: the static IP address assigned to NetLink....
Open the catalog to page 11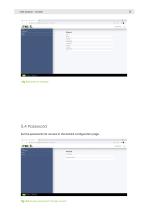
5.4 Password Set the passwords for access to the NetLink configuration page. Fig. 5.4 Access password change screen
Open the catalog to page 12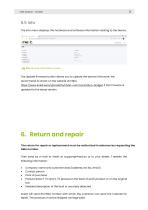
5.5 Info The info menu displays the hardware and software information relating to the device. Fig. 5.5 General information screen The Update firmware button allows you to update the device's firmware. We recommend to check on the website at https: https://www.4next.eu/en/prodotto/radio-communication-bridge/ if the firmware is updated to the latest version. 6. Return and repair DEVELOPMENT The return for repair or replacement must be authorized in advance by requesting the RMA number. Then send by e-mail to 4neXt at [email protected] or to your dealer / reseller the following information: • Company...
Open the catalog to page 13All 4neXt catalogs and technical brochures
 aMBition manual
10 Pages
 EasyNET quick start
2 Pages
 EasyNET manual
23 Pages
 MDB-W manual
12 Pages
 MDB-W quick start
2 Pages
 MDB-E quick start
2 Pages
 MDB-E manual
15 Pages
 NetLink quick start
2 Pages
 EasyLog quick start
2 Pages
 EasyLog manual
24 Pages
 NetLink
1 Page
 MQTT
MQTT2 Pages
 MDB-E
MDB-E1 Page
 aMBition brochure
1 Page
 MDB-W
MDB-W1 Page
 EasyNET
2 Pages
 owa450
2 Pages
 owa4Xplatform
2 Pages
 EasyLog XL quick start
2 Pages
 EasyLog XL manual
24 Pages
 EasyLog XL brochure
2 Pages
 I/O Acquisition Modules
1 Page
 owa3Xplatform
2 Pages
 zigbee smart building
47 Pages
 ModBridge
1 Page
- Automation software solution
- Management software solution
- Data logger
- Digital I/O
- Cloud-based software
- IO module
- Temperature datalogger
- Analog I/O
- Digital IO module
- Industrial software
- Communication gateway
- Interface software
- Industrial gateway
- Visualization software solution
- Ethernet gateway
- Fieldbus gateway
- Wireless datalogger
- Fieldbus I/O module
- Datalogger without display
- Development software