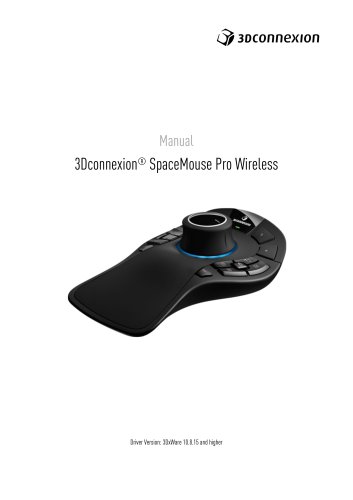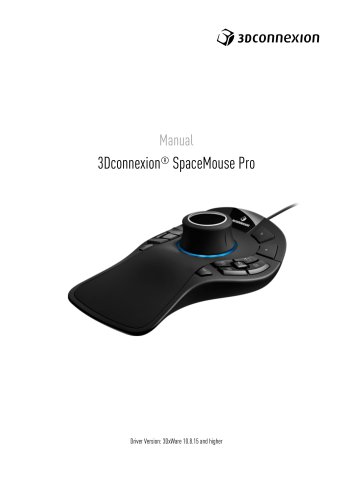
Catalog excerpts
Driver Version: 3DxWare 10.8.15 and higher
Open the catalog to page 1
QuickStart Guide Desktop Setup Place the SpaceMouse Pro Wireless on the opposite side of the keyboard to your standard mouse. One hand engages the 3D mouse to position your model: rotating, panning and zooming. The other hand uses the standard mouse to select, create and edit. Hand Position Position your hand as shown. The contoured controller cap will guide your fingers into the perfect position for precise and effortless control. 1. Connect USB Hub Connect the included 3Dconnecxion Universal Receiver to your computer. 2. Turn on the SpaceMouse Pro Wireless Turn on the power switch located...
Open the catalog to page 3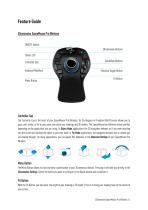
Feature Guide 3Dconnexion SpaceMouse Pro Wireless Controller Cap The Controller Cap is the heart of your SpaceMouse Pro Wireless. Its Six-Degrees-of-Freedom (6DoF) sensor allows you to push, pull, rotate, or tilt to pan, zoom and rotate your drawings and 3D models. The SpaceMouse has different motion profiles depending on the application you are using. In Object Mode applications the 3D navigation behaves as if you were reaching into the screen and holding the object in your own hand. In Fly Mode applications, the navigation behaves like a camera you are viewing through. For many...
Open the catalog to page 4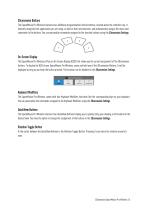
3Dconnexion Buttons The SpaceMouse Pro Wireless features four additional programmable function buttons, located above the controller cap. It instantly recognizes the applications you are using, as well as their environments, and automatically assigns the most used commands to the buttons. You can personalize commands assigned to the function buttons using the 3Dconnexion Settings. On-Screen Display The SpaceMouse Pro Wireless offers an On-Screen Display (OSD) that shows you the current assignment of the 3Dconnexion buttons. To display the OSD of your SpaceMouse Pro Wireless, press and hold...
Open the catalog to page 5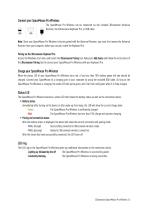
Connect your SpaceMouse Pro Wireless The SpaceMouse Pro Wireless can be connected via the included 3Dconnexion Universal Receiver, the 3Dconnexion Keyboard Pro, or USB cable. Note: Since your SpaceMouse Pro Wireless is factory paired with the Universal Receiver, you must first remove the Universal Receiver from your computer, before you can pair it with the Keyboard Pro. Pairing via the 3Dconnexion Keyboard Pro: Access the Windows start menu and launch the 3Dconnexion Pairing tool. Now press Add device and follow the instructions of the 3Dconnexion Pairing tool to connect your SpaceMouse...
Open the catalog to page 6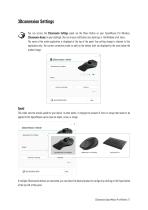
3Dconnexion Settings You can access the 3Dconnexion Settings panel via the Menu Button on your SpaceMouse Pro Wireless, 3Dconnexion Home (on your desktop), the icon in your notification area (systray), or the Windows start menu. The name of the active application is displayed at the top of the panel. Any setting change is relevant to this application only. The current connection mode, as well as the battery level are displayed by the icons below the product image. Speed This slider sets the overall speed for your device. In other words, it changes the amount of force or torque that needs to...
Open the catalog to page 7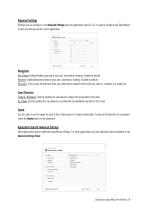
Advanced Settings Settings you can configure in the Advanced Settings panel are application-specific. So, it's easy to configure your SpaceMouse to work just how you prefer in each application. Navigation Pan / Zoom: Enables/disables panning of your part, assembly or drawing. Enabled by default. Rotation: Enables/disables rotation of your part, assembly or drawing. Enabled by default. Dominant: Turns on and off dominant filter axis, which when enabled restricts the pan, zoom or, rotations to a single axis. Zoom Direction Forward / Backward: Zoom by pushing the cap toward or away from you...
Open the catalog to page 8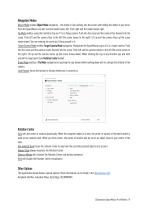
Navigation Modes Object Mode enables Object Mode navigation - this mode is like reaching into the screen and holding the model in your hand. Push the SpaceMouse cap left, and the model moves left. Push right and the model moves right. Fly Mode enables using the Controller Cap as if it is a flying camera. Push into the scene and the camera flies forward into the scene. Push left and the camera flies to the left (the scene moves to the right). Lift up and the camera flies up (the scene moves down). You are entering the scene as if flying around in it. Target Camera Mode enables Target Camera...
Open the catalog to page 9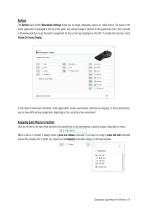
Buttons The Buttons panel within 3Dconnexion Settings allows you to assign commands, macros or, radial menus. The name of the active application is displayed at the top of the panel. Any setting change is relevant to this application only. Press and hold a 3Dconnexion Button to get the button assignment for the current app displayed on the OSD. To disable this function, check Disable On-Screen Display. A note about Environment sensitivity: Some applications feature environment sensitive key mapping. In those applications, you can have different key assignments depending on the currently...
Open the catalog to page 10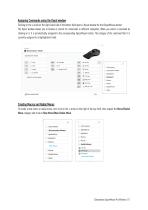
Assigning Commands using the flyout window Clicking on the > arrow on the right-hand side of the button field opens a flyout window for that SpaceMouse button: The flyout window allows you to browse or search for commands in different categories. When you select a command by clicking on it, it is automatically assigned to the corresponding SpaceMouse button. The category of the command that it is currently assigned to is highlighted in bold. Creating Macros and Radial Menus To create a new macro or radial menu, first click on the > arrow on the right of the key field, then expand the...
Open the catalog to page 11
Assigning icons to Macros and Radial Menus In a first step you are asked to give your macro or radial menu a name and assign an icon to it. You can choose to use one of the icons already provided in the icon gallery tab or upload your own icon in the custom icon tab. Note: The image must not be larger than 500x500px and must be in one of the following file formats: SVG, ICO, PNG, GIF, BMP, TIFF, EXIF, WMF, and EMF. For an optimal rendering result, we recommend an image in 24x24px with a transparent background. Creating Macros As a second step, when creating a new macro, you have the option...
Open the catalog to page 12All 3Dconnexion Inc. catalogs and technical brochures
-
3Dconnexion ® SpaceMouse Compact
14 Pages
-
3Dconnexion ® SpaceMouse Pro
15 Pages
Archived catalogs
-
brochure_spacepilotpro
2 Pages
-
spacepilotpro
1 Pages

