 ウェブサイト:
RENISHAW/レニショー
カタログの抜粋

XM-60 multi axis calibrator multi-axis
カタログの1ページ目を開く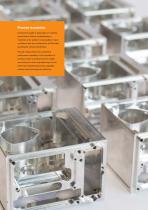
Process foundation Component quality is dependent on machine performance. Without understanding a machine’s error profile it is impossible to have confidence that your components will fall within specification during manufacture. Periodic measurement of a machine’s performance capability is the foundation of process control, providing a known, stable environment in which manufacturing is to be performed. Quantifying process capability reduces costs and improves efficiency.
カタログの2ページ目を開く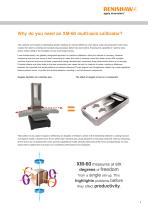
Why do you need an XM-60 multi-axis calibrator? The machine tool industry is developing quickly. Initiatives to improve efficiency, and reduce scrap and production costs have created the need to understand manufacturing processes better than ever before. Knowing the capability of machine tools before metal cutting is the foundation of any machining process. Laser interferometry, the globally recognised approach for machine calibration, offers the ultimate in accuracy. However, measuring one error per set-up is time consuming for users who wish to measure more than linear errors. With...
カタログの3ページ目を開く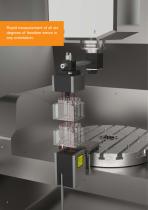
Rapid measurement of all six degrees of freedom errors in any orientation.
カタログの4ページ目を開く
Direct measurement of errors Reducing measurement uncertainties is important for any user XM-60 provides users with powerful machine diagnostic capability through the measurement of all degrees of freedom from a ‘single shot’. By capturing six degrees of freedom, users can discover the source of their errors, rather than the effect which is often seen when performing linear measurement alone. Reducing measurement uncertainties is important for any user. The XM-60 has been designed to measure machine errors directly, by aligning the laser beams with a machine axis. This reduces the...
カタログの5ページ目を開く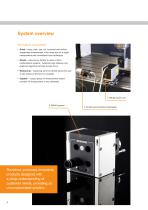
System overview Key features and benefits: • Quick – linear, pitch, yaw, roll, horizontal and vertical straightness measurement in the same time as a single measurement with conventional laser techniques. • Simple – easy set-up, familiar to users of other interferometric systems. Automatic sign detection and graphical alignment minimise human errors. • Reassuring – measuring all errors directly allows the user to see results as the test is in progress. • Capable – unique optical roll measurement system provides roll measurement in any orientation. Renishaw produces innovative products...
カタログの6ページ目を開く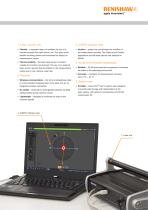
1. Laser / launch unit 3. CARTO software suite • Flexible – a separate laser unit enables the use of a remote compact fibre optic launch unit. This gives more flexible mounting options and minimises the impact on measurement volume. • Intuitive – guides the user through the workflow of the measurement process. The Capture and Explore applications provide data capture and analysis for XM-60. • Thermal stability – the laser heat source is located outside the machine environment. The use of an external laser source reduces thermal effects on the measurement optics and on the machine under...
カタログの7ページ目を開く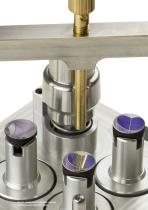
Precise measurement capability requires meticulous assembly techniques
カタログの8ページ目を開く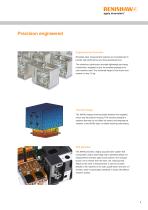
Precision engineered Engineered by Renishaw Renishaw laser measurement systems are manufactured to provide high performance and long operational lives. The aluminium substructure provides lightweight yet strong construction, designed to give the smallest package to fit onto machine tools. The combined weight of the launch and receiver is only 2.5 kg. Thermal design The XM-60 employs thermal breaks between the magnetic mount and the product housing. This ensures changes in machine thermals do not affect the device and temperature variation in the XM-60 does not affect machine performance....
カタログの9ページ目を開く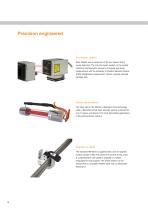
Precision engineered Four-beam system Easy, flexible set-up using any of the four beams during visual alignment. The only four-beam system on the market matching interferometric accuracy of angular and linear measurement with the simplicity of Position Sensitive Device (PSD) straightness measurement. Allows a greatly reduced package size. Proven performance The laser tube in the XM-60 is developed from technology used in Renishaw’s RLE laser encoder system, produced for over 10 years, and found in the most demanding applications in the semiconductor industry. Attention to detail The...
カタログの10ページ目を開く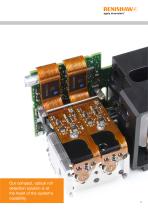
Our compact, optical roll detection solution is at the heart of the system’s capability. 11
カタログの11ページ目を開く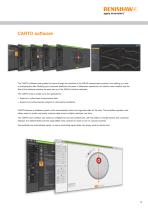
CARTO software The CARTO software suite guides the users through the workflow of the XM-60 measurement process, from setting up a test to analysing the data. Building upon customer feedback and years of calibration experience, the intuitive user interface and the flow of the software matches the easy set-up of the XM-60 multi-axis calibrator. The CARTO suite is made up of two applications; • Capture to collect laser measurement data. • Explore to provide powerful analysis to international standards. CARTO features a database system which automatically stores and organises data for the user....
カタログの13ページ目を開く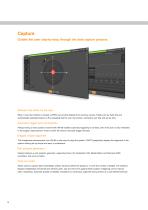
Capture Guides the user step-by-step through the data capture process Software that thinks for the user When a new test method is created, CARTO can provide defaults from previous set-ups. Fields such as dwell time are automatically populated based on the averaging that the user has chosen, saving the user test and set-up time. Automatic triggering for all channels Always having a linear position channel with XM-60 enables automatic triggering for all tests, even if the user is only interested in the angular measurement. There is never the need to manually trigger the laser. Elegant, simple...
カタログの14ページ目を開く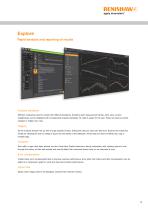
Explore Rapid analysis and reporting of results Analysis standards Different companies need to comply with different standards, therefore each measurement (linear, pitch, yaw, roll and straightness) can be displayed with all supported analysis standards. To make it easier for the user, these can also be sorted, enabled or hidden from view. Tagging As the analysis browser fills up with a large quantity of tests, finding the data you need can take time. Explore has made this simple by allowing the user to assign a tag to any test saved in the database. All the data can then be filtered by a...
カタログの15ページ目を開くRENISHAW/レニショーのすべてのカタログと技術パンフレット
-
Brochure: OMP60
6 ページ
-
OLP40 flyer
6 ページ
-
RTP20
2 ページ
-
PH10M-iQ PLUS
2 ページ
-
RLMD01_09
13 ページ
-
RLBD01_04
9 ページ
-
RLCD03_03
9 ページ
-
HiLin™
20 ページ
-
PRIMO™ system
8 ページ
-
Renishaw retrofit
12 ページ
-
Renishaw fixtures
8 ページ
-
SP80
4 ページ
-
SP600
4 ページ
-
Precision styli
60 ページ
-
CMM technology guide
28 ページ


